Add a Dialogflow node to your bot
Continuing with the same example initiated above related to pricing requests, we already created a simple bot, with a Multiple Choice node in which one of the options is “Ask a question”. From here, we will follow the next steps to add a Dialogflow node.
1. Add a free-text node to ask a visitor their question
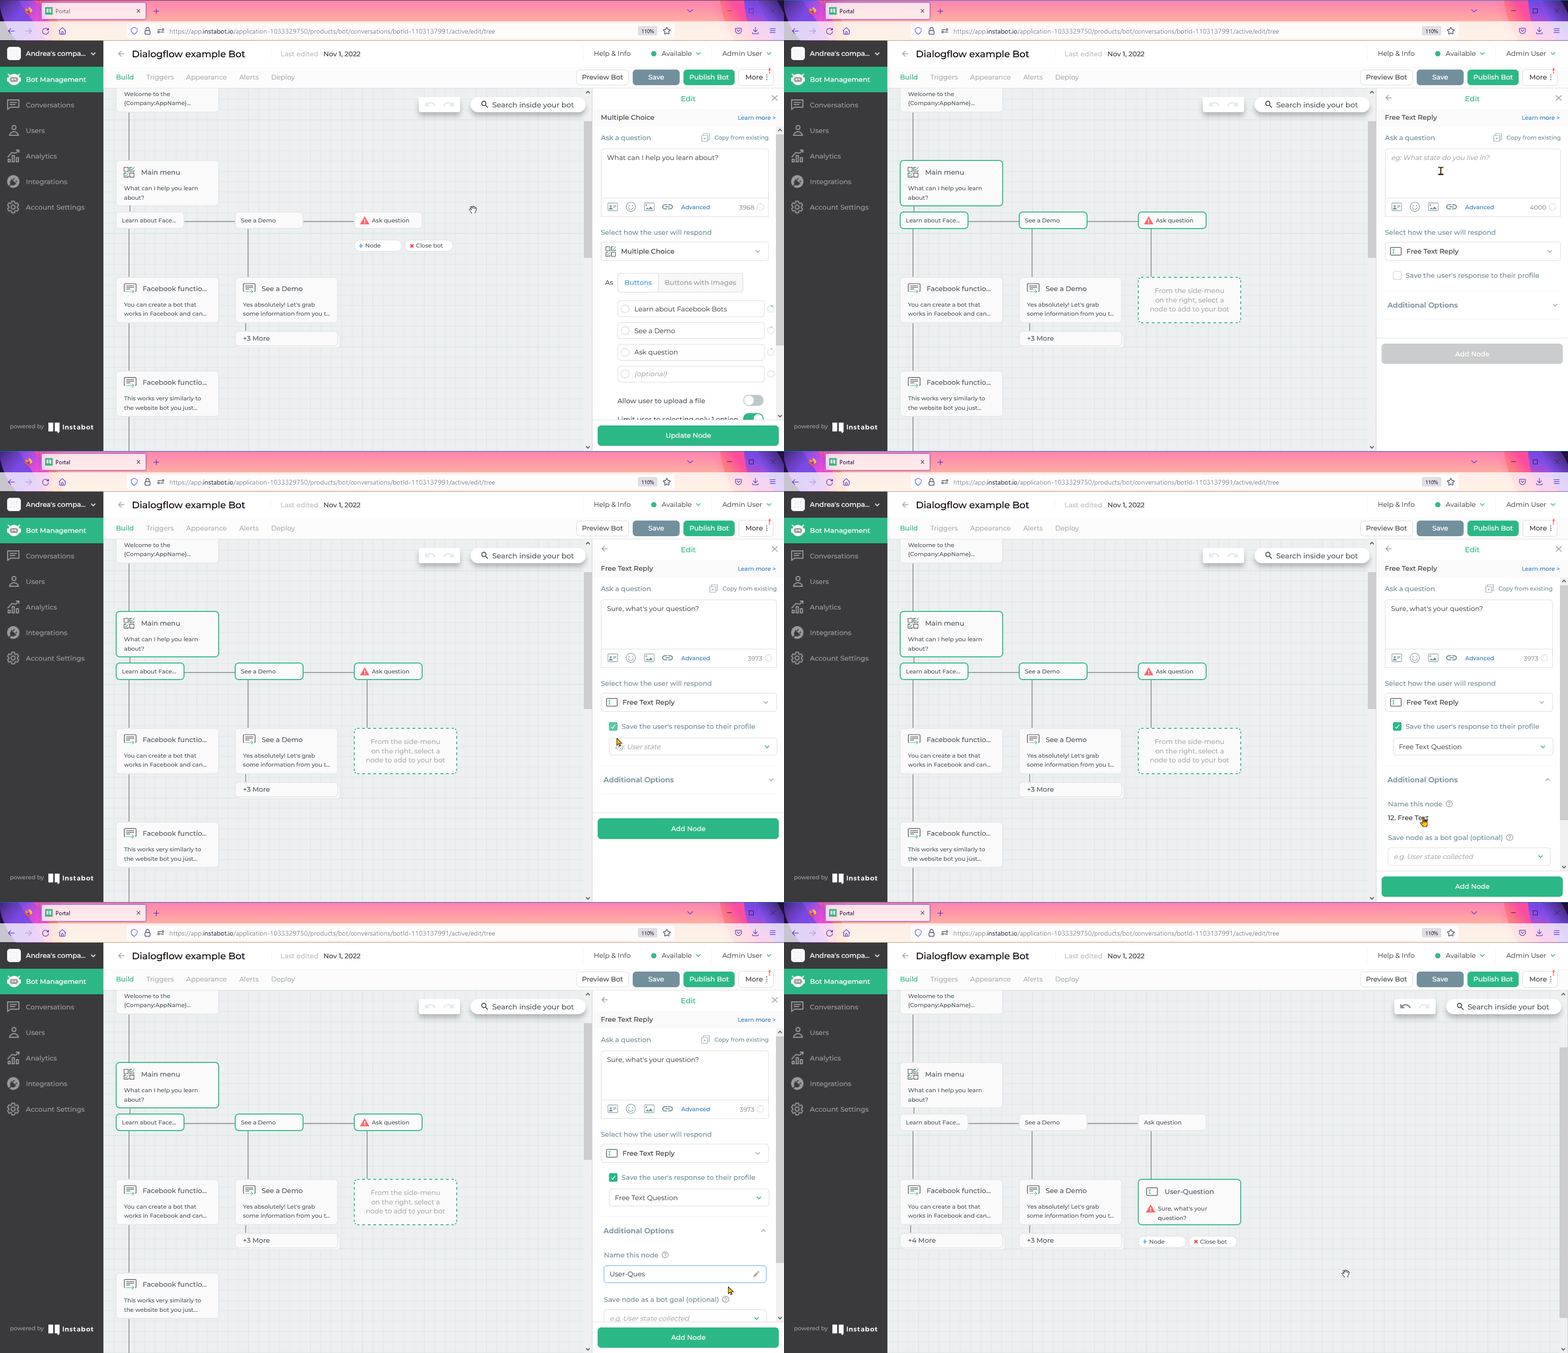
The first step for adding a Dialogflow node is to have a previous Free-text node in which the users will enter a question.
It's critically important to name this free-text node in a very specific way. We strongly suggest naming this node "user-question". If you want to use your name, do not use spaces or dots in your node name, use dashes to separate words in your node name instead (eg: "ask-visitor-something").

Add Free-Text node
2. Add a Dialogflow node
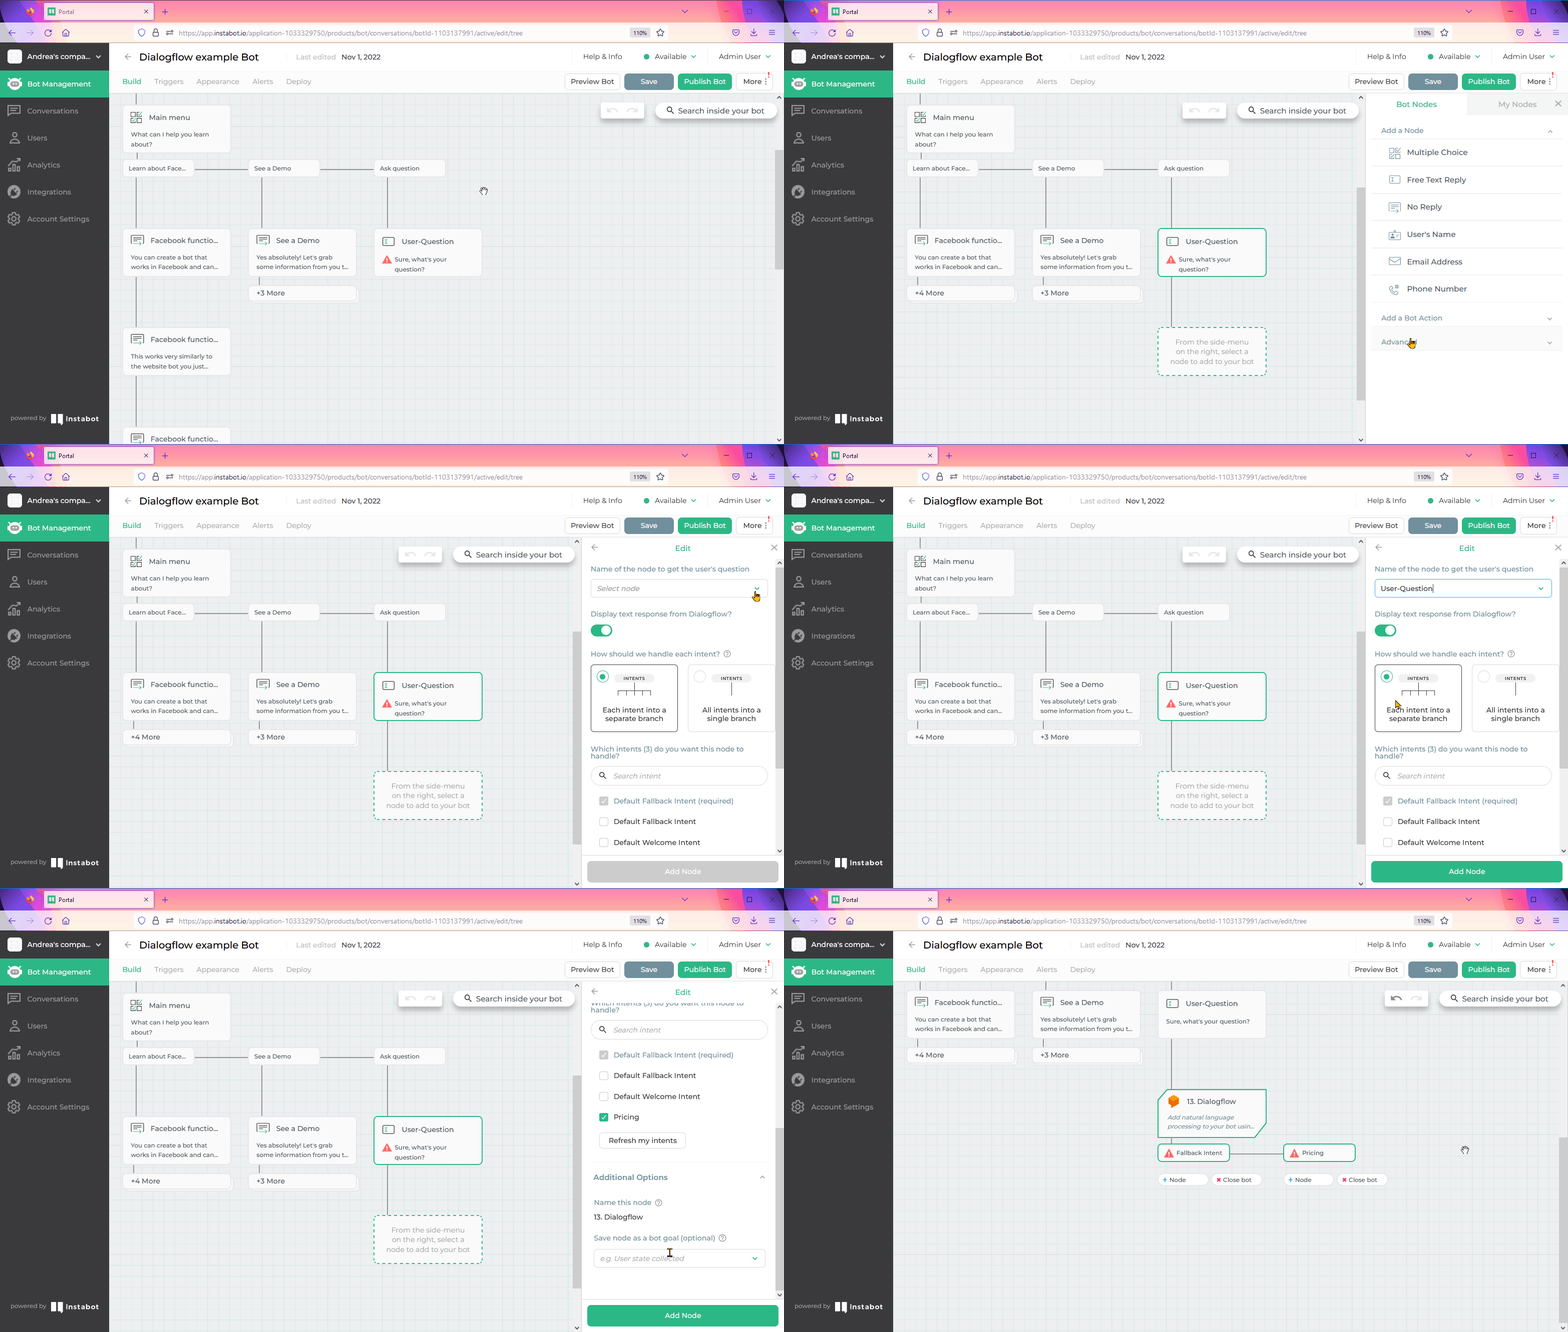
Immediately below the free-text node created in step 1, add a Dialogflow node. You will find this node type in the Advance options.
In this node, you have to configure:
-
Name of the node to get the user's question, in this example it is the node called “User-Question” created in step 1.
-
Turn on/off the “Display text response from Dialogflow?” switch. This setting controls whether the bot will display the Dialogflow response back to the visitor. For now, we will keep it turned on. You will find variants in the Advance Features article, here.
-
Choose How should we handle each intent? This setting controls how each intent in your Dialogflow account will be expressed and handled in the bot-builder. For this example, we will select the option “Each intent into a separate branch”. You will find more details in the Advance Features article, here.
-
Choose Which intents (n) do you want this node to handle?
In this setting, you have to select which intent/s you would like to handle in your bot path. Between parenthesis, you will see the number of intents that you have set in your Dialogflow account connected to Instabot (in this case, we have only 3 intents).
Fallback Intent is mandatory, and it is not unselectable.
Following our example, we will select here the “Pricing” intent.
Here also you have the option for refreshing your intents, in case you are doing some changing in the Dialogflow console at the same time and you want to see that changes reflected in Instabot. -
Finally, you have Additional options like other nodes, for changing the default node name or saving the node as a bot goal.

Add Dialogflow node
3. Complete the bot path for each intent
The last step in this example is to complete the bot path for each intent.
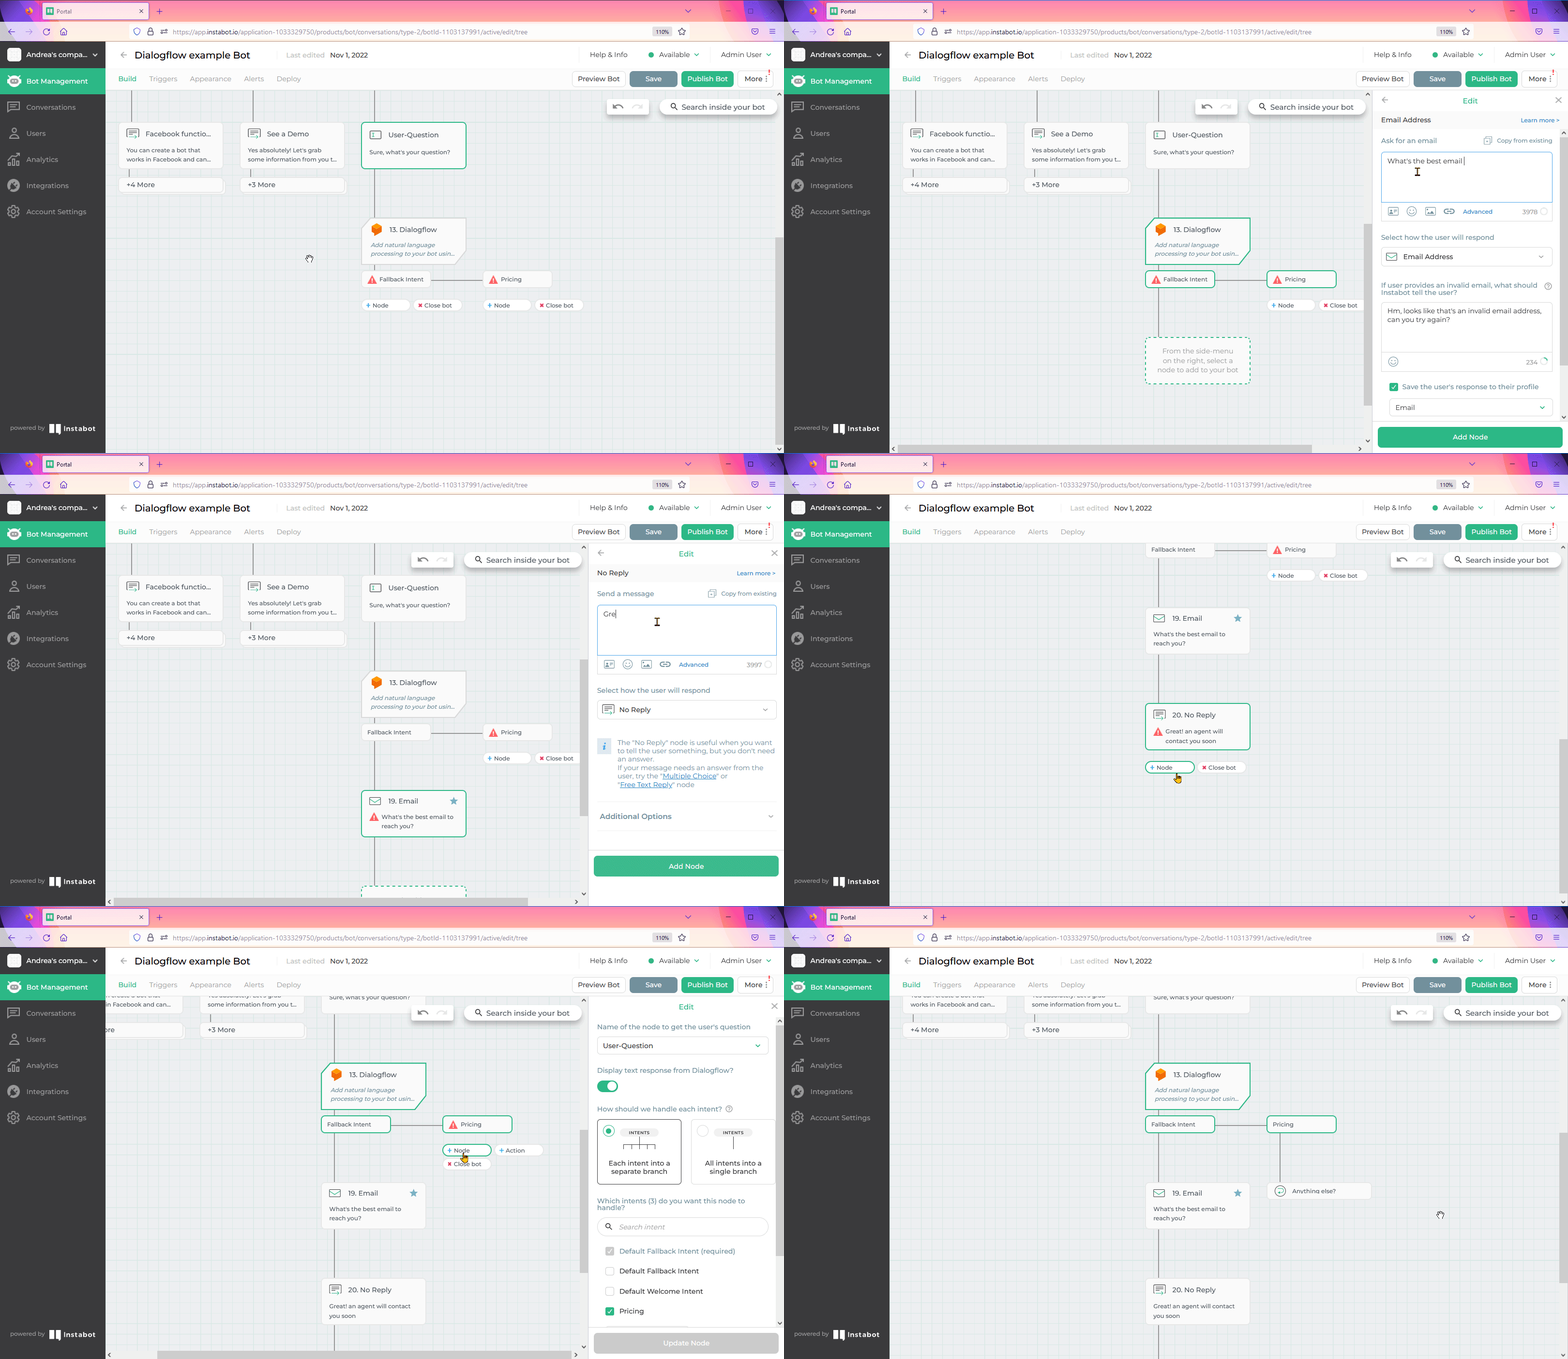
For the Fallback Intent, we will request the user’s email for sending it to an agent that will contact the user for answering the question that the bot has not been trained yet.
If Dialogflow could match the user question with the Pricing intent, it will return the correct answer to the bot and because we have the Display text response from Dialogflow turned on, the bot will show the answer. So, in this case, the next step after the Pricing intent is just to redirect the user to a previous node for offering help with anything else.

Complete the bot path for each intent
Updated about 3 years ago
