Shopify
Integrate web Instabot into your Shopify site
Don't have an Instabot account yet?
Overview
This guide will demonstrate how to integrate web Instabot into your Shopify site, and launch the Instabot when a user clicks a link or button on your site.
Contents
Prerequisites
1. Get your Instabot JavaScript snippet
IMPORTANT
You only have to perform these steps once! Once the Instabot code is inserted into your website, you can change your Instabot's location, behavior, and content in the portal without touching any code, ever again!
- In the Instabot portal, click 'Settings' in the side-panel - this is where you will find your Instabot JavaScript
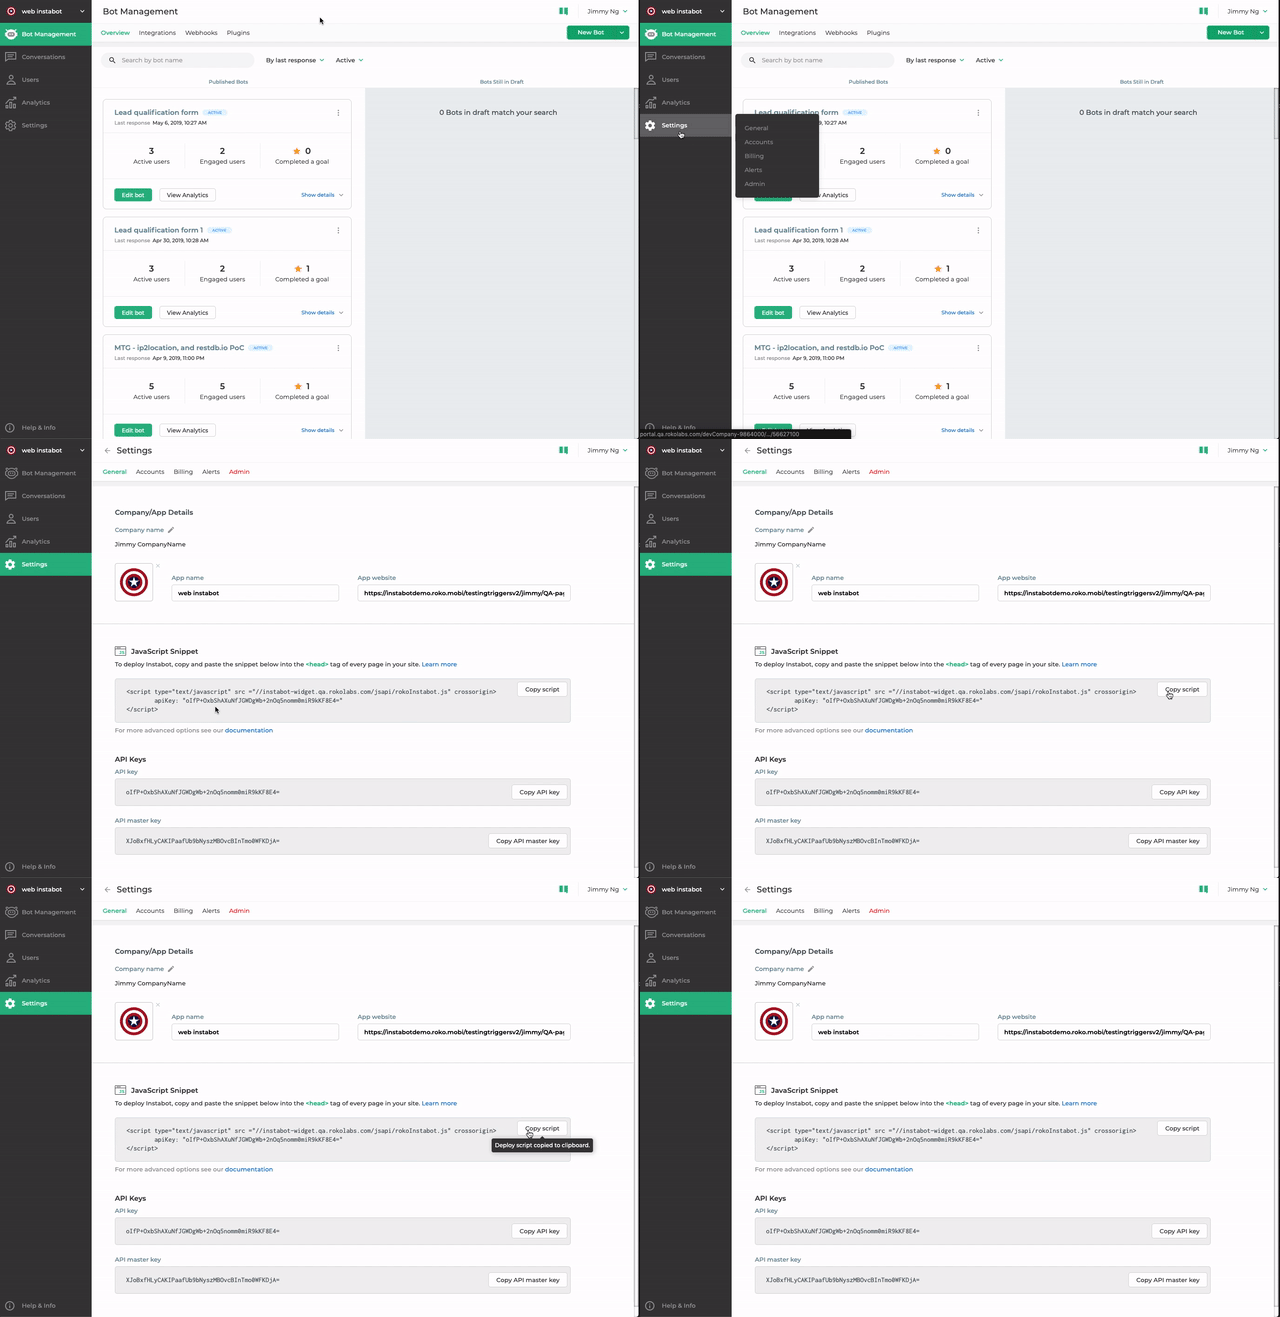
That's it! Now we're ready to insert our Instabot JavaScript into our Shopify site.
2. Insert Instabot into our Shopify page
- In your Shopify admin console, let's navigate to where we can edit the source code of our page, select:
Online StoreThemesActionsEdit HTML/CSS
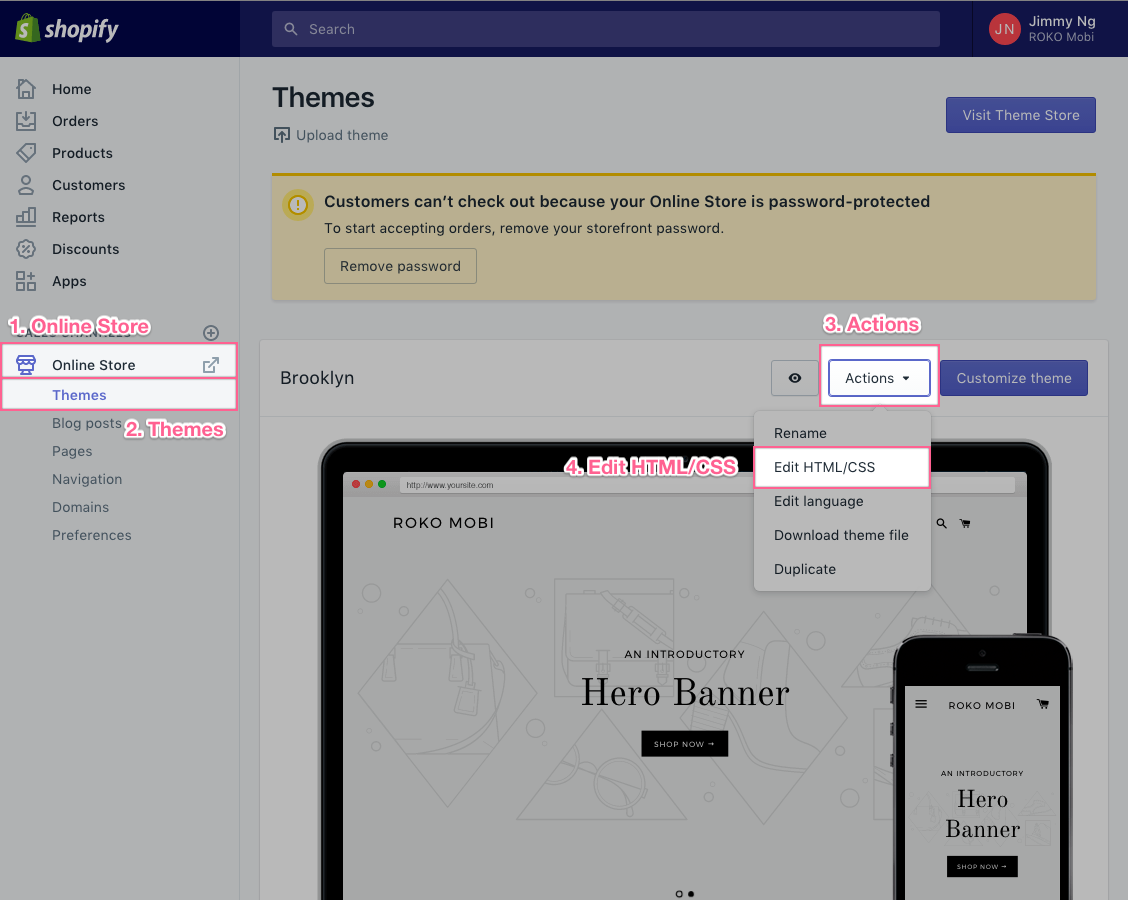
Edit HTML/CSS of Shopify theme
- In this screen, you will see all of the templates and files that your Shopify site is currently using. Find and select the specific section, template or file that you want to insert an Instabot into. In this example, we've chosen to insert our code into a template file called
featured-content.liquid.
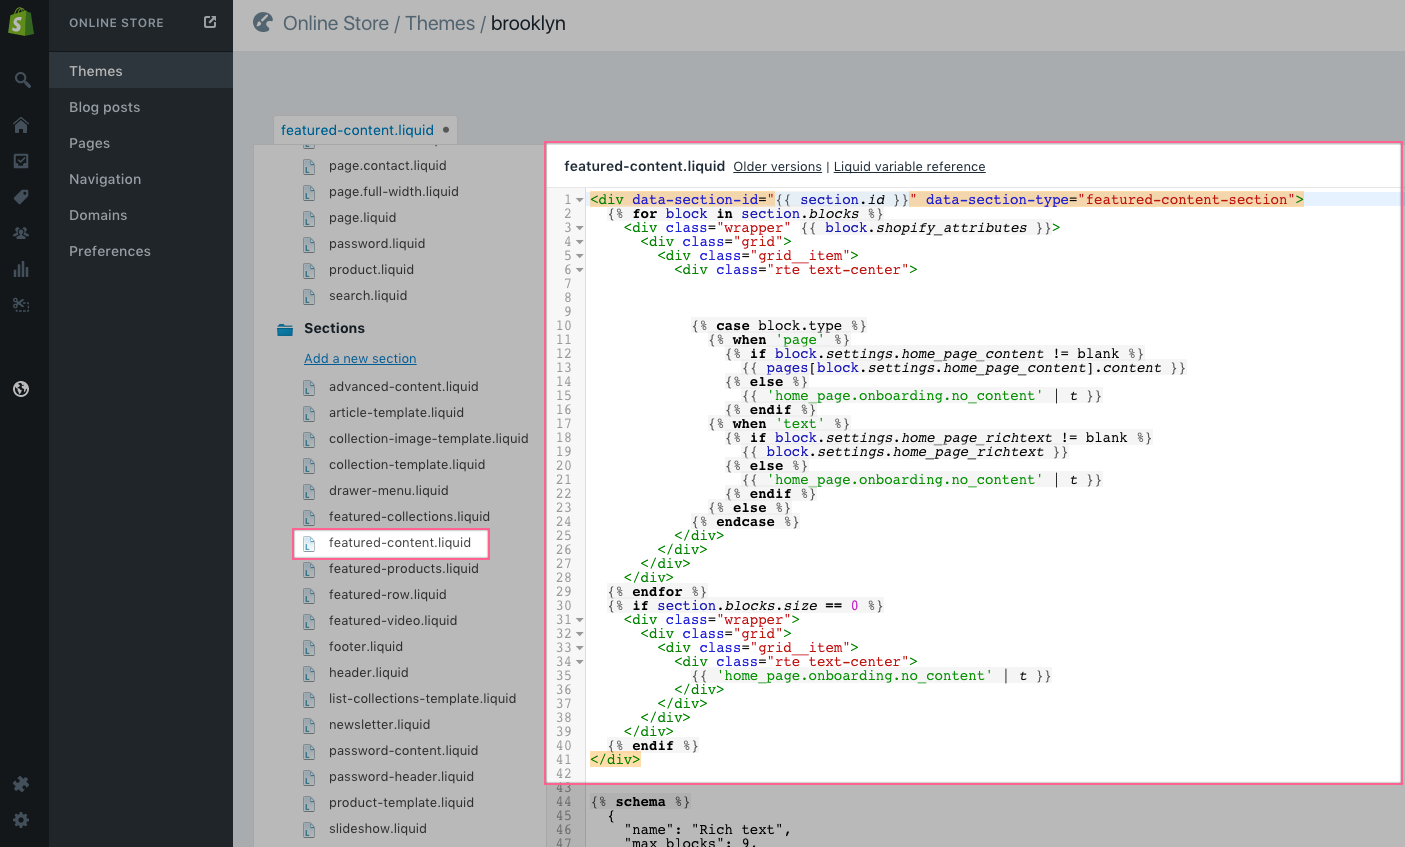
Specific section, template or file to insert Instabot into (example)
- Paste your Instabot JavaScript into your Shopify code, then click save.
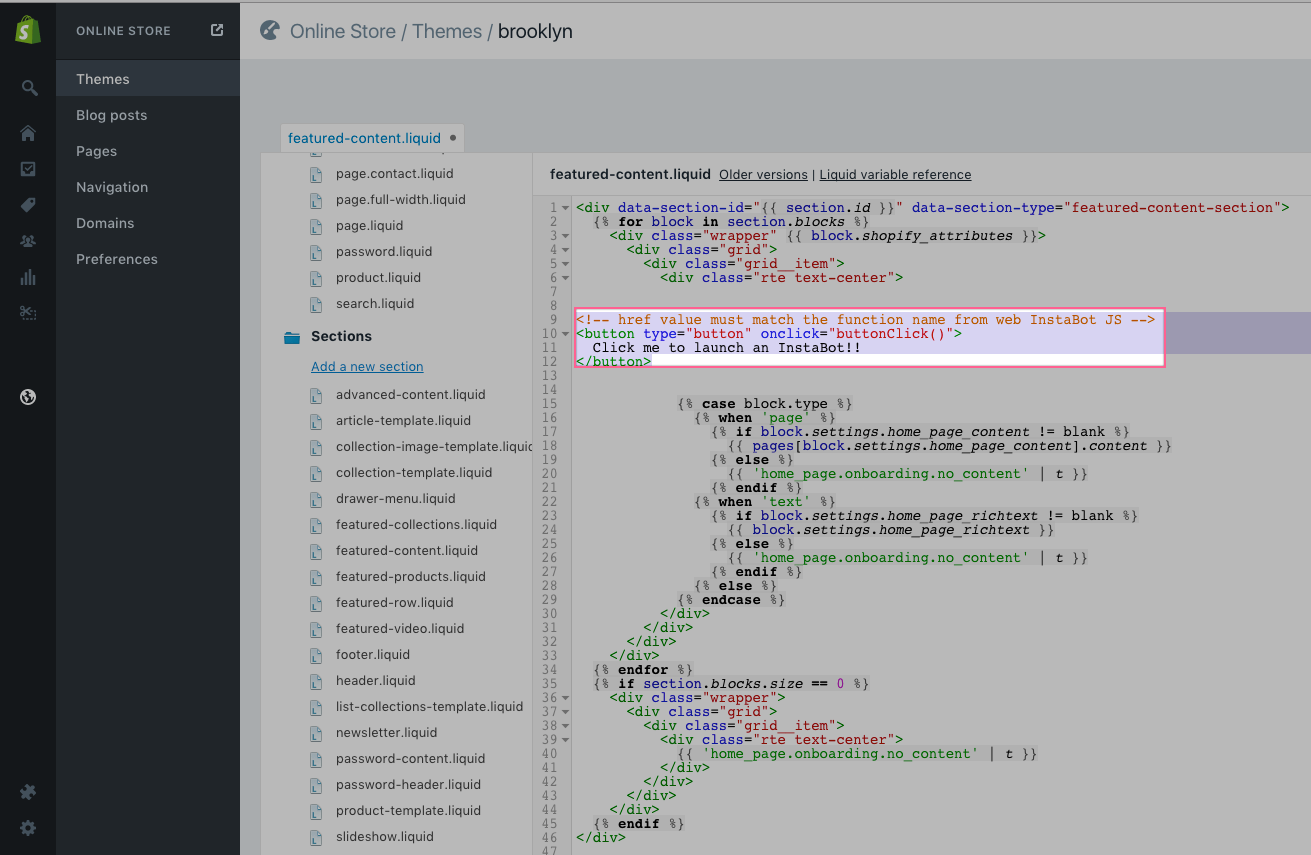
Instabot JavaScript and button code
- After saving and reloading your page, you see the button you just added in the previous step.
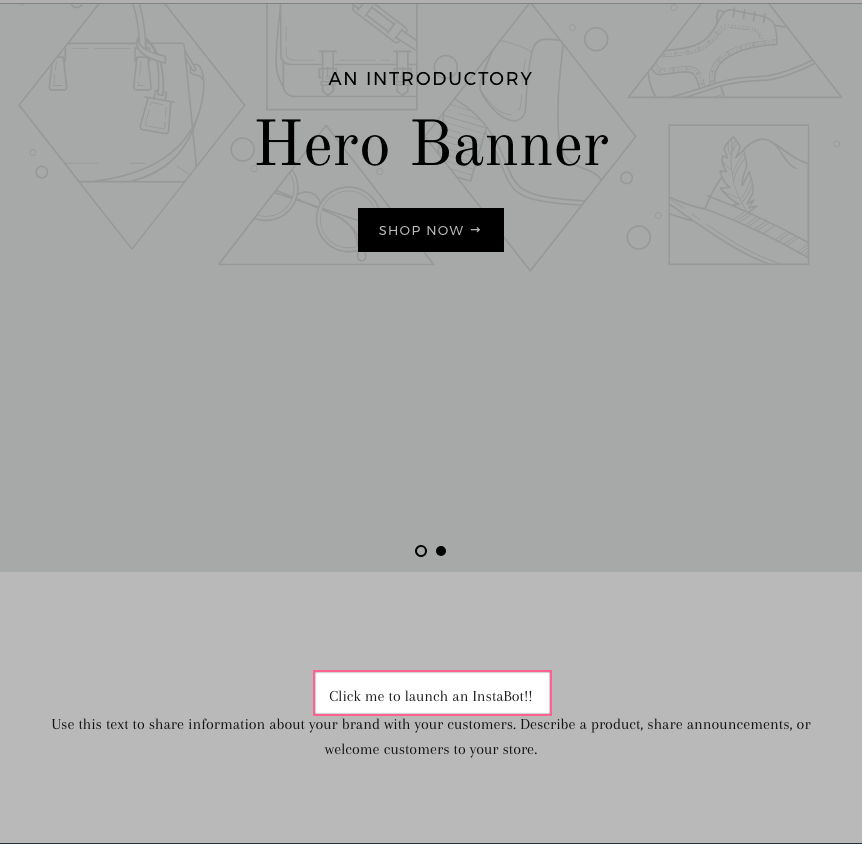
A simple button that when clicked, will launch your Instabot
- Click the link, you should see your web Instabot launch!
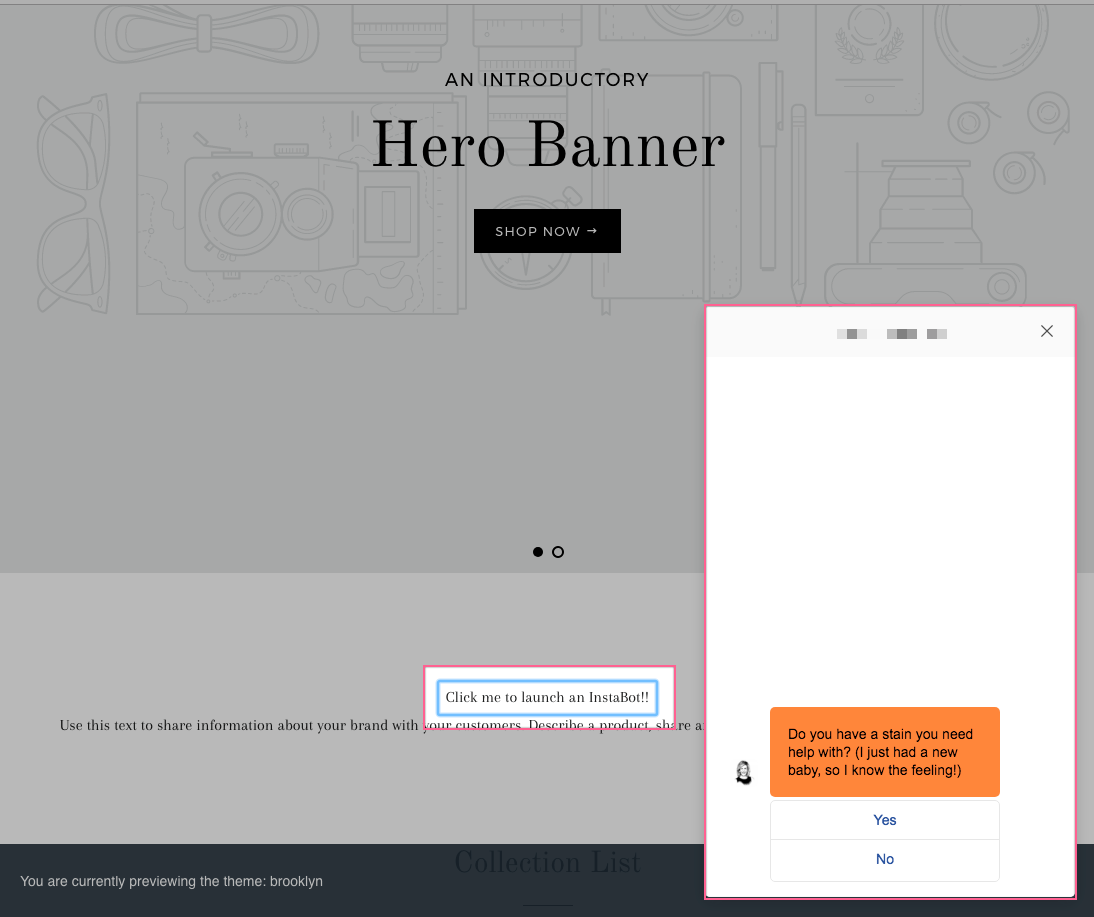
Updated over 6 years ago
