Dialogflow Advanced features
Contents
Display the text responses from Dialogflow settings
Separated branches vs Single branch mode
How to route the user to different paths in the bot if Dialogflow returns the Default Fallback Intent
How to access the full JSON payload returned by the Dialogflow node
Display the text responses from Dialogflow settings
One of the options that can be handled in a Dialogflow node is to display or not the text response received from Dialogflow. You can find the switch to turn it on/off in the Edit Node section.
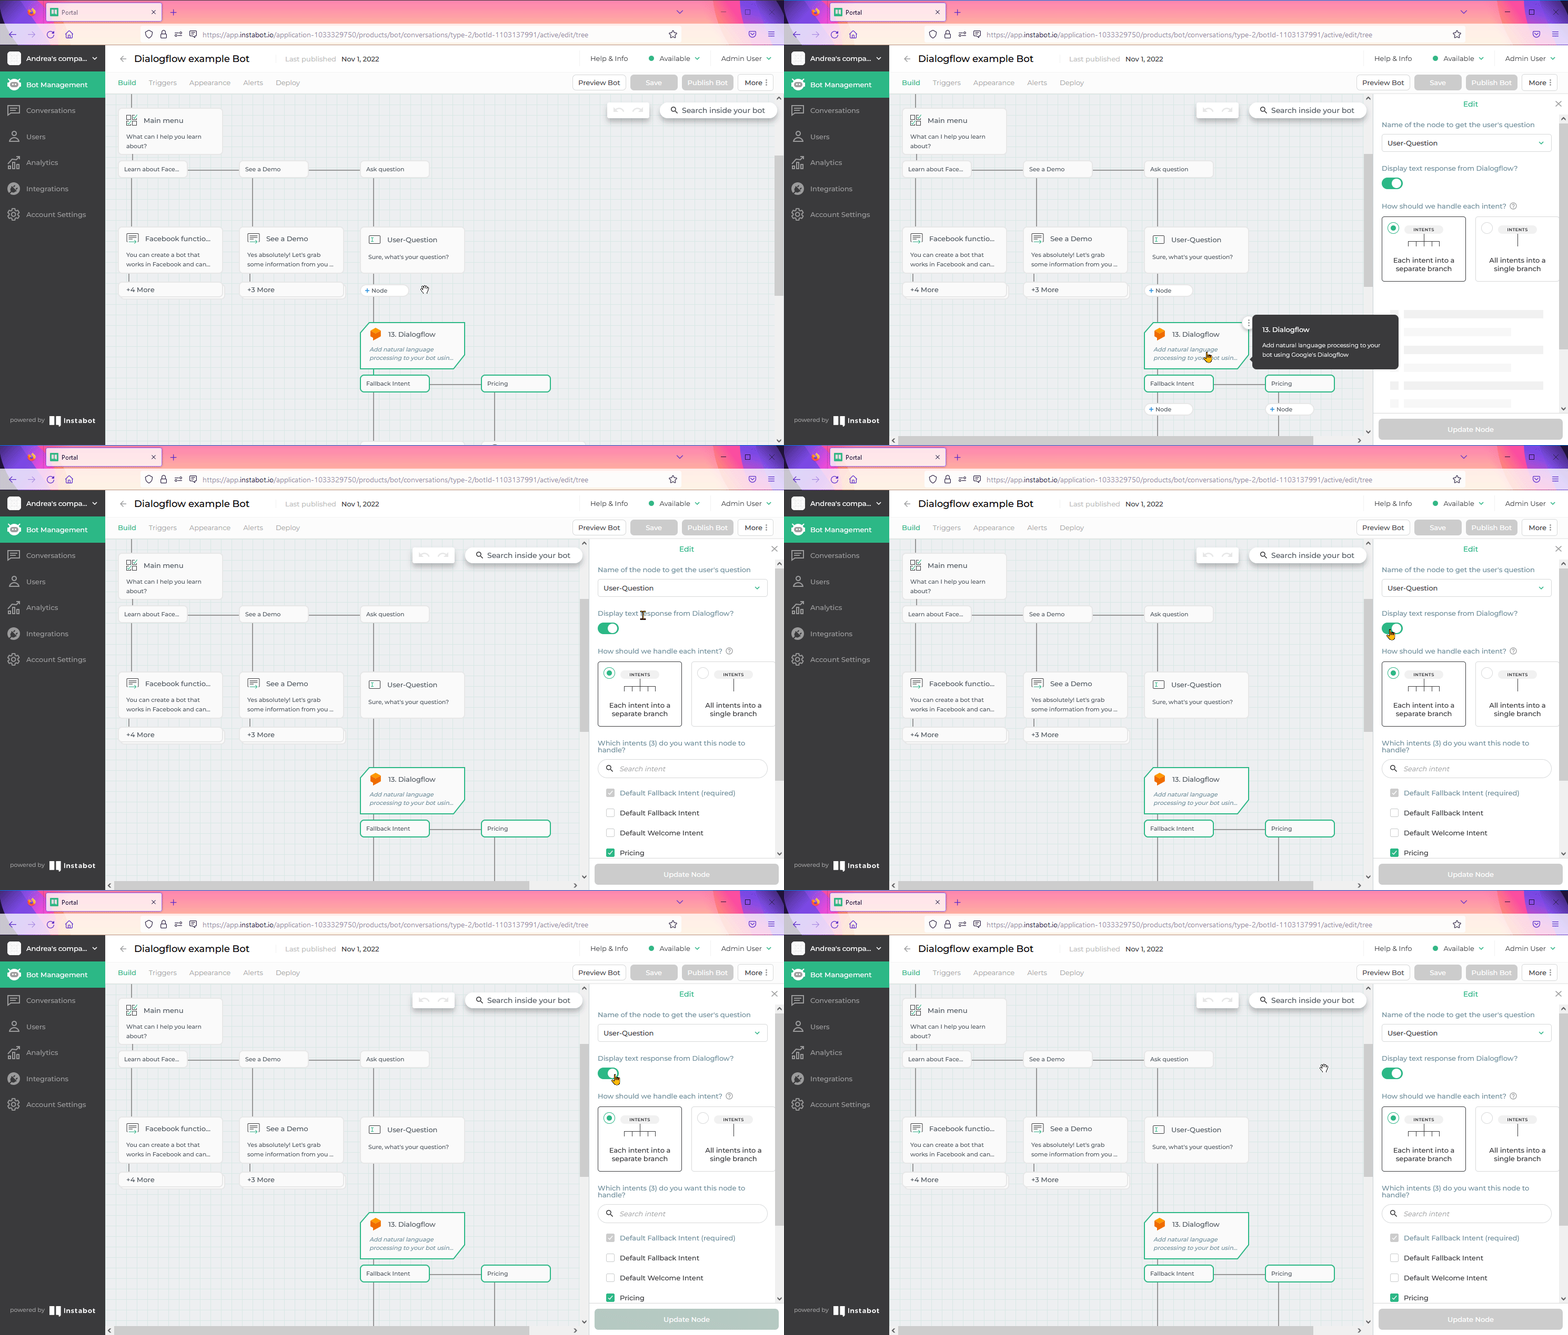
Dialogflow node - Set Display response option
Turn on the “Display the text response from Dialogflow
This is the most common way of implementing Dialogflow and managing text responses for each intent directly inside the Dialogflow console. When this option is turned on, the bot will automatically display the text response for each intent.
Turn off the “Display the text response from Dialogflow"
In some particular cases, you could find it easier to manage text responses for each intent from within Instabot instead of within the Dialogflow console.
Please follow these steps to handle the text response from your Bot’s path:
- Disable the setting for "Display text response from Dialogflow?"
- Add a node for each intent you wish to display your text response. Use the type of node most convenient for the way that you want to communicate the response.
Let’s see an example in the following videos. Please note that for this example we keep each intent in a separate branch.
First, we will complete the response that we want to show in case of Dialogflow is not able to match the user’s question with the Pricing intent and returns the Fallback Intent. In this case, we will show the response in an Email node type, for requesting at the same time an email address for contacting the user later.
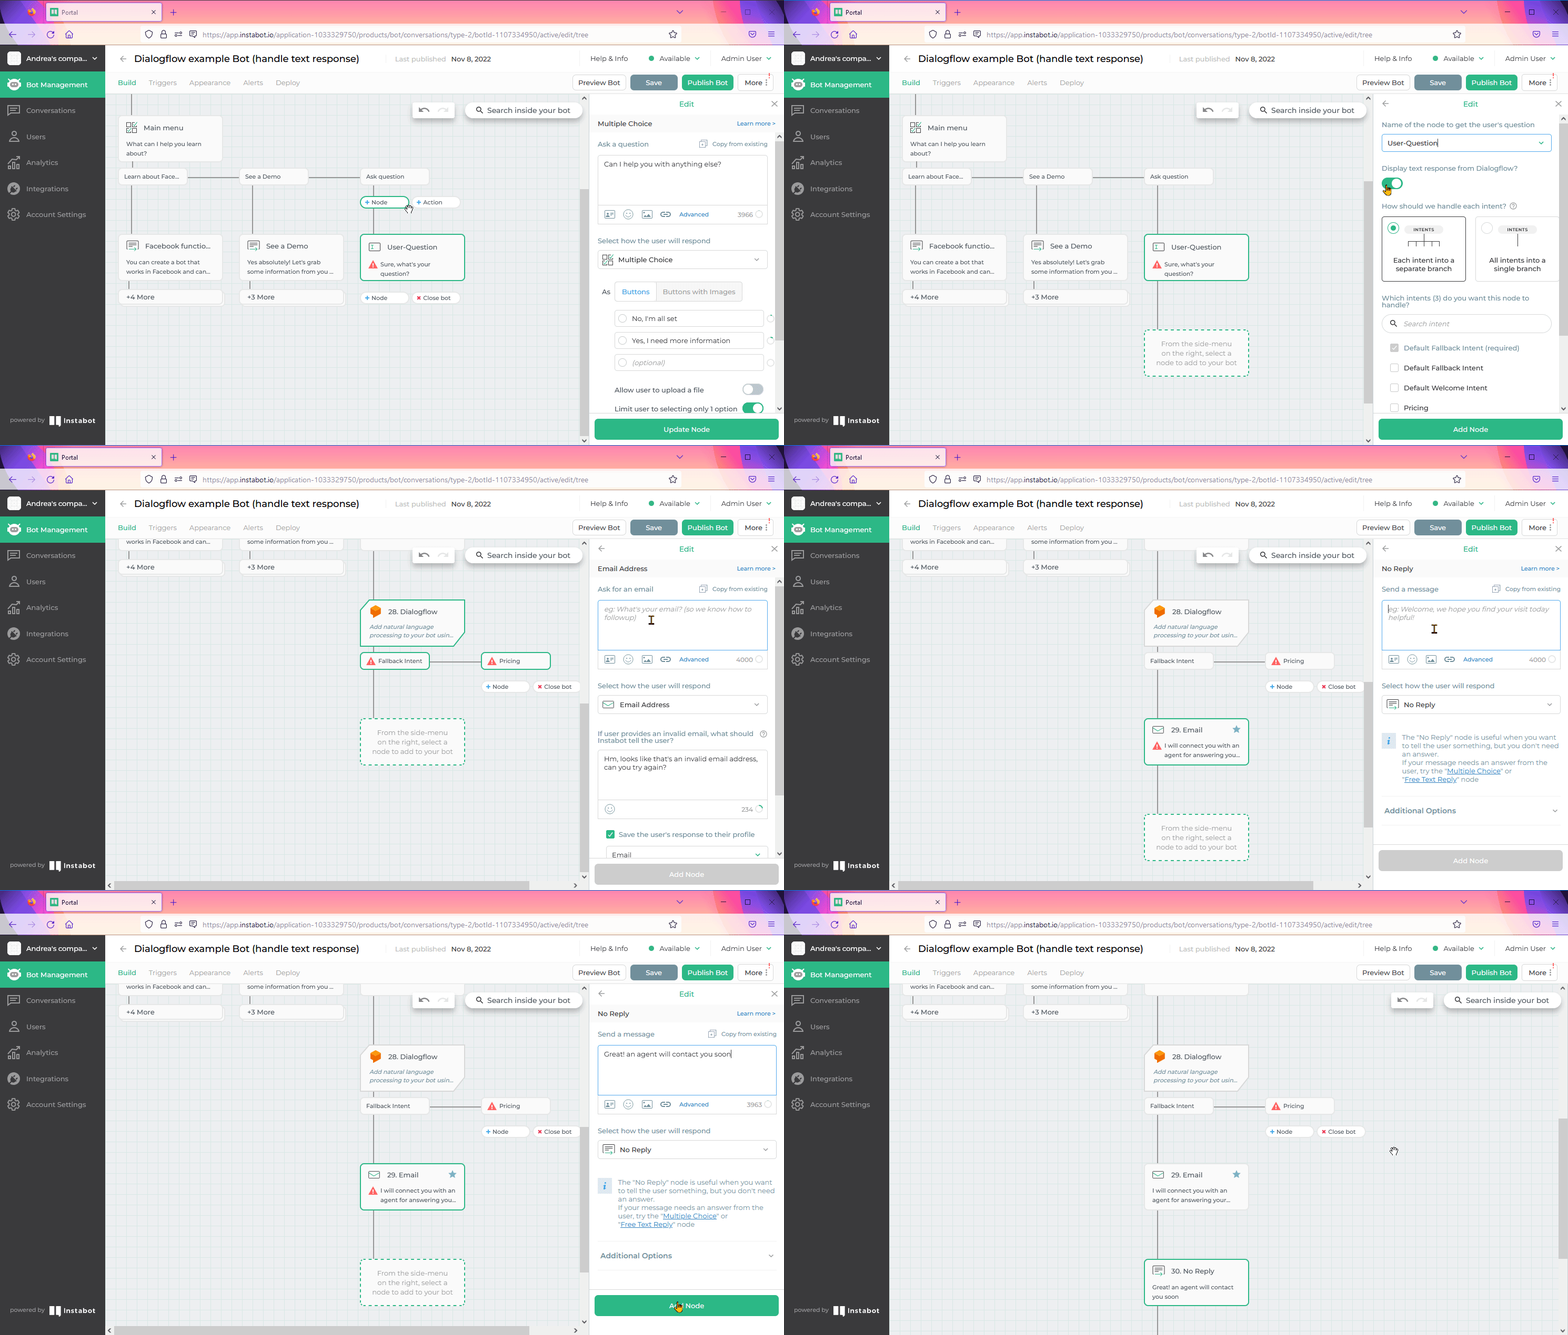
Dialogflow Node - Display response for a Fallback Intent
Now, we will complete the response that we want to show in the case of Dialogflow can match the question with the Pricing intent. In this case, we will use just a simple No-reply node for proving the response.
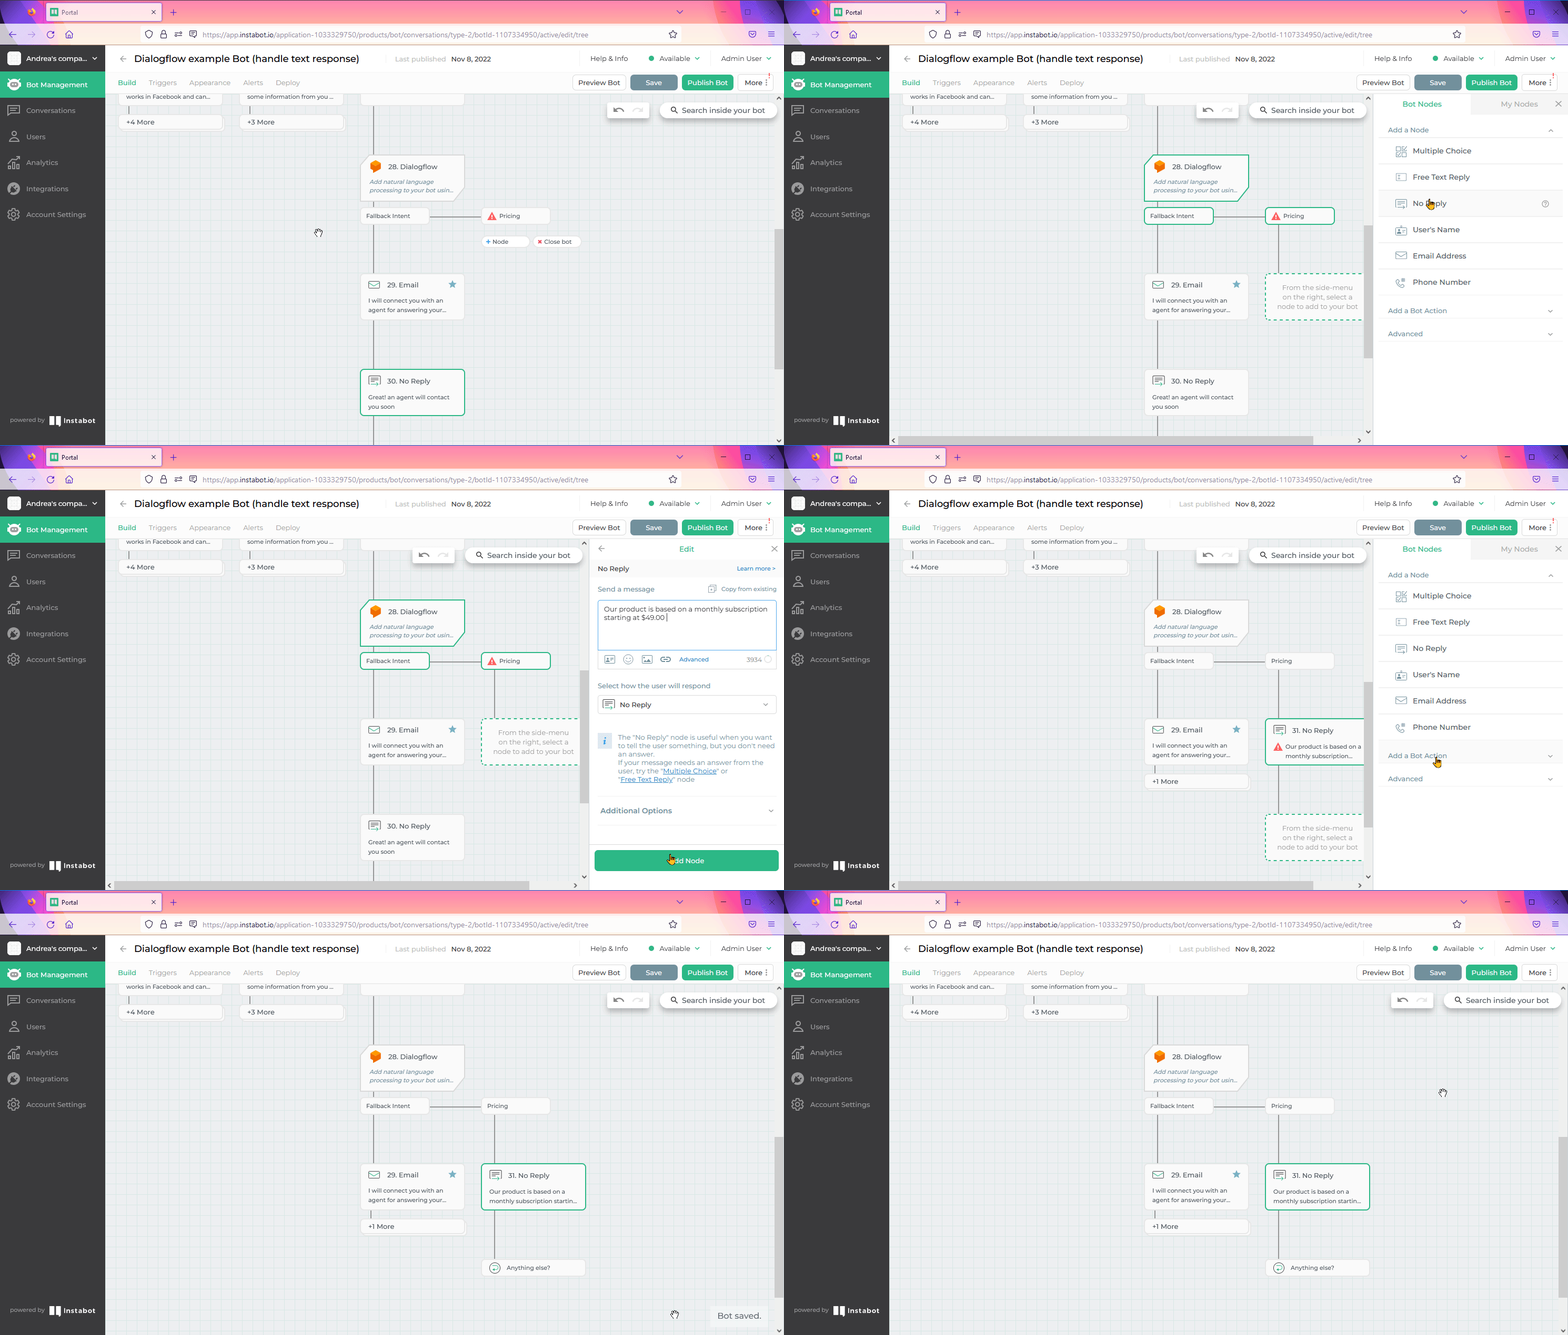
Dialogflow Node - Display response for an Intent
Separated branches vs Single branch mode
The "How to handle each intent?" setting controls how each intent in your Dialogflow account will be expressed and handled in your bot´s path. The two options are:
- Separate Branches Mode
- Single Branch Mode
"Separate branches Mode
This setting will automatically create multiple, distinct branches/options after your Dialogflow node for each intent that's selected in the node.
Separate Branches mode
The Separate Branches mode is useful if you want the option to send the user to different nodes/paths depending on which intent was detected.
For example, the video below shows four separate paths that you can configure separately and independently of each other:
- Default Fallback Intent
- Pricing
- Facebook Integration
- CRM integration
If Dialogflow matches the user’s question with the intent Pricing then
The interaction with the user will follow the bot’s path defined underneath the Pricing option.
If Dialogflow matches the user’s question with the intent of Facebook Integration then
The interaction with the user will follow the bot’s path defined underneath the Facebook Integration option. Same logic for intent Salesforce Integration,
Finally, if Dialogflow can’t match with any intent, then it will return the Default Fallback Intent and the user will be redirected to the bot’s path below that intent.
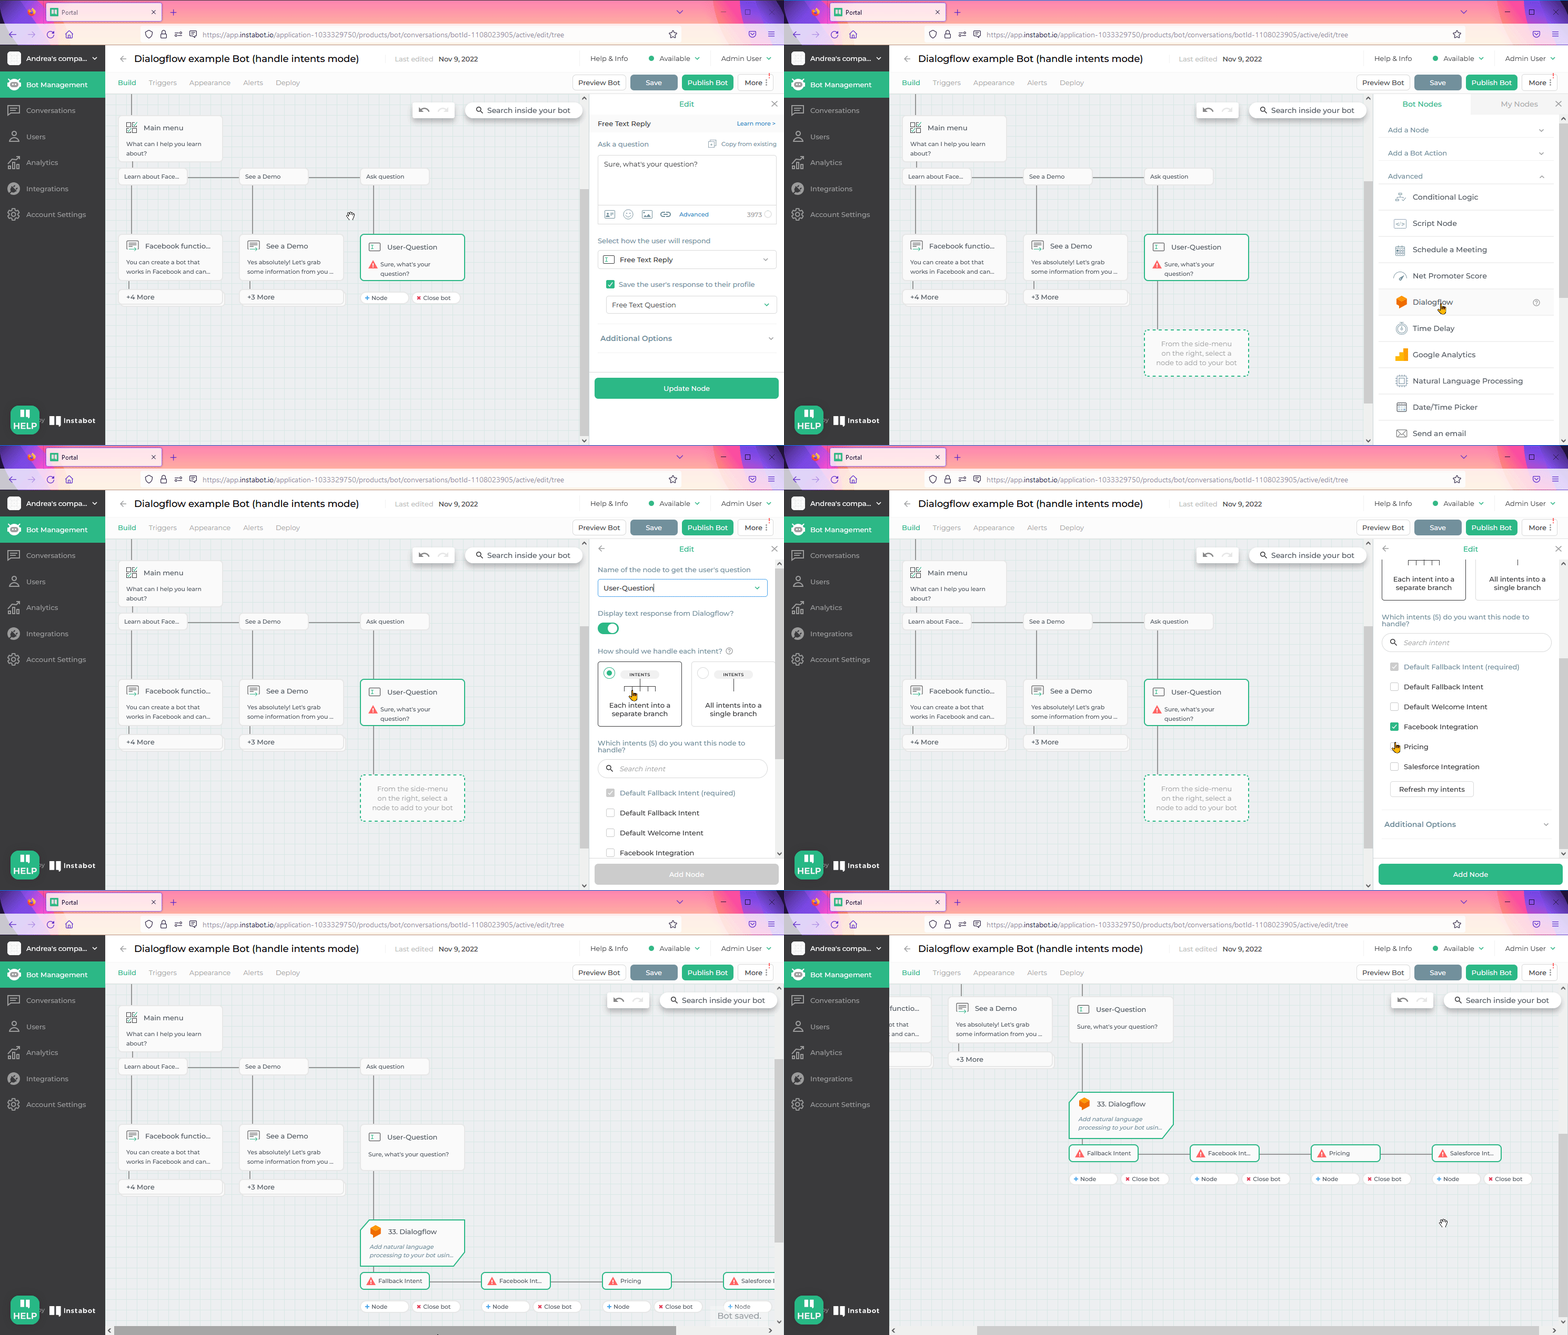
Dialogflow node - Separate Branches mode
Single Branch Mode
This setting will automatically create a single branch/option after your Dialogflow node for all/every intent.
Single Branch mode
The Single Branch mode is useful when you don't care about what intent was detected and you want to send the user down the same path no matter what.
Let's see how it looks like the same example of the previous video, but now selecting the Single Branch Mode.
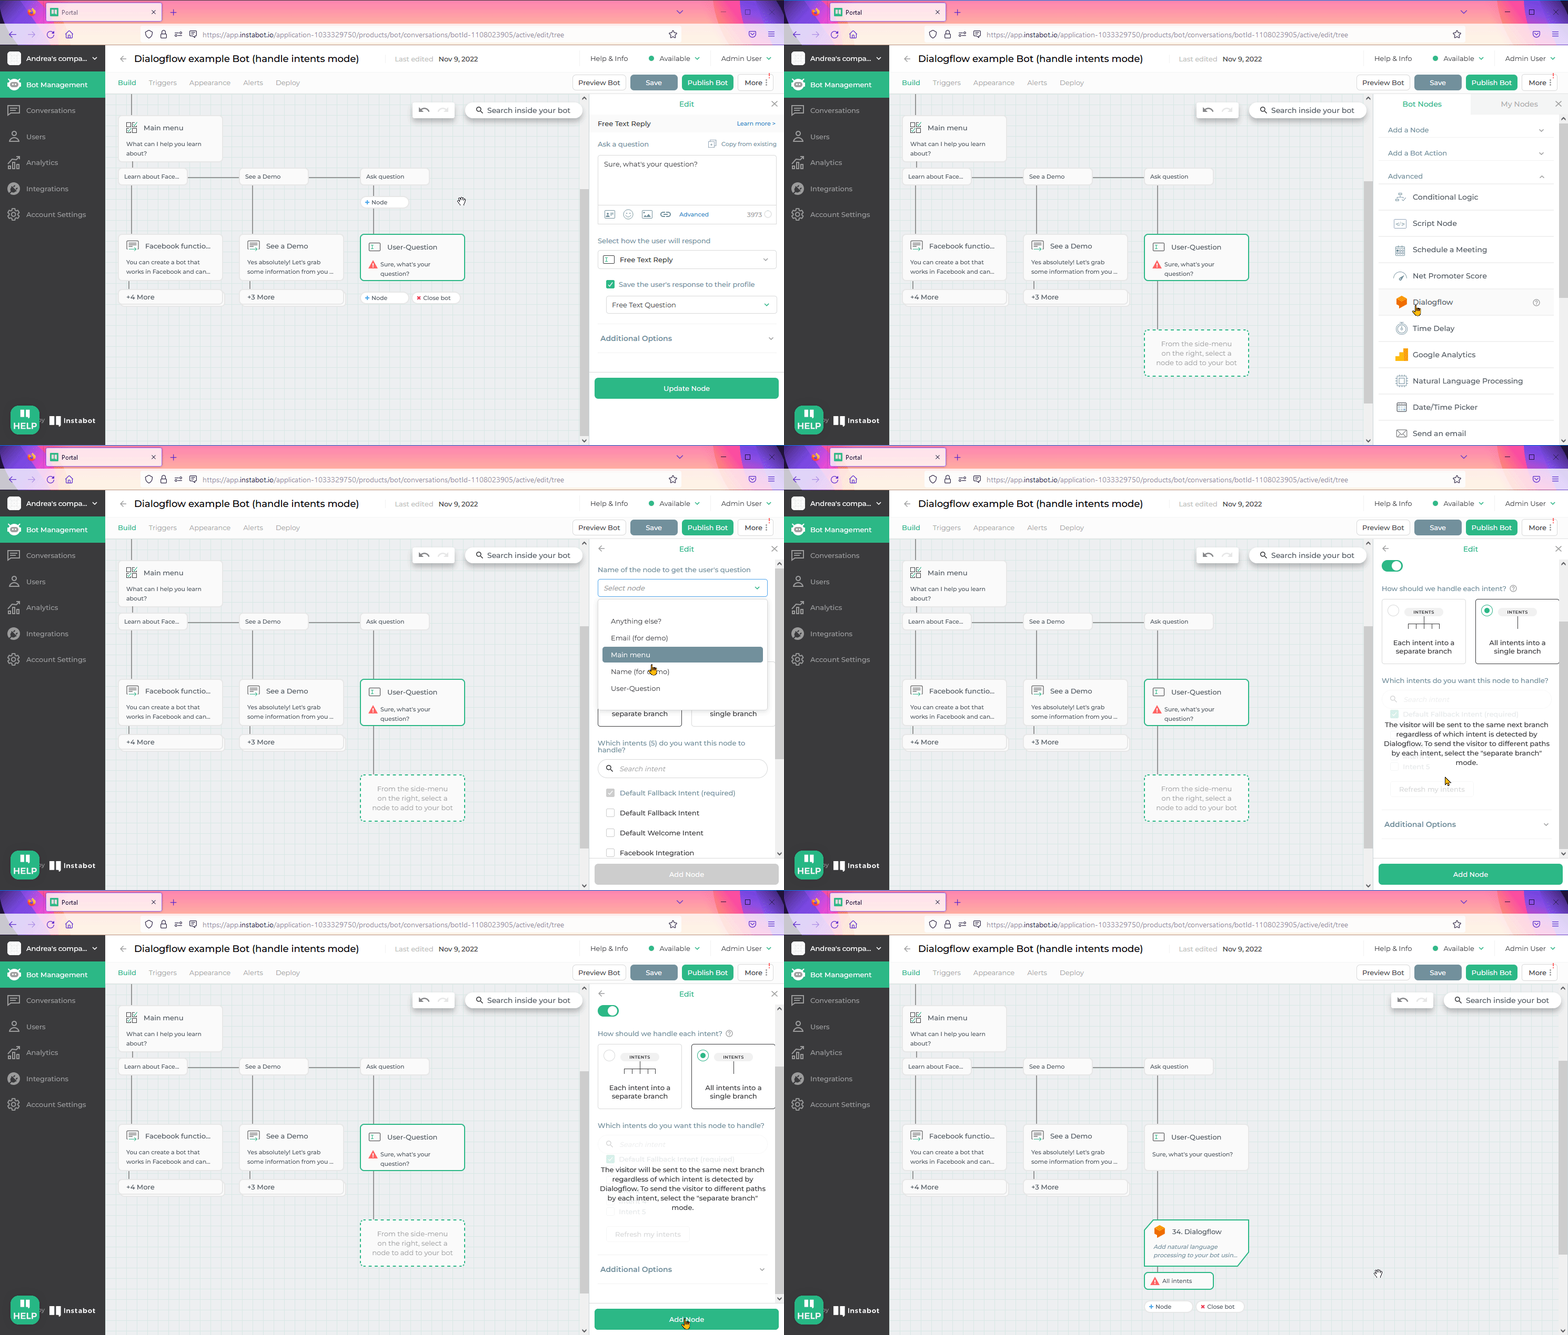
Dialogflow node - Single Branch mode
Please note that when you select the Single Branch mode the option ”Which intents do you want this node to handle?” turns disabled. So, all intents configurated in the Dialogflow agent that you have been connected to the Instabot account will be handled by this node.
When you are using the mode “Single Branch” probably you don’t care about what intent was detected but you would like to handle it in a particular way in case of Dialogflow was not able to match the User’s question with some of the intent and returns the Default Fallback intent. In this case, you can use our next tip, about how to route the user to different paths if Dialogflow returns the Default Fallback Intent.
How to route the user to different paths in the bot if Dialogflow returns the Default Fallback Intent
Sometimes all you care about is detecting if Dialogflow couldn't understand the user's question (Default Fallback Intent), and then sending that user down a specific path to escalate their query to a human or get more information from them.
To do this, you need to add a Conditional Logic node to check specifically for the Default Fallback Intent. Let’s see how to do it in the next video.
In this example, we add a Conditional Logic node, and the condition that we evaluate in that node is if the Dialogflow response matches the Default Fallback Intent.
If it matches then we requested the user to enter an email for contacting later with an agent. After entering the email, we ask the user if we can help him/her with anything else.
If the Dialogflow response matches any other intent, then we just ask the user if we can help him/her with anything else.
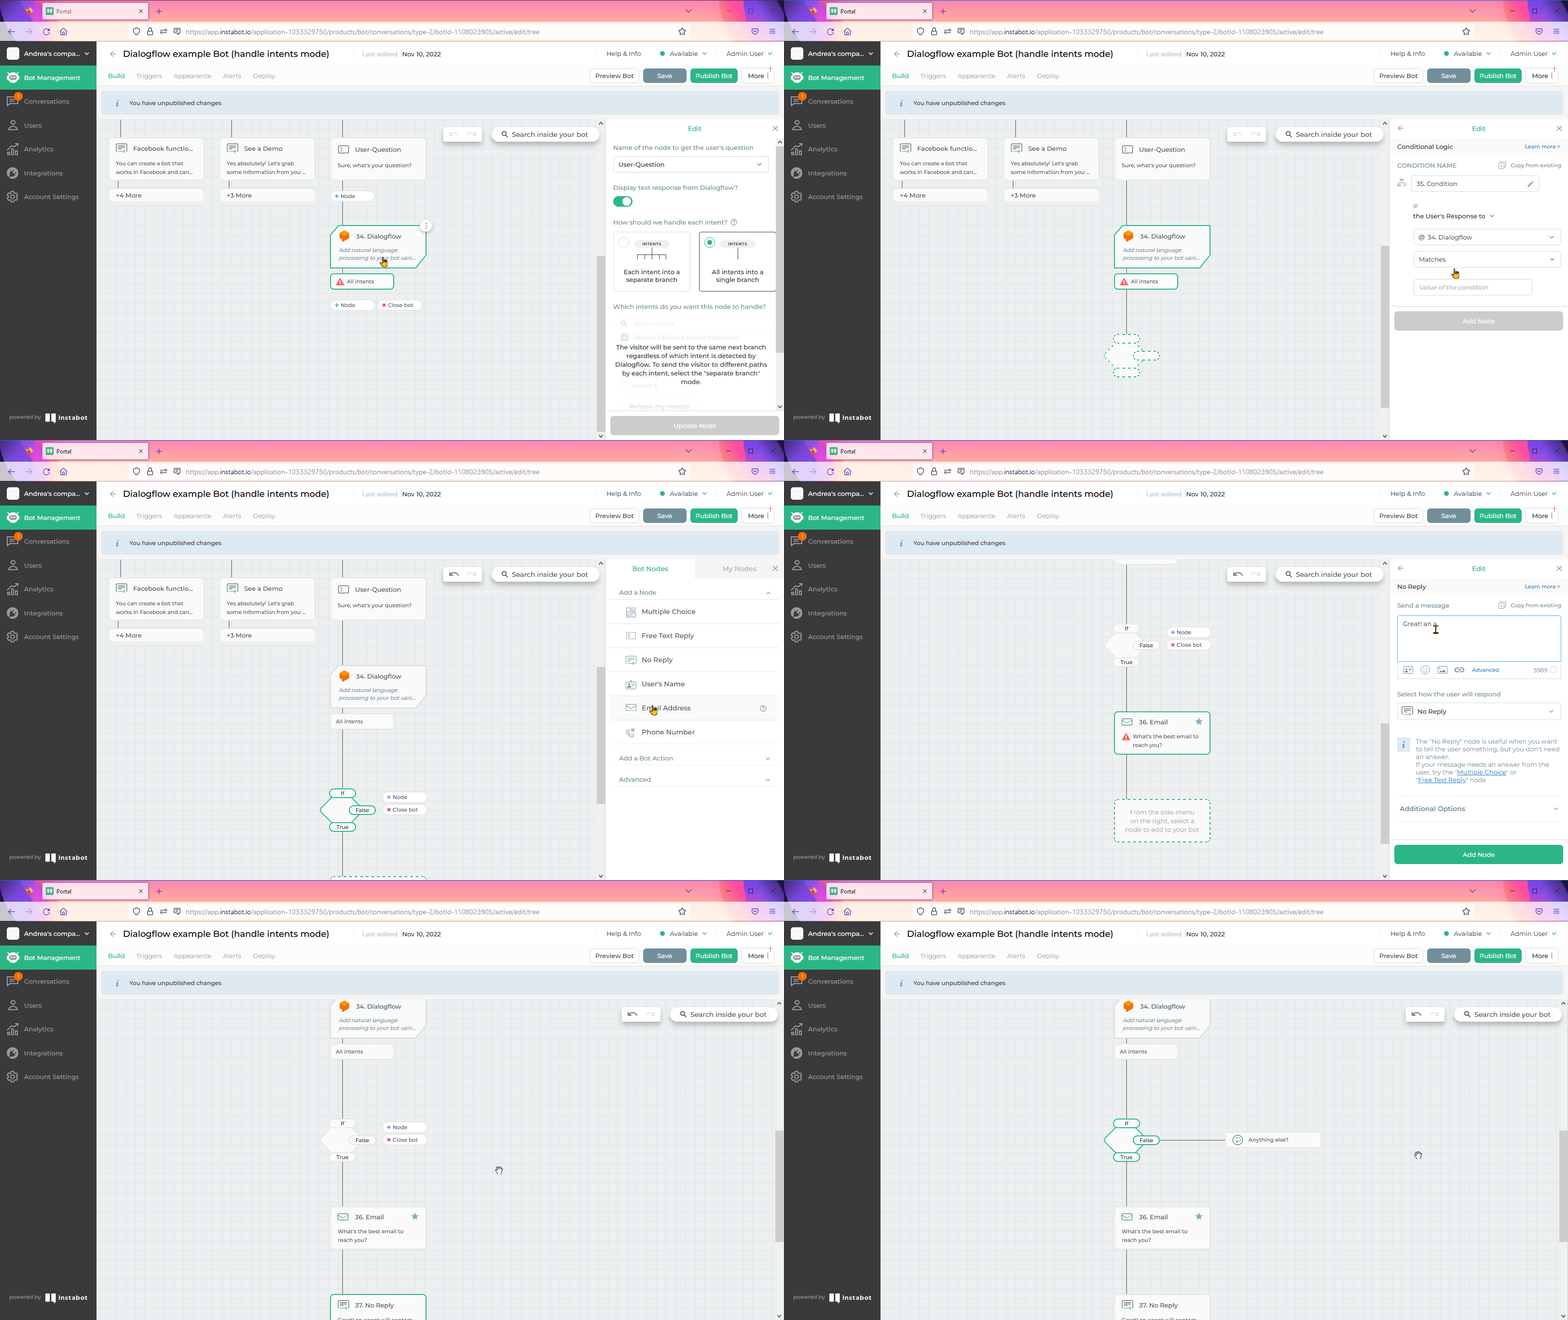
Dialogflow node + Conditional Logic node
Now, let’s see our bot in action!
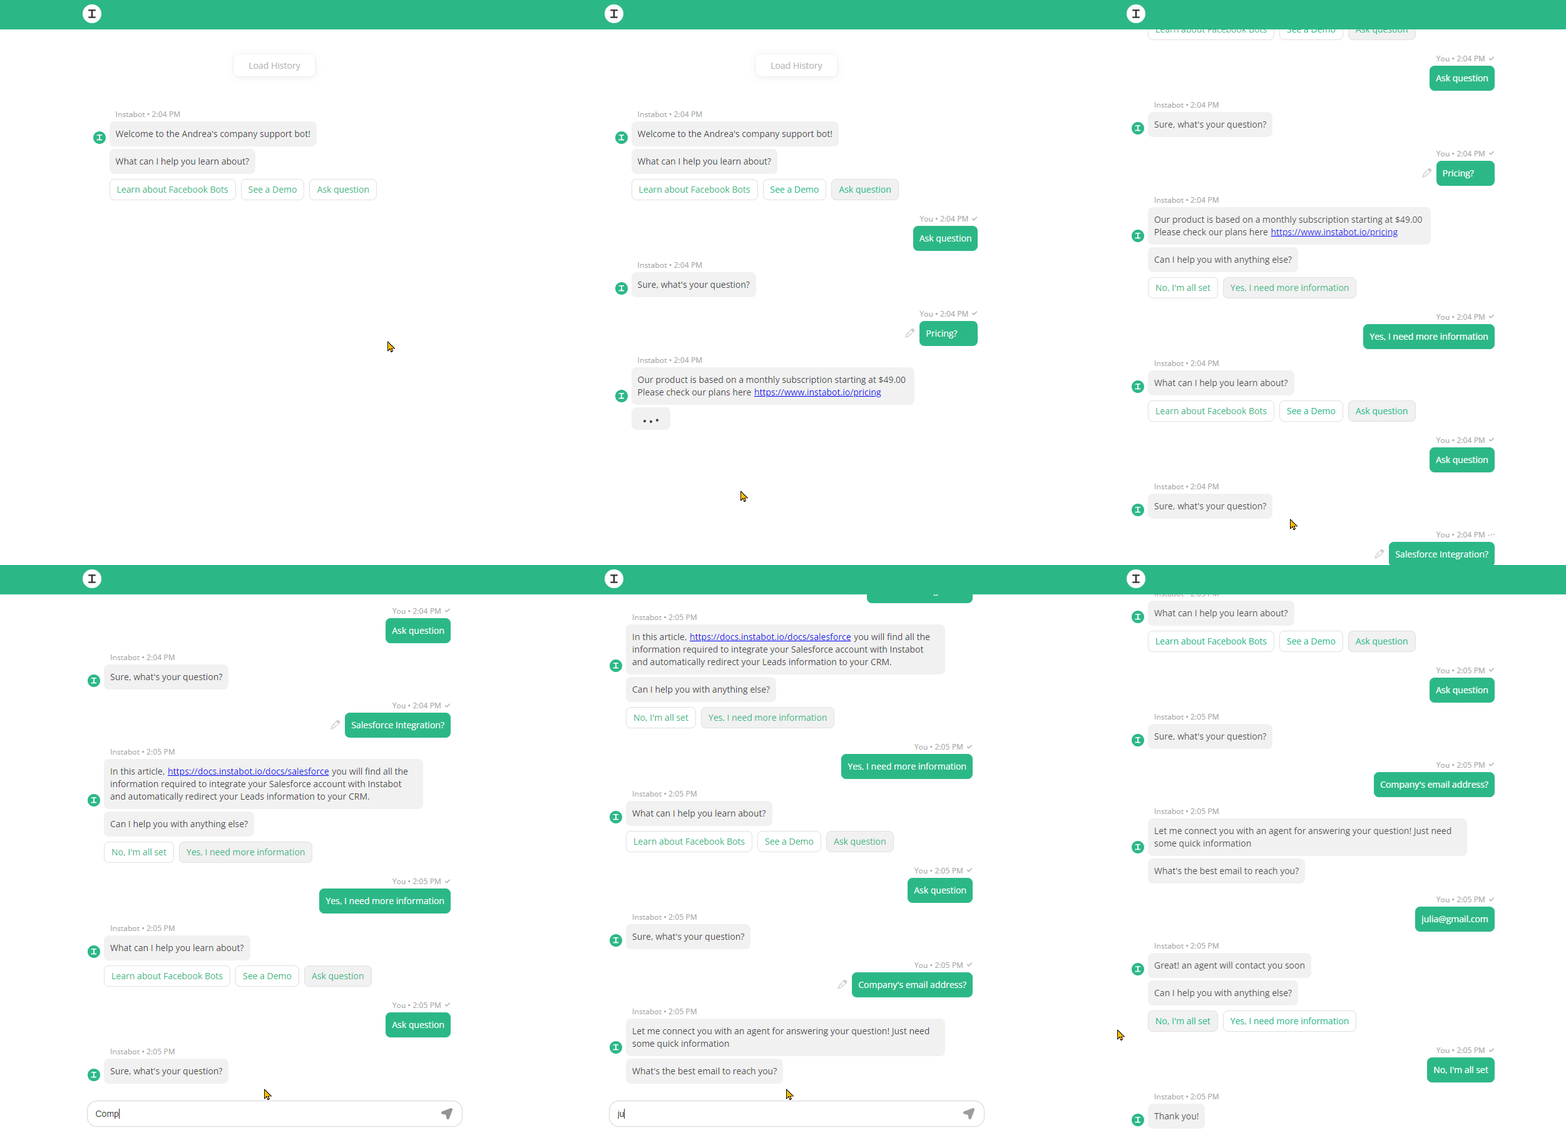
Dialogflow node + Conditional Logic node in action
How to access the full JSON payload returned by the Dialogflow node
In this tip, we introduce references about the power of the JSON payload returned by the Dialogflow node.
Till now, we identify the detected Intent by Dialogflow using the logic and settings of the Dialogflow node that resolves the interpretation of the JSON payload, but, what if you need to access more stuff in the Dialogflow returned data?
Well, the answer is that you can use the Script node in Instabot to access any field that's returned in the JSON payload.
The Script Node is an advanced node type that greatly extends the power of your bot by allowing you to insert and execute any JavaScript silently within the bot as the visitor is talking to the bot.
You can do some advanced things like:
- Perform and calculate some business-specific logic based on the user's answers
- Get data from 3rd-party APIs via a GET request
- Send data to 3rd-party platforms via a POST request
- Programmatically customize your bot messages from some info that exists on the page itself
Using Script Node requires programming knowledge so we recommend starting to know the power of this advanced node type by reading this article
For more information on what else you can do after you've parsed the JSON response payload, see these examples in our documentation.
To complement, we also recommend checking the documentation on the Dialogflow side about the Detected Intent responses here
Updated about 3 years ago
