Salesforce
Don't have an Instabot account yet?
Salesforce Integration requires Advanced tier and up
Integrating your Instabot with Salesforce requires your Instabot account to be on the Advanced tier or higher.
To upgrade, click here, or email [email protected]!
Contents
- Overview
- Connect your Salesforce Account to Instabot
- Config when to trigger a SFDC update
- Config when a lead should be created
- Map the data collected in Instabot to SFDC fields
- Salesforce is now ready for receiving your Leads
1. Overview
One of the most important features of an advanced chatbot is its ability to integrate with CRM systems. This means that the interactions that take place with the bot can be properly managed by the CRM, without the need for manual uploads or other time-consuming methods of data transfer.
While the ways chatbots integrate with CRMs are platform-dependent, the principles behind a useful integration are the same:
- Ease of setup, so you can get at least basic information into your CRM as soon as your chatbot is live.
- Accuracy of information, so that attribution and reporting remain clear as conversations are actioned further down the line.
- Ability to customize, so you and your team can segment with the degree of complexity you’re used to when working with other channels.
Instabot is a chatbot that easily integrates with Salesforce and other CRM Systems. You can collect and capture leads through the Instabot added to your website and directly route them right into your CRM. Instabot will automatically create new leads and update them every time they interact with your Bot.
Follow these steps for integrating your Instabot with Salesforce. Let's get started!
2. Connect your Salesforce Account to Instabot
To start, connect your Salesforce Account to Instabot on the Integrations tab.
In the Instabot Portal, go to the Integrations tab and select the Salesforce option. From here you can input your Salesforce Account credentials.
Salesforce Editions
Connecting to your Salesforce Account requires a specific edition of Salesforce. Please see more details in this article Salesforce editions with API access
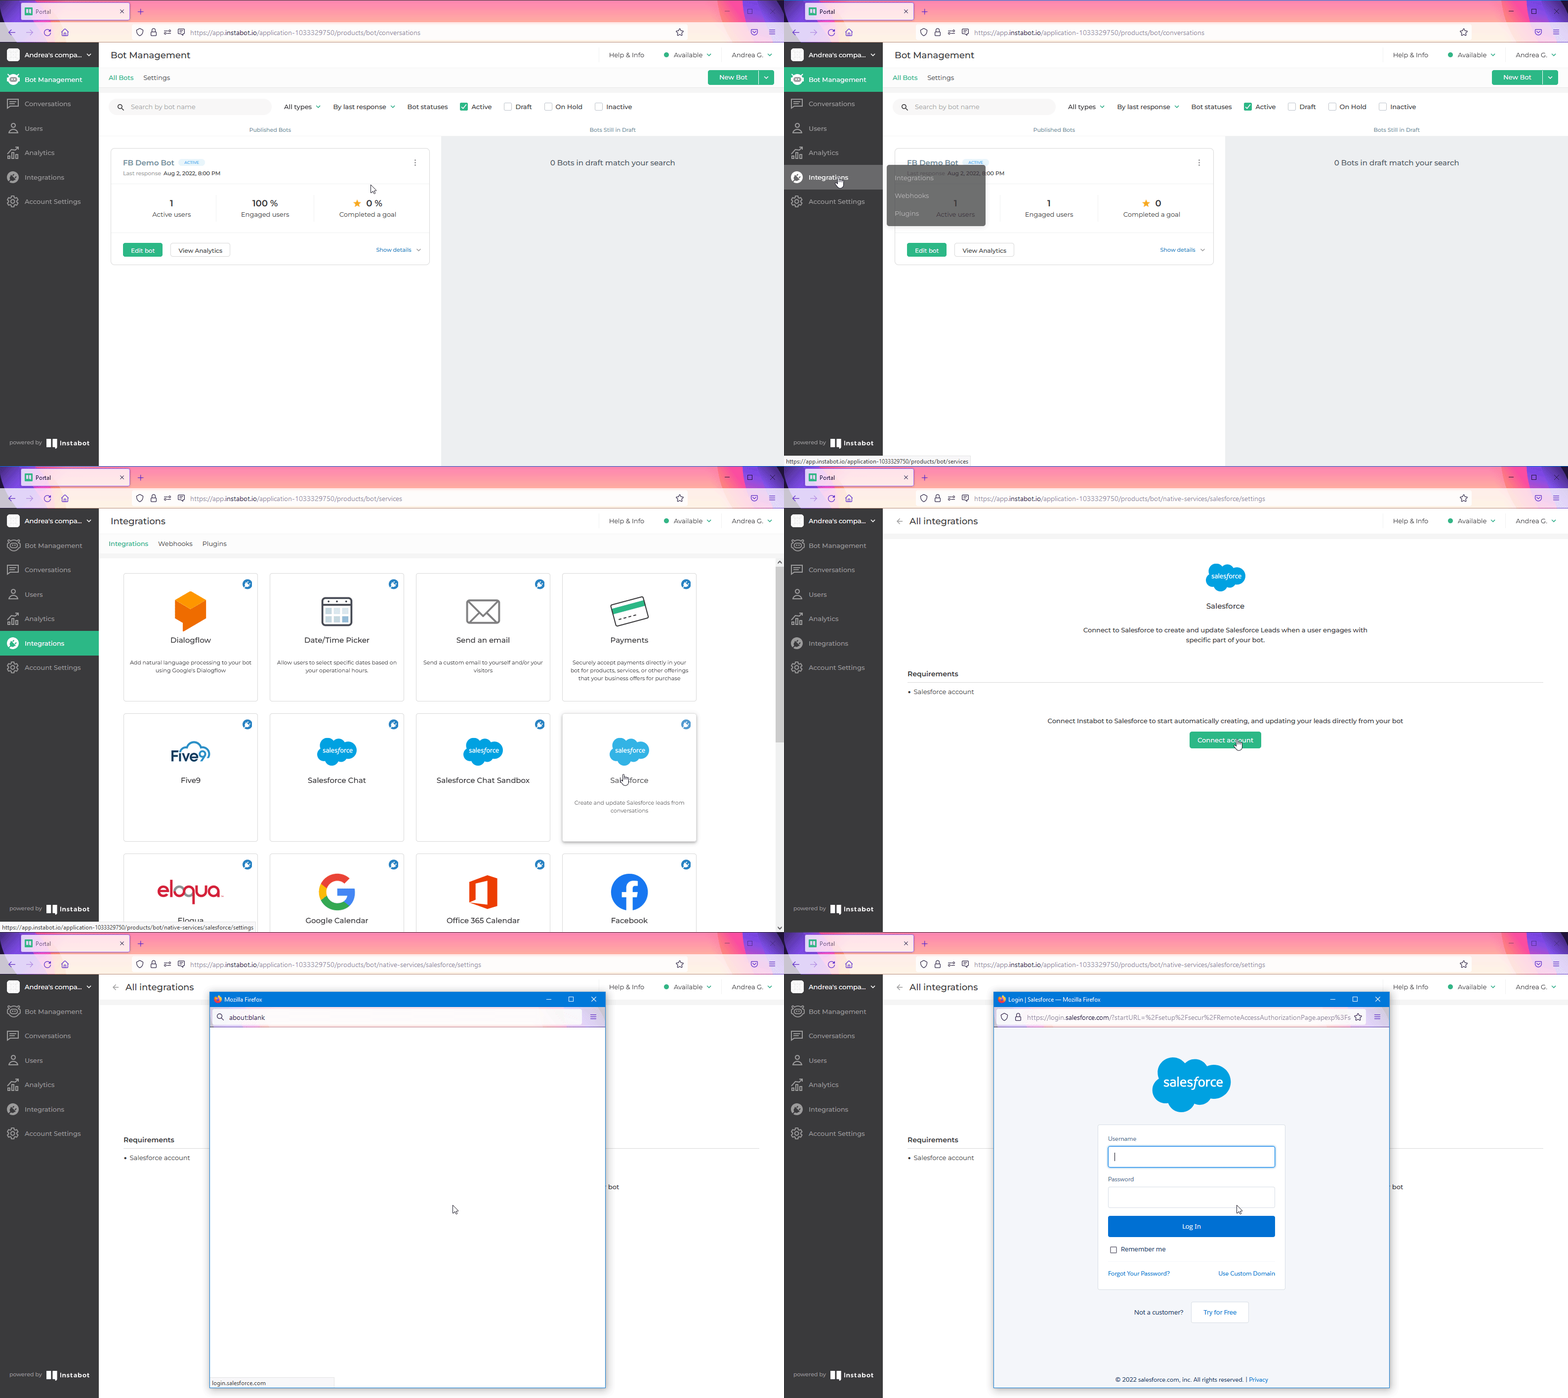
Connect your Salesforce Account
3. Configure When to Trigger a SFDC Update
Once you have connected your Salesforce Account to Instabot, you will find three sections for configuring the integration.
In the first section, you will set up which goals you want to trigger the updates on the CRM. In the following example, we have three goals: “Demo Requested”, “Question Asked” and “Email Collected”.
At least one trigger (goal completion) must be enabled. We will turn the “Email Collected” goal on.
Here you also can set two optional fields per each goal:
- The SFDC field to record that a visitor completed the goal
- The SFDC field to record the timestamp of goal completion
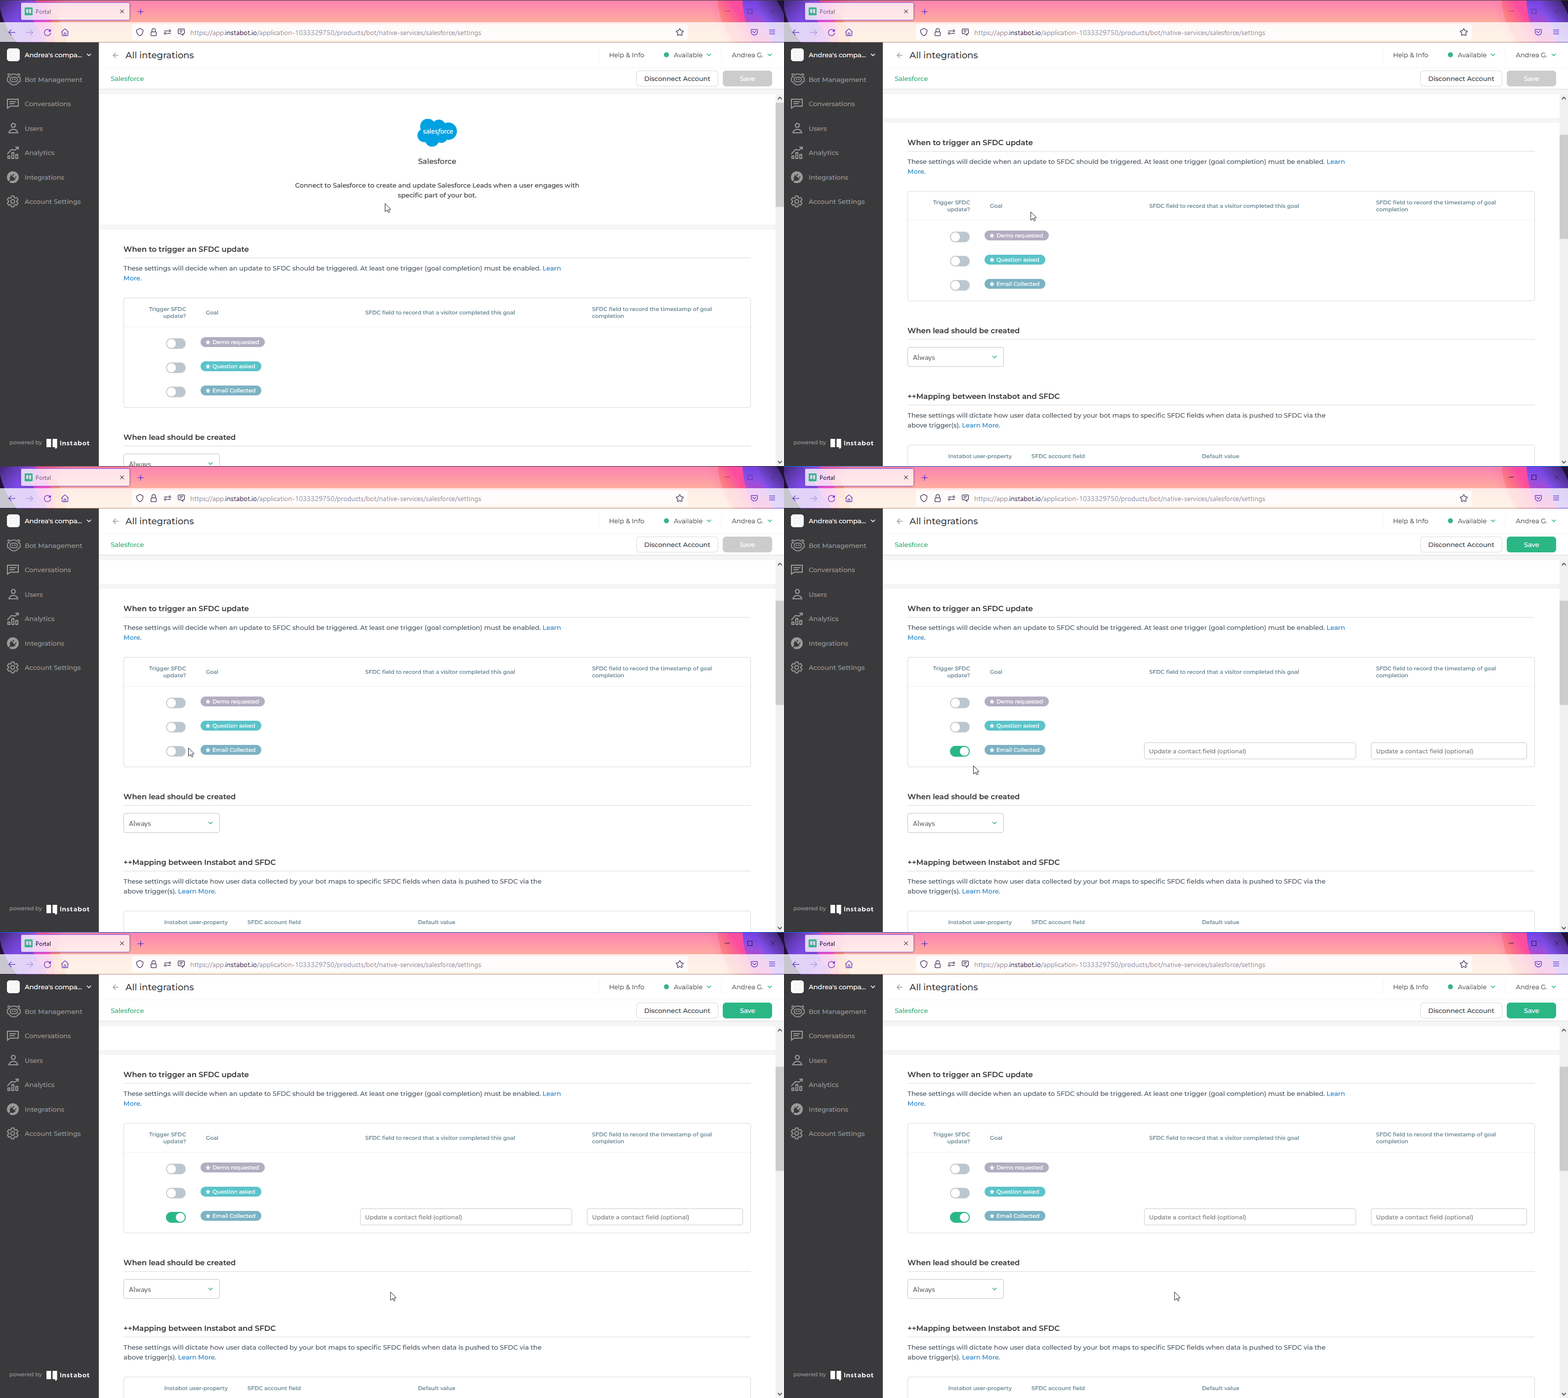
When to trigger a SFDC update
4. Configure When a New Lead Should Be Created
In this section, you will set when a lead should be created in your CRM Lead List.
There are two options:
- Always
- If the contact does not exist
Please note that the criteria for determining whether the contact exists or not in your CRM Lead List is the field defined as mandatory in the mapping section (see the next step).
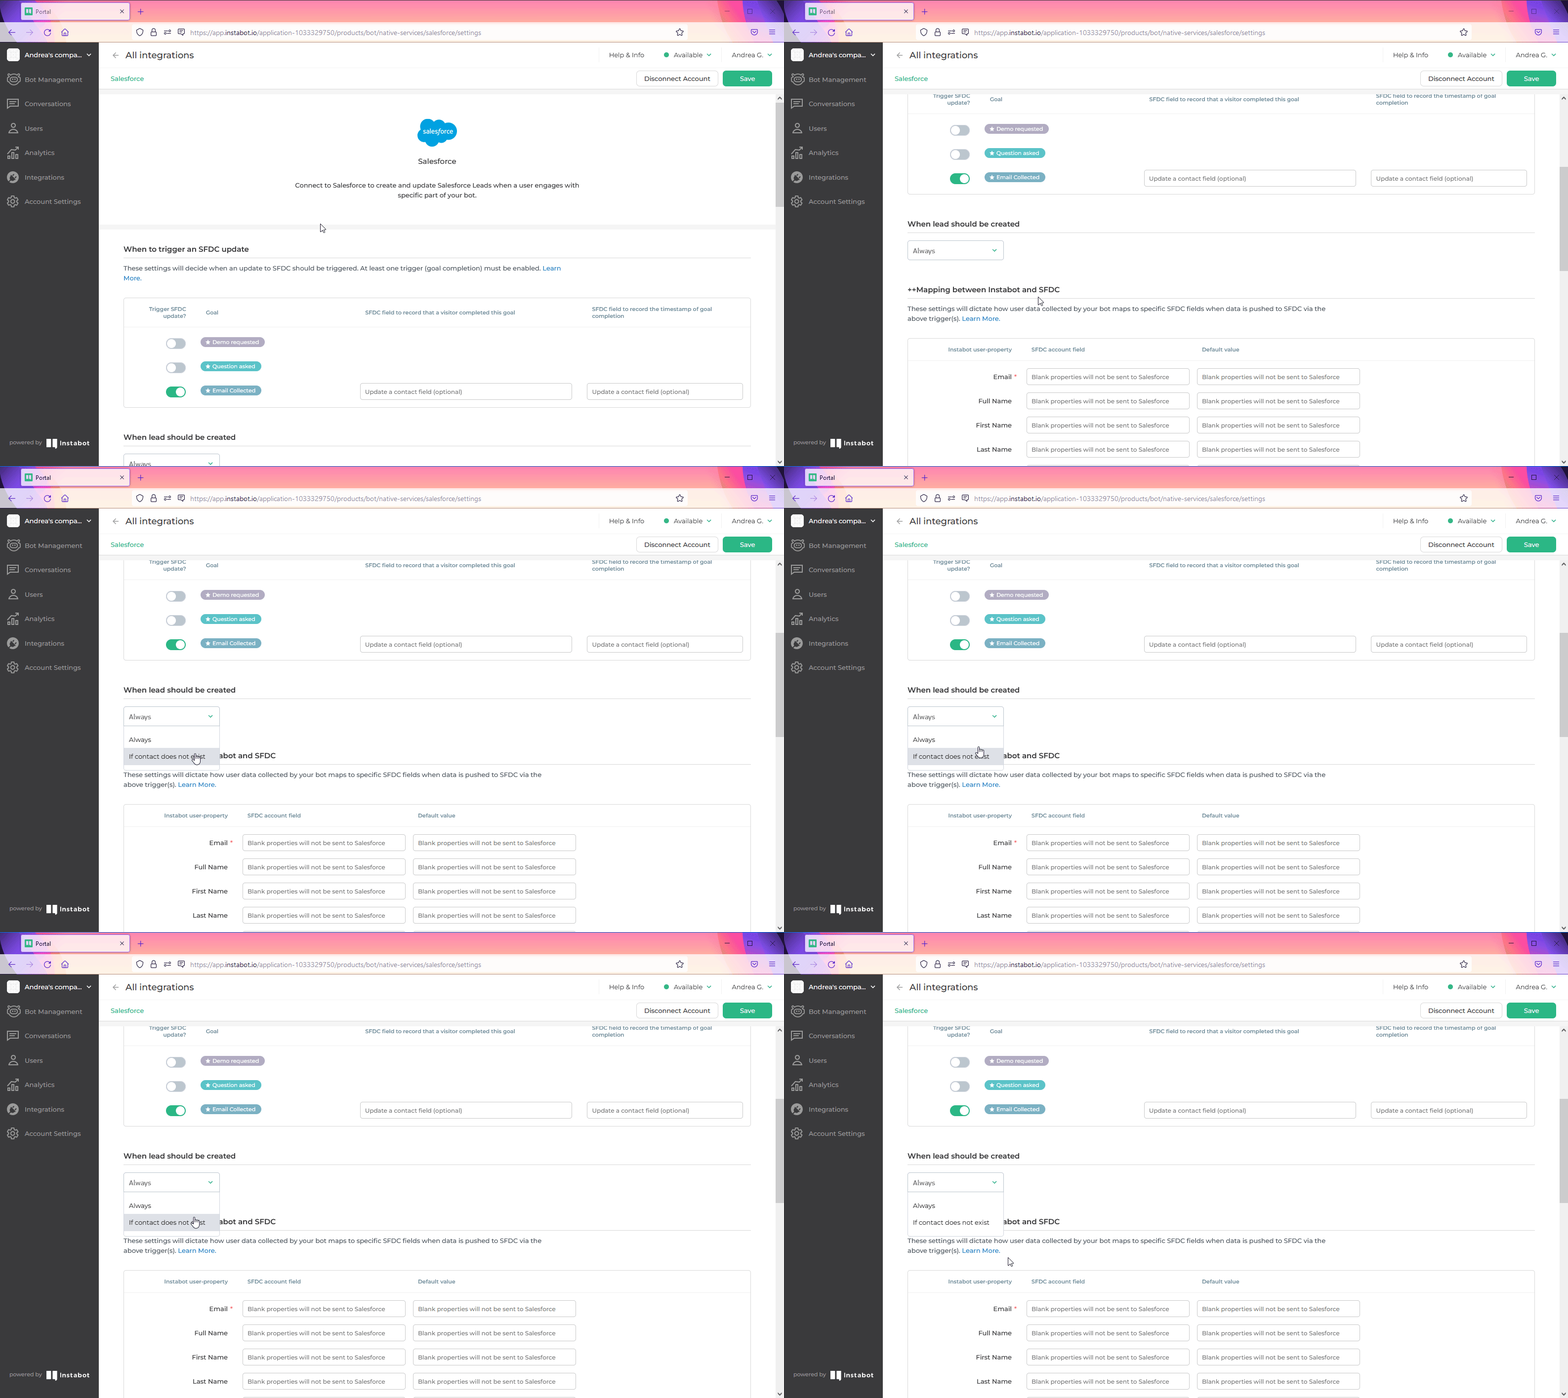
When a lead should be created
5. Map the Data Collected in Instabot to SFDC Fields
Finally, the settings in this section will dictate how user data collected by your bot maps to specific SFDC fields when data is pushed to SFDC via the trigger(s) selected in step 3.
To do that, you will enter the Salesforce properties as they are configured in your account: email, first name, last name, and any other out-of-the-box in correspondence with each Instabot user property.
Please note that also a default value can be assigned to each field. This value is optional.
Once you have done this and hit save all your properties will be saved. You can always come back and add more properties to this list.
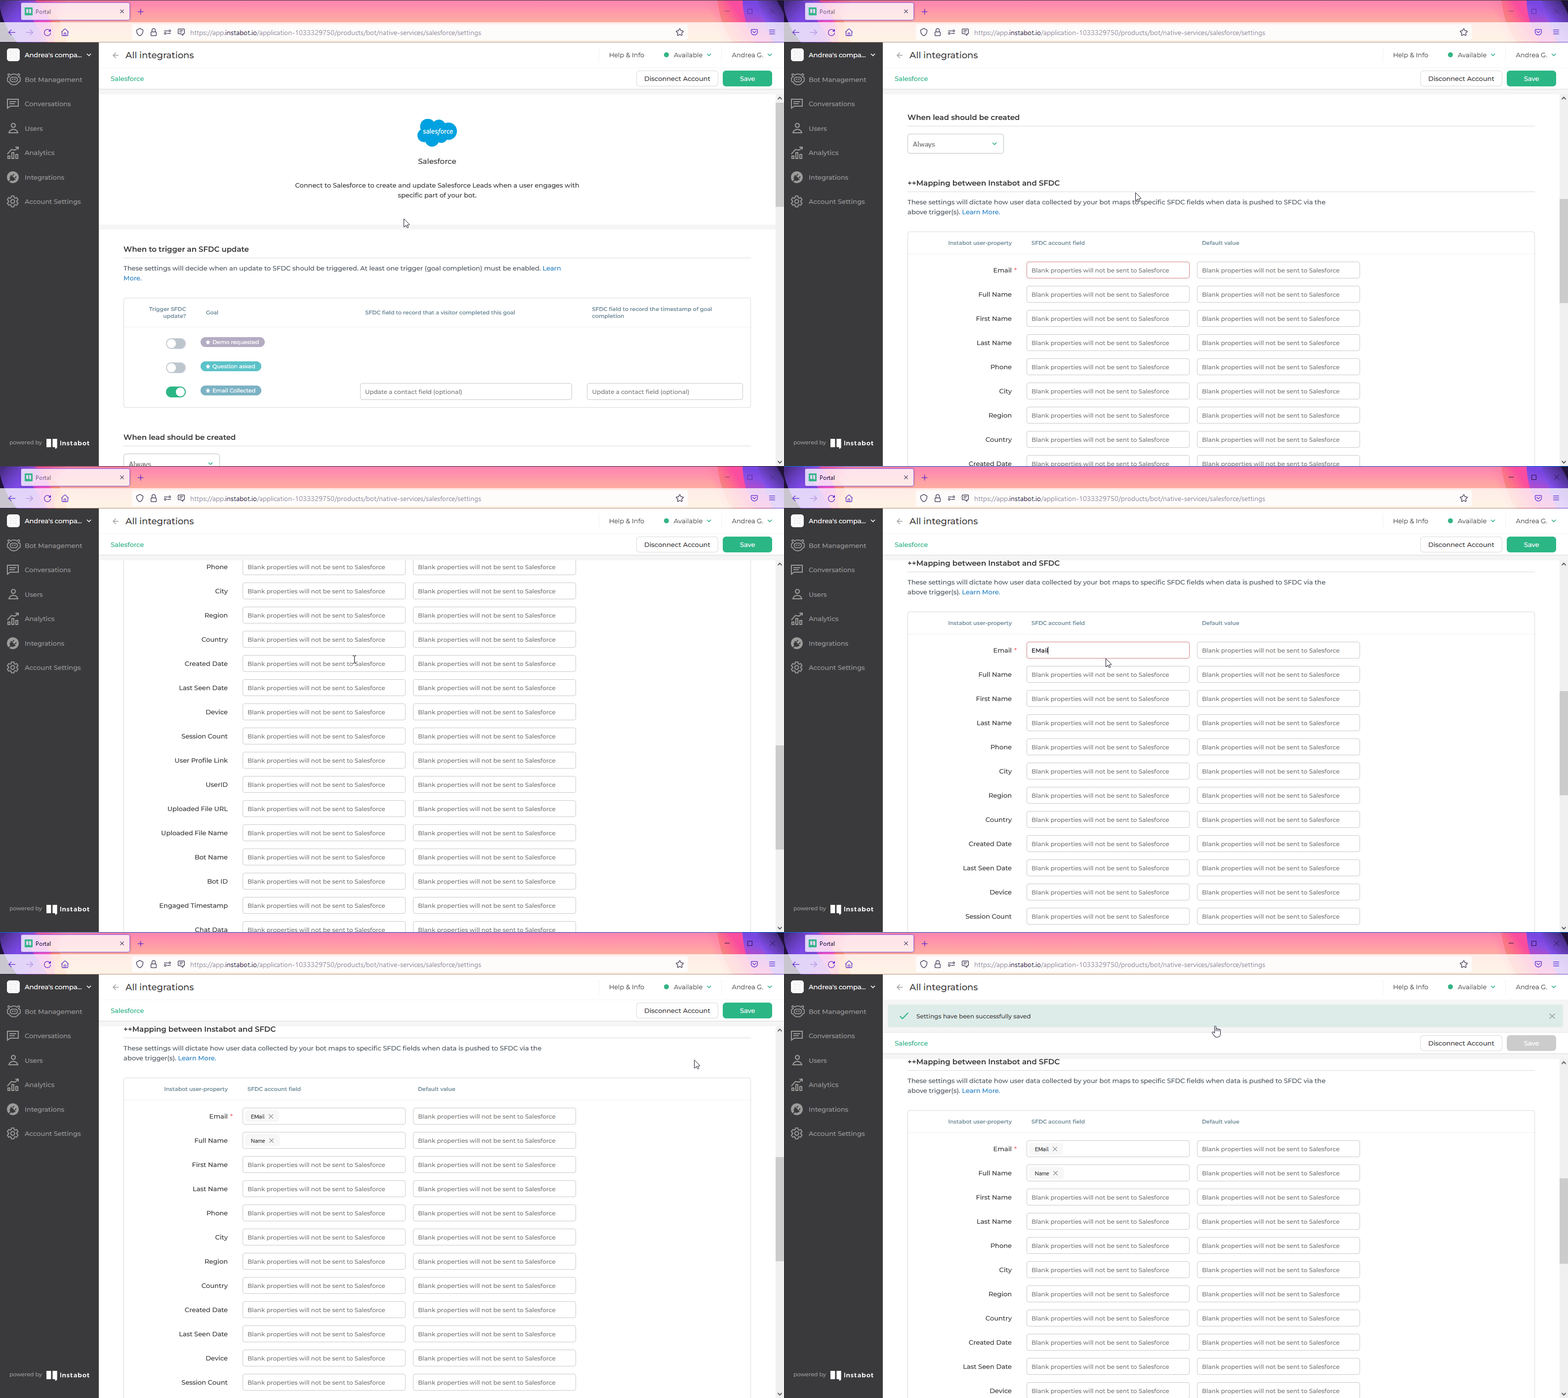
Map data collected in Instabot to SFDC fields
6. Salesforce is Now Ready for Receiving Your Leads!
Now, as soon as the users interact with your bots and complete the goals the exact information that they just entered in Instabot is reflected in your Salesforce account.
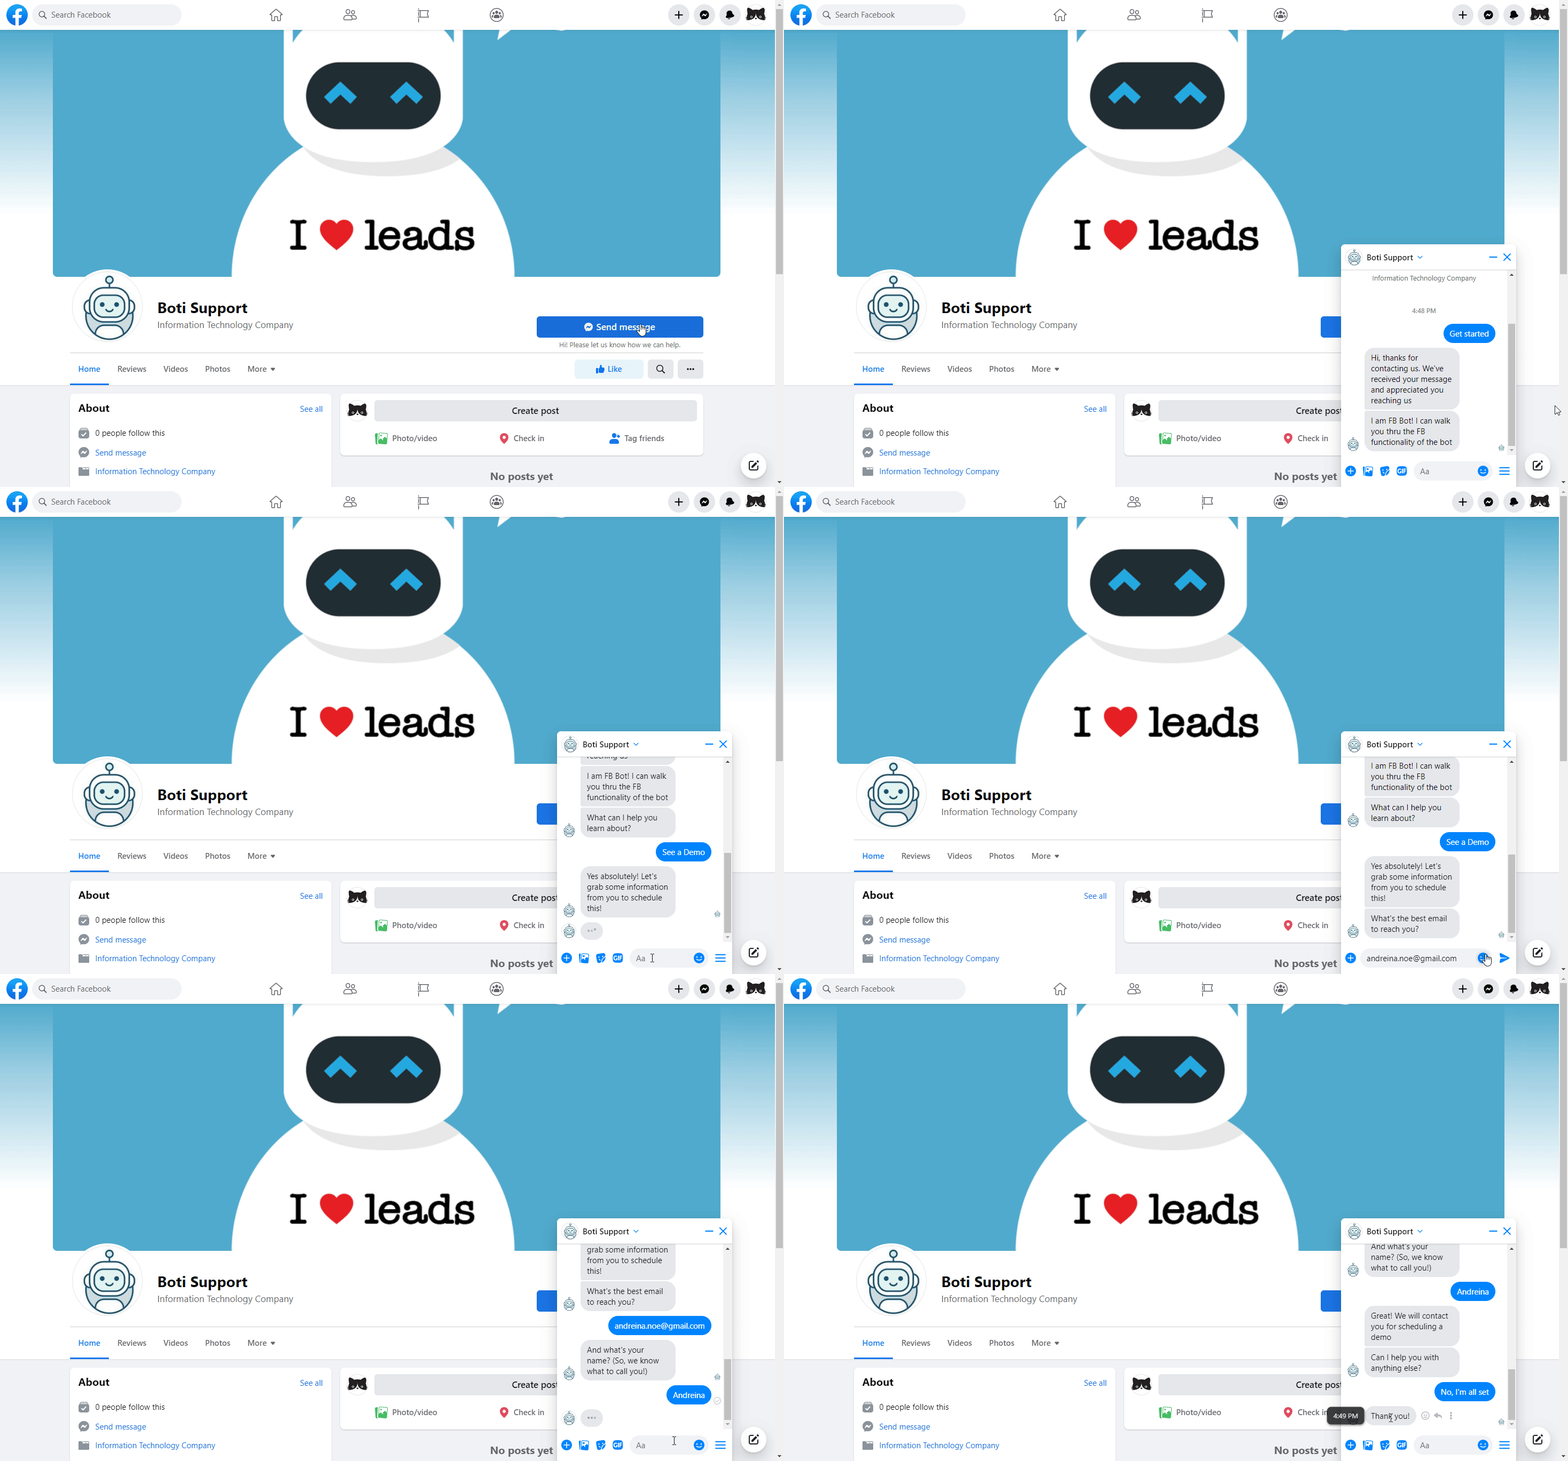
Let’s see an example of how it works with an Instabot integrated with Facebook.
In the next video, we can see a user that requested a Demo and the bot collected the email for contacting and scheduling the demo.
In the next video, we can see how the information collected by the bot was automatically sent to the Salesforce Lead List.
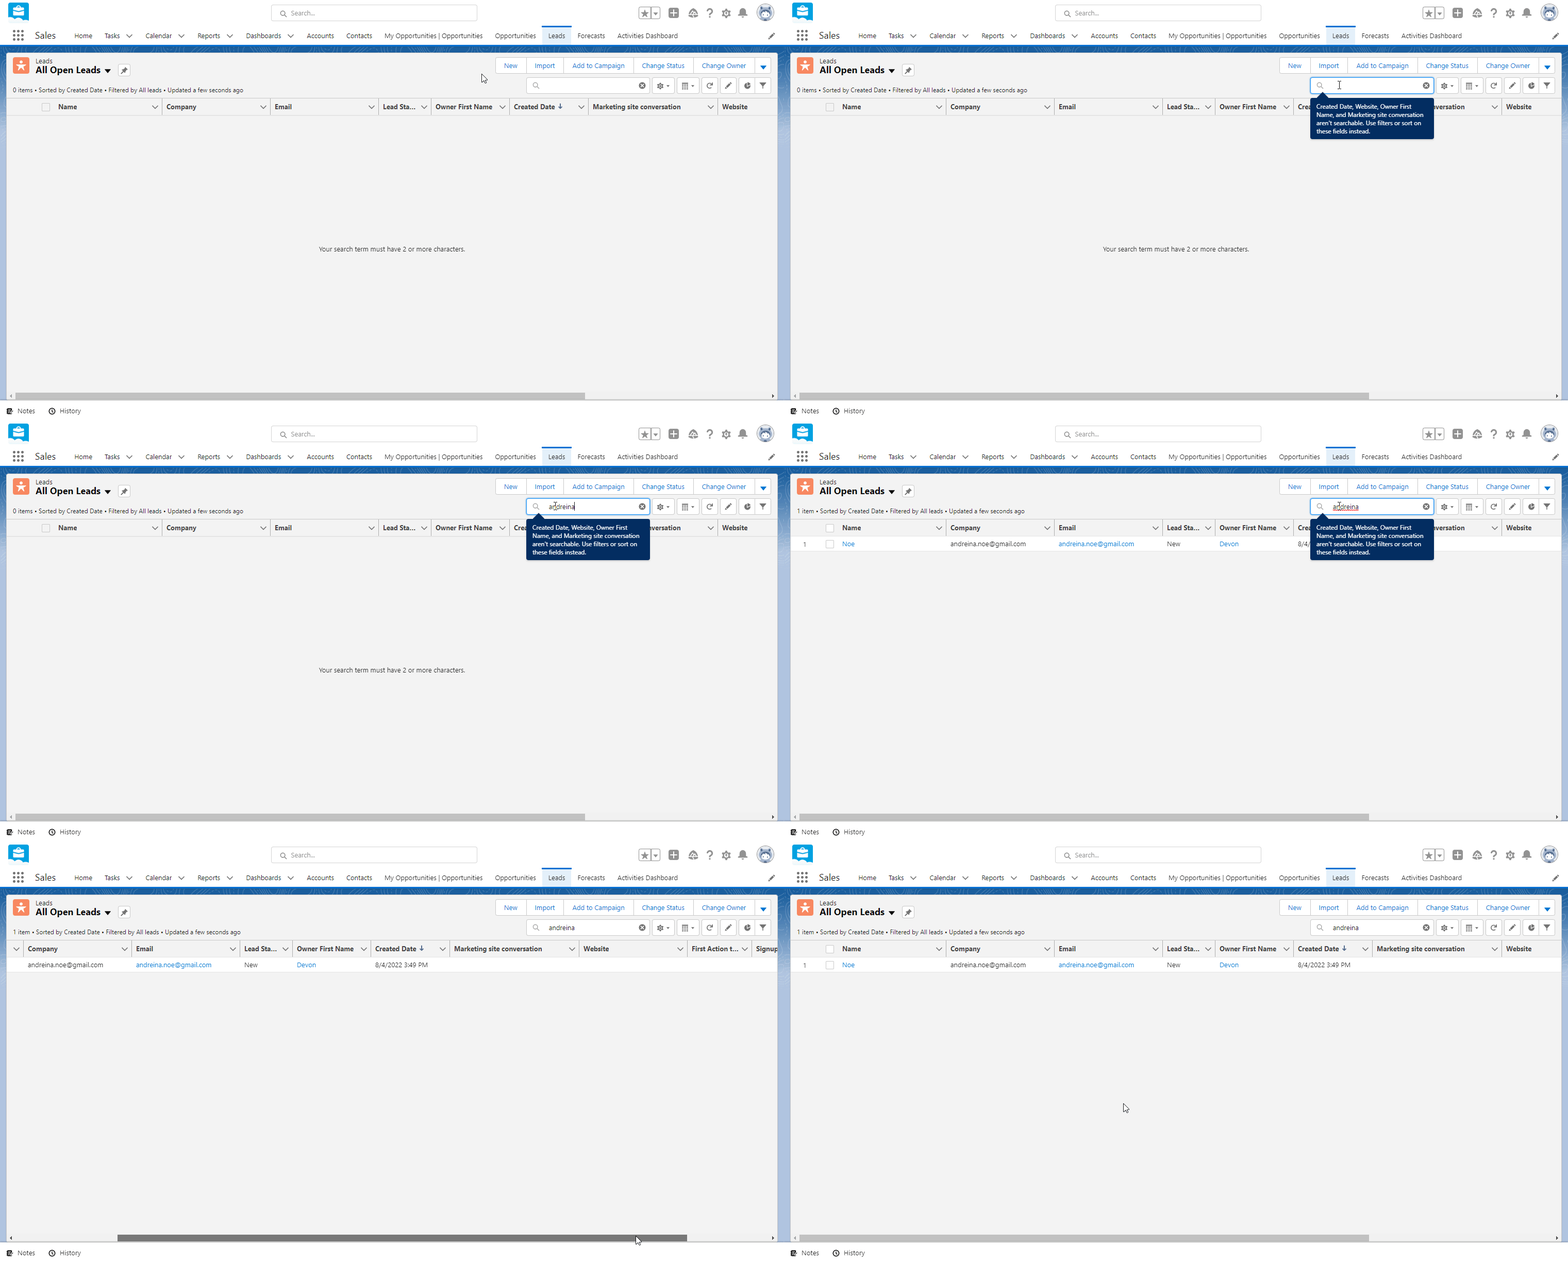
Go ahead and check your Salesforce Lead List!
If you need help with anything here, please email us at [email protected]!
Updated over 3 years ago
