Integrate Dialogflow into your Instabot account
To connect your Dialogflow account to your Instabot account you will need to generate the Dialogflow key in the Dialogflow console and upload that key into your Instabot account in the Instabot portal.
We'll show you step-by-step how to do it. And don't worry, you don’t need to have technical knowledge for proceeding with this integration, just follow each of these steps in order.
1. Log Into the Dialogflow Console
You can access a Dialoglfow trial-free account by logging in with a Gmail address.
The first time that you log in to the Dialogflow console you will need to create an agent. Just click on the Create Agent button and provide an Agent name as we can see in the following video.
Please note that you can create several agents for different purposes. For this tutorial, we created only one.
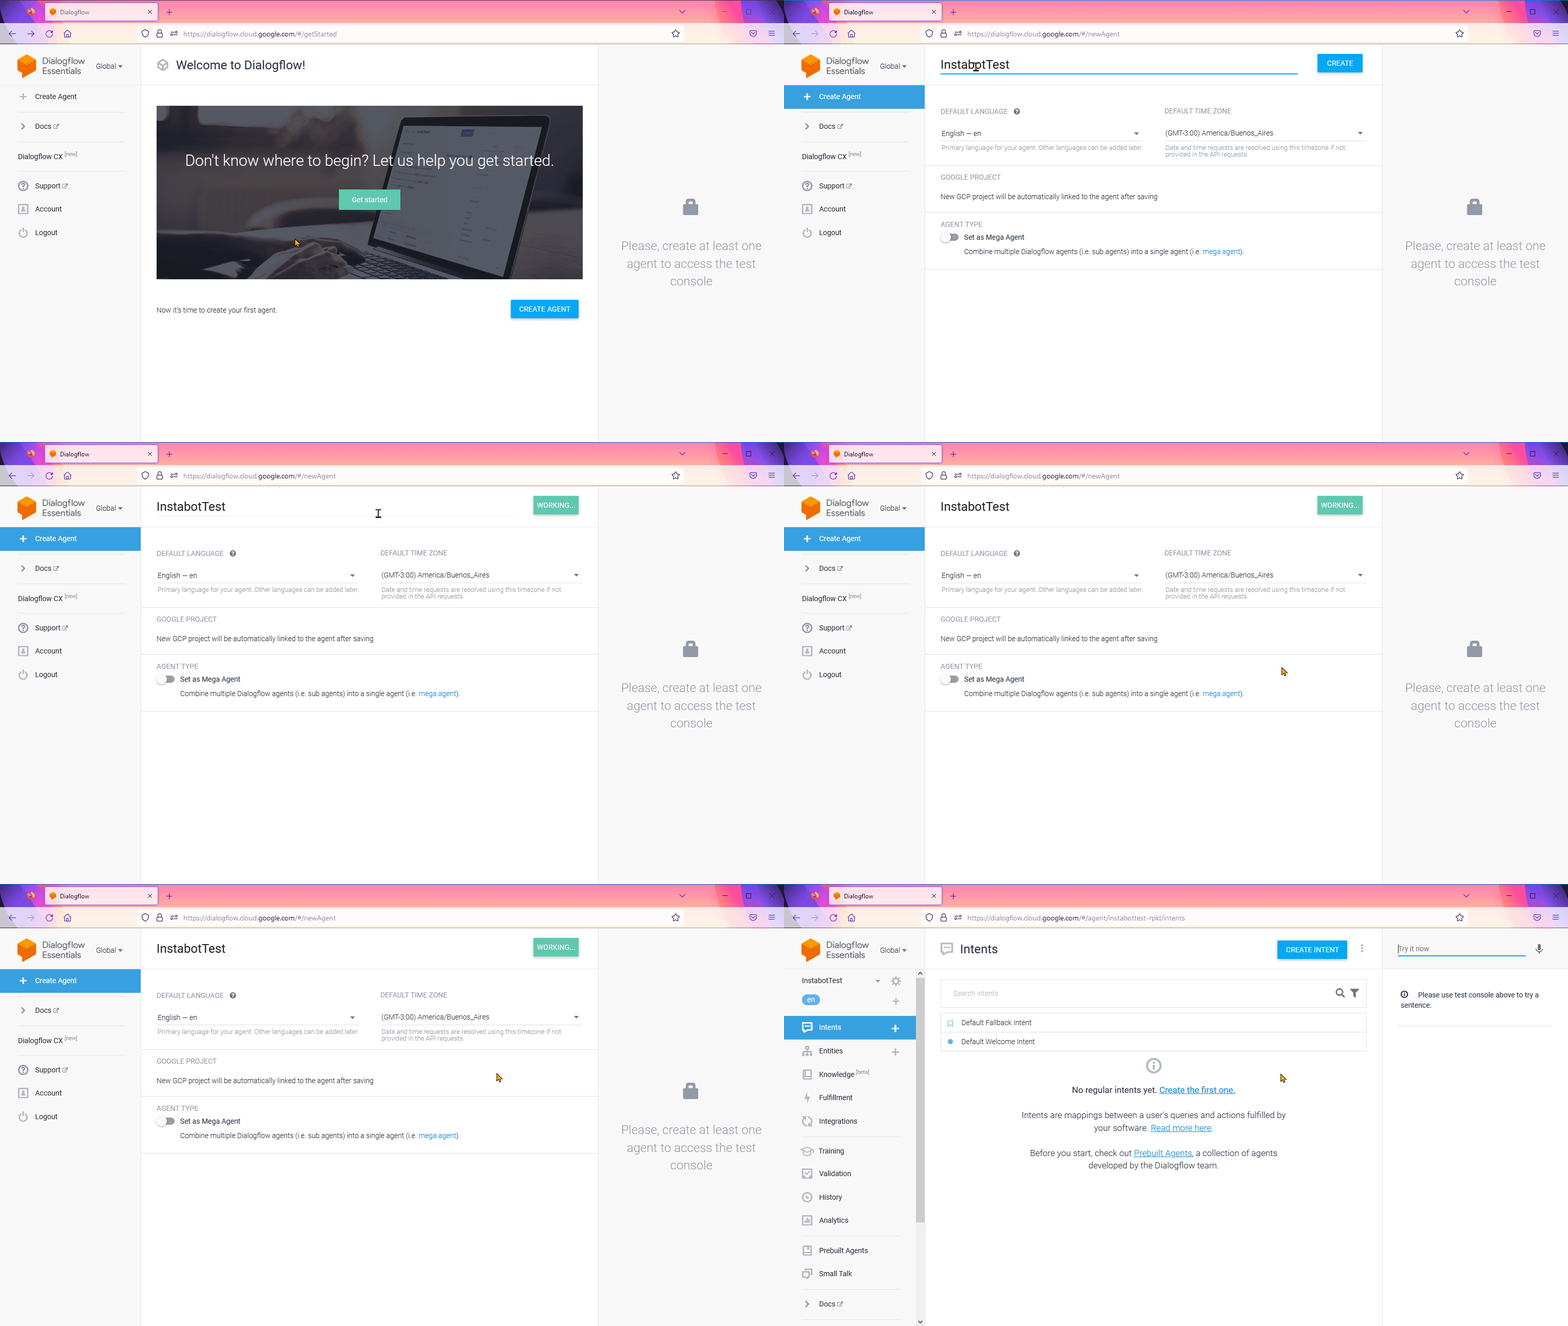
Create an Agent
2. Access to the Agent’s Project ID
In the top-left, find the specific agent you want to connect to Instabot.
Click the “Gear” icon to open the agent's settings page, find the Project ID and click on that link.
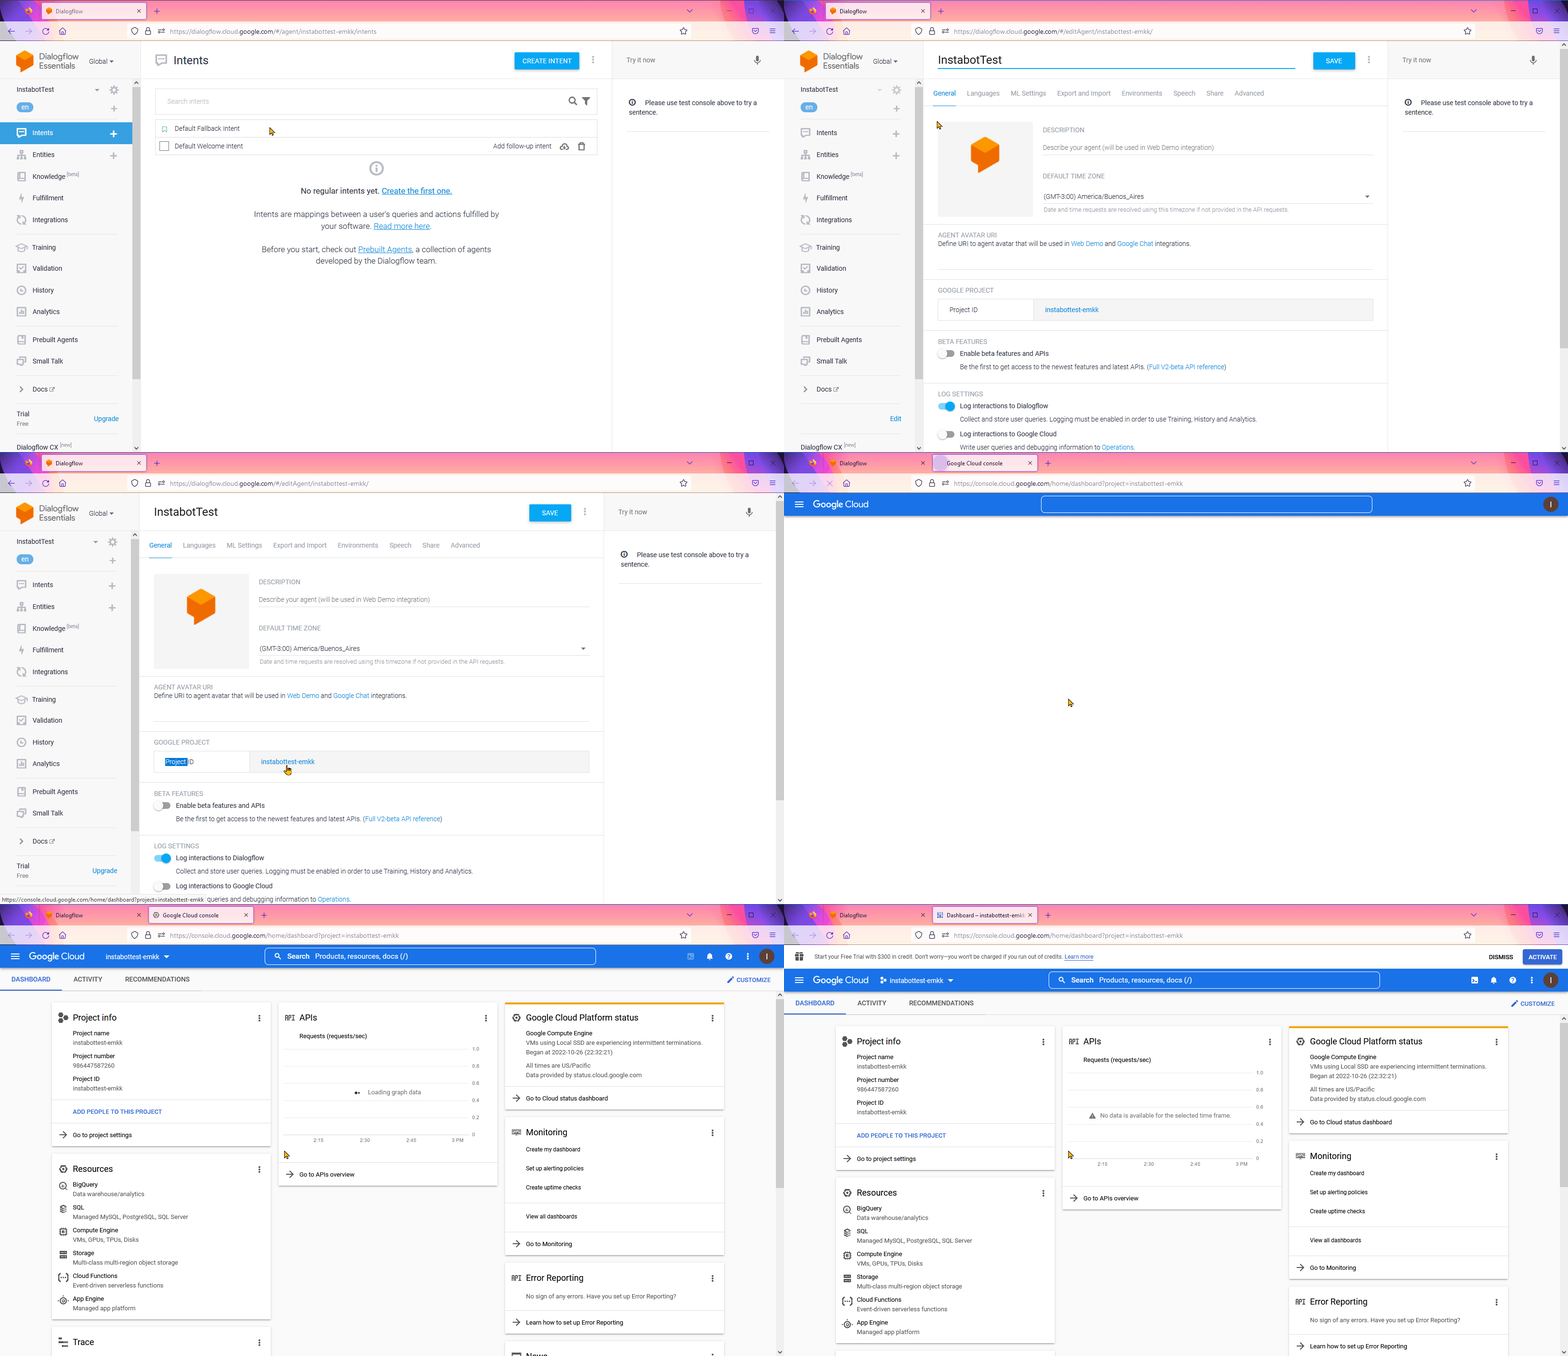
Agent Project ID
3. Create a Service Account
In the top-left, click on the Navigation Menu.
Select the option “IAM & Admin” and then select the option “Service accounts”.
Click on Create Service account button.
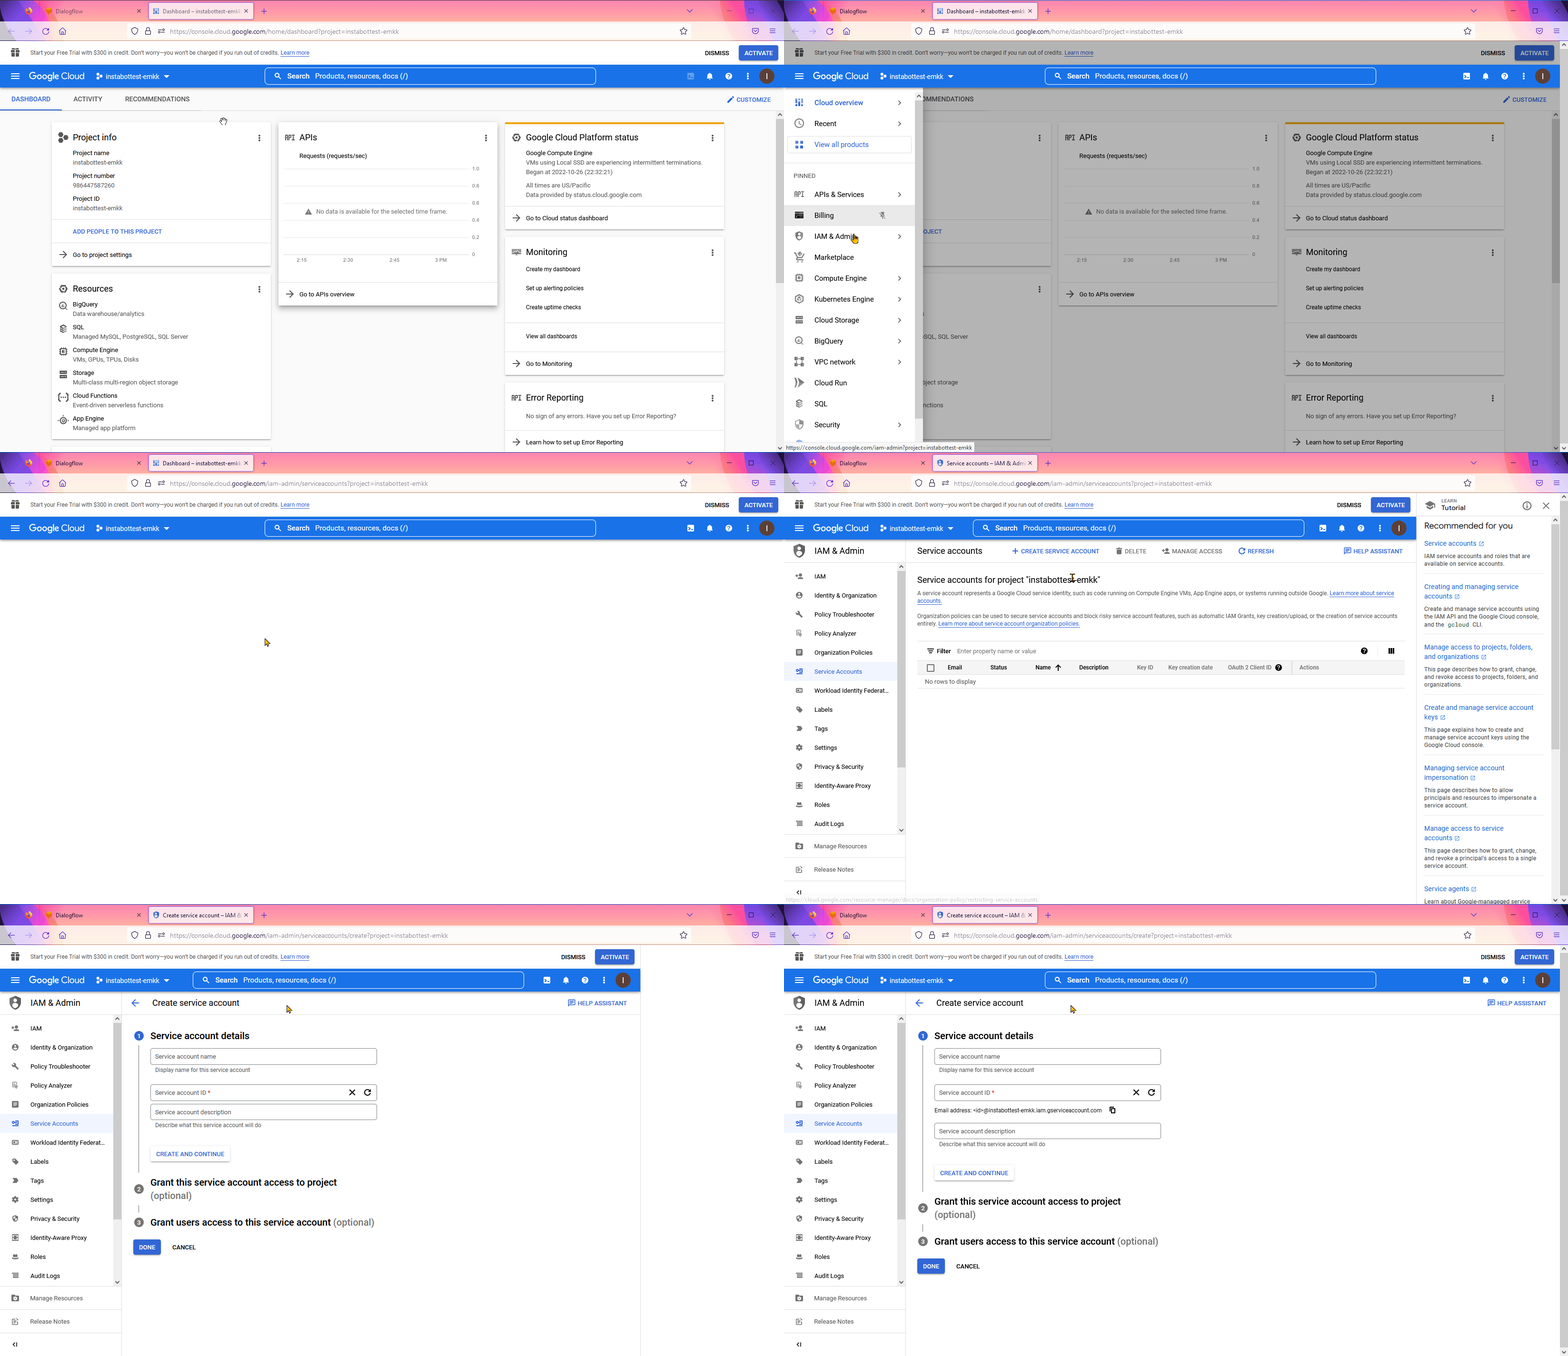
Create a Service Account
Enter the desired Service Account Name. By default, Dialogflow automatically completes the Services Account ID and generates an email address associated with that Service Account ID. You can complete the Service Account Description (which is optional) and finally click on the “Create and Continue” button for completing the Service Account creation.
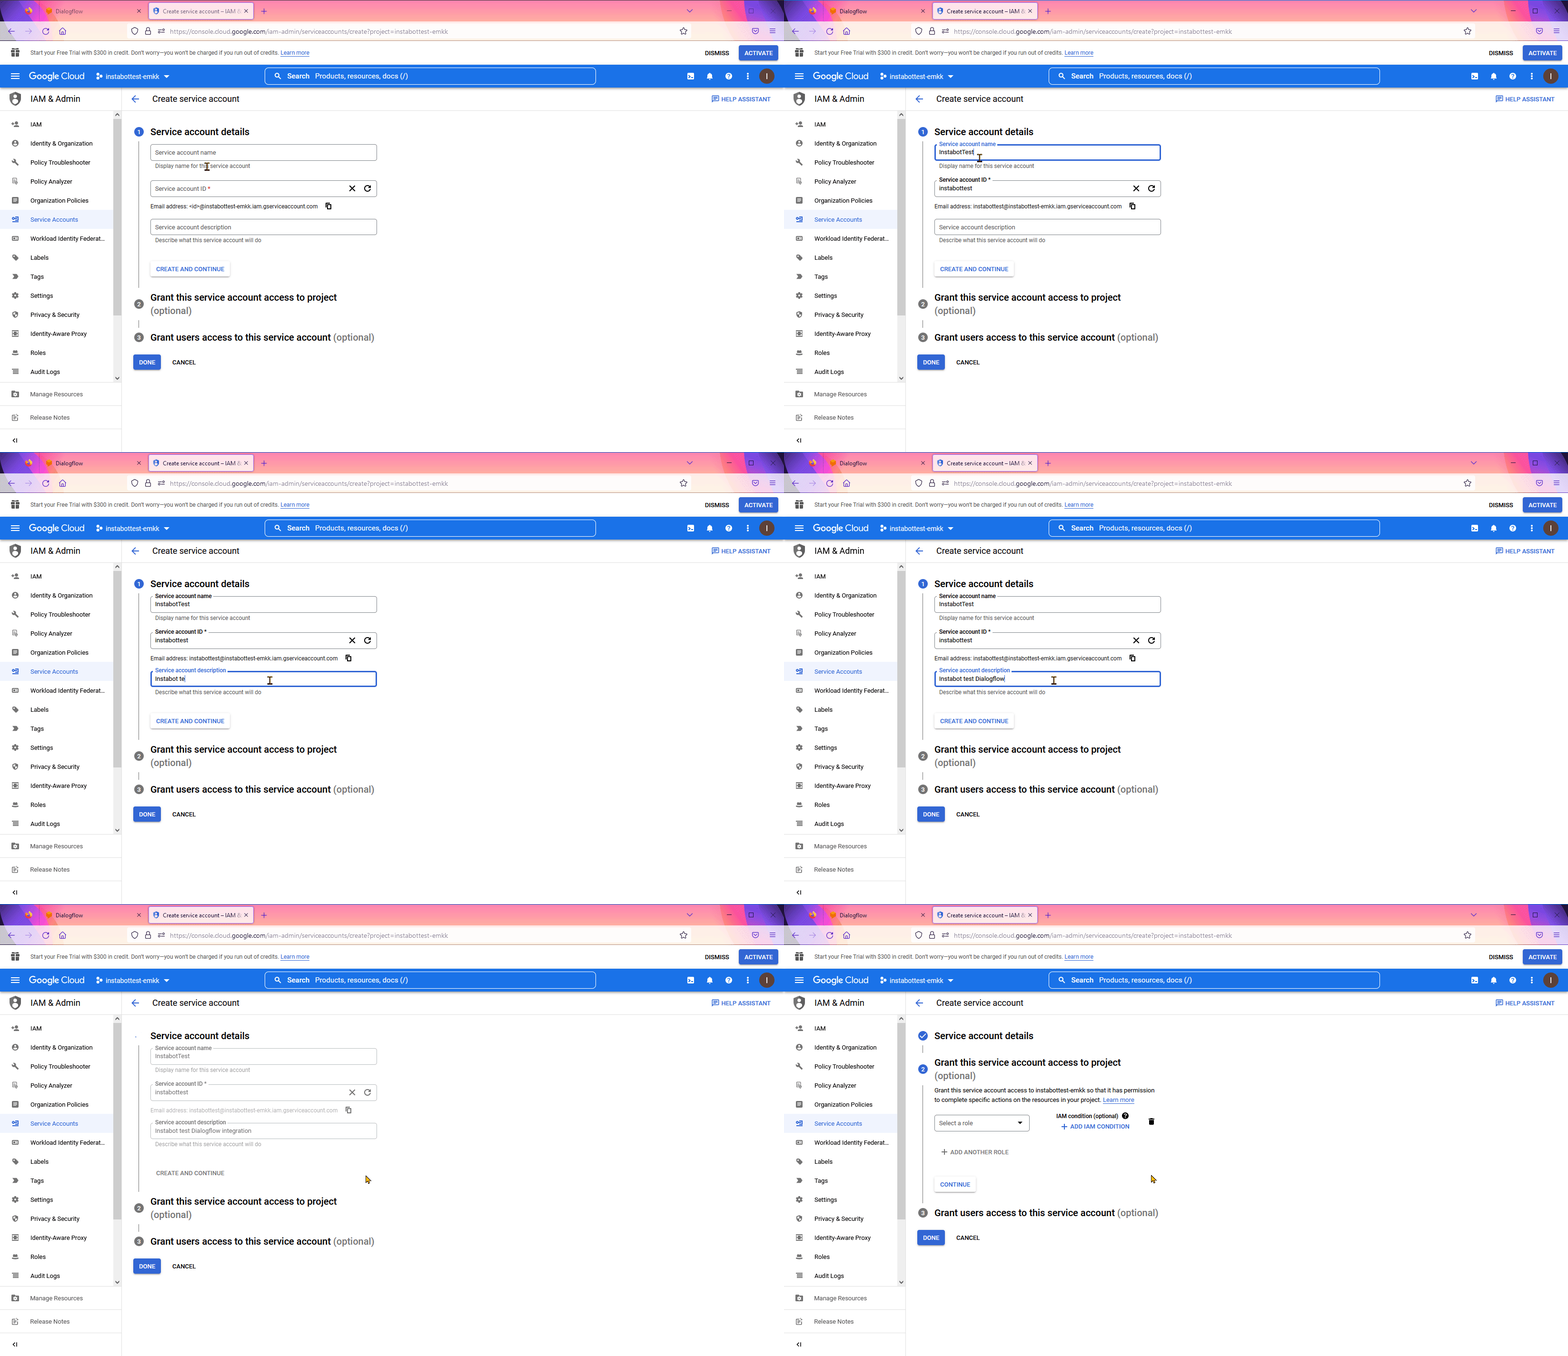
Create a Service Account
4. Assign Dialogflow API Admin role to the Service Account
Once you have created the Service Account, Dialogflow shows an option for assigning roles to that account. The Instabot integration requires that you assign the “Dialogflow API Admin” role to your Service Account. To find easily the role name just type “Dialogflow API Admin” in the search filter, choose the option and then click on the Continue button.
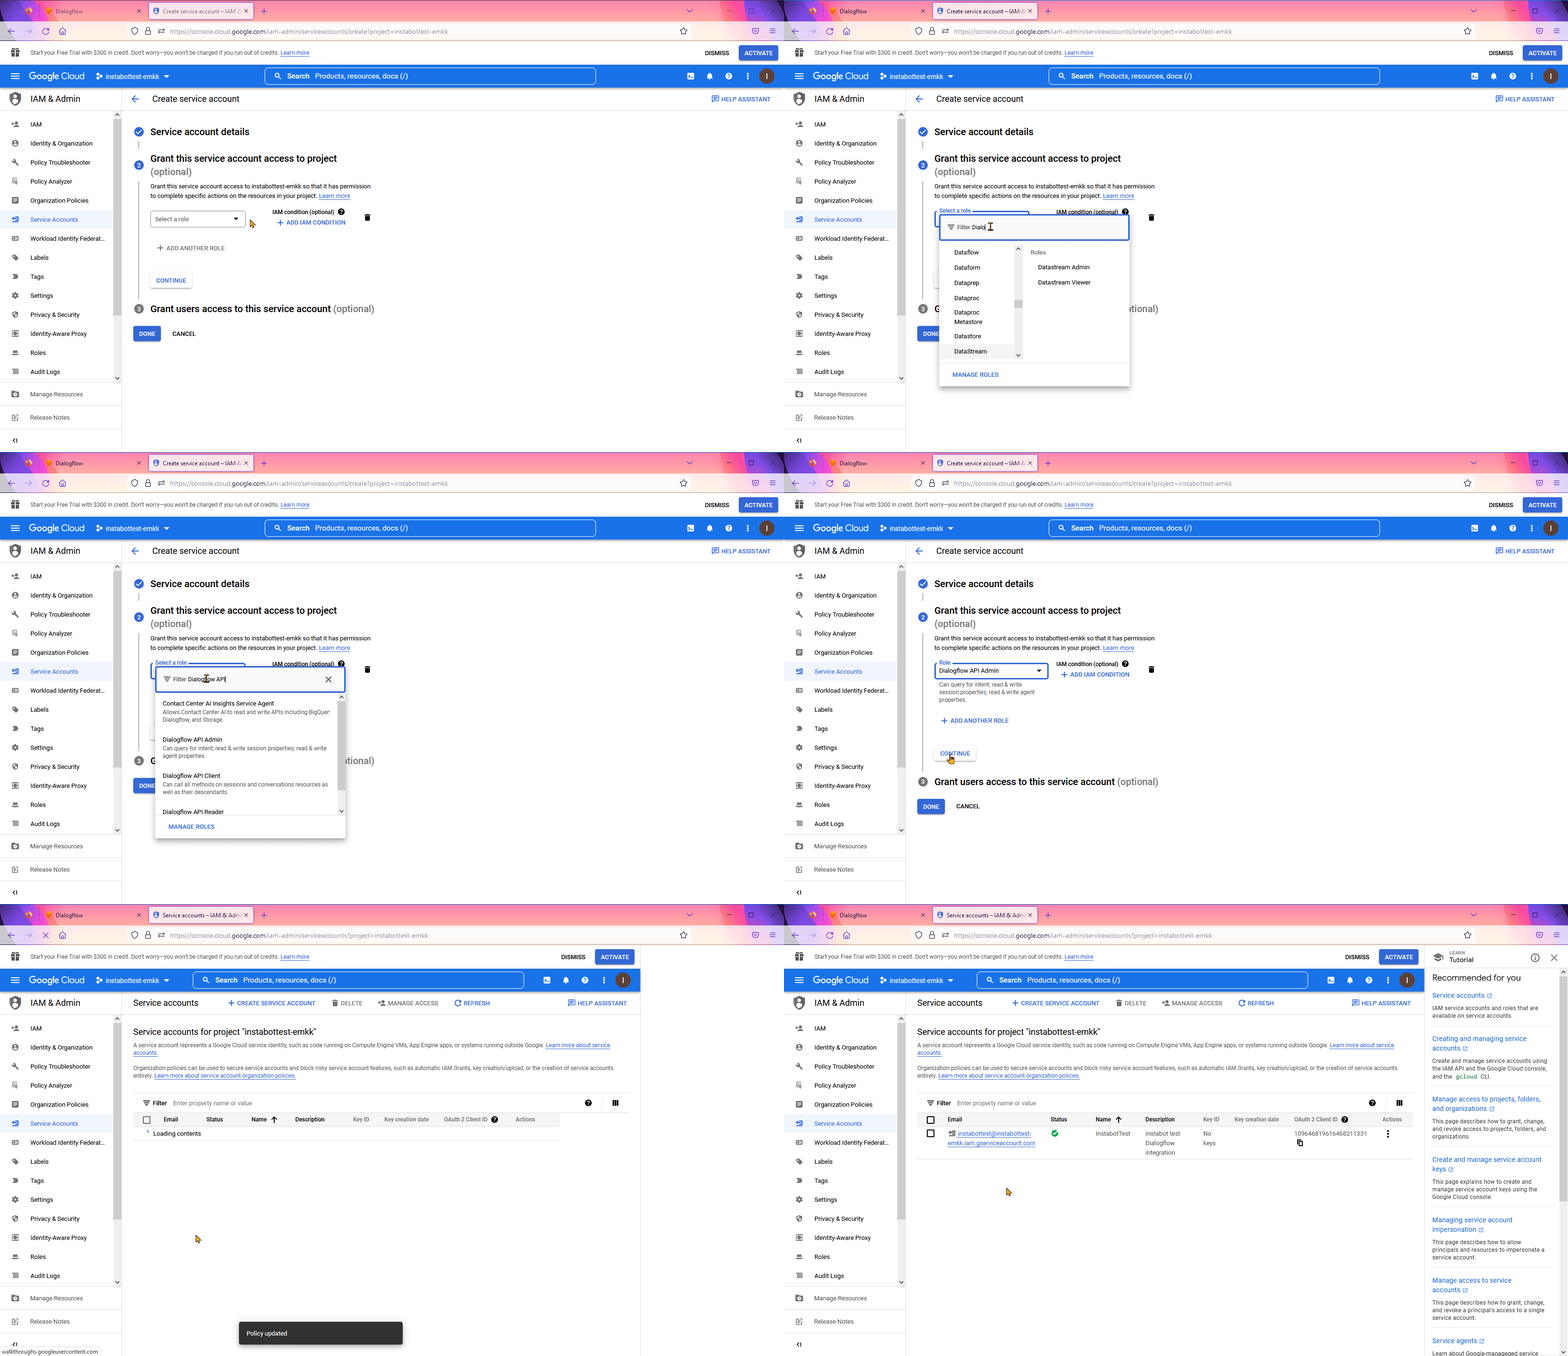
Assign API Admin Role
5. Create an Account Key
When you complete step 4, Dialogflow shows your Service accounts page.
On this page, click on your Service Account email for accessing to the details.
Once there, select the option “Key” in the top menu and click on the “Add Key” button. Here you will find two options: “Create a New Key” or “Update an existing Key.”
Select the option “Create a New Key” and then select the JSON key type. Finally, click on the “Create” button.
This action will download a file locally to your computer. Check your common Download folder, and look for a file with the extension “JSON.”
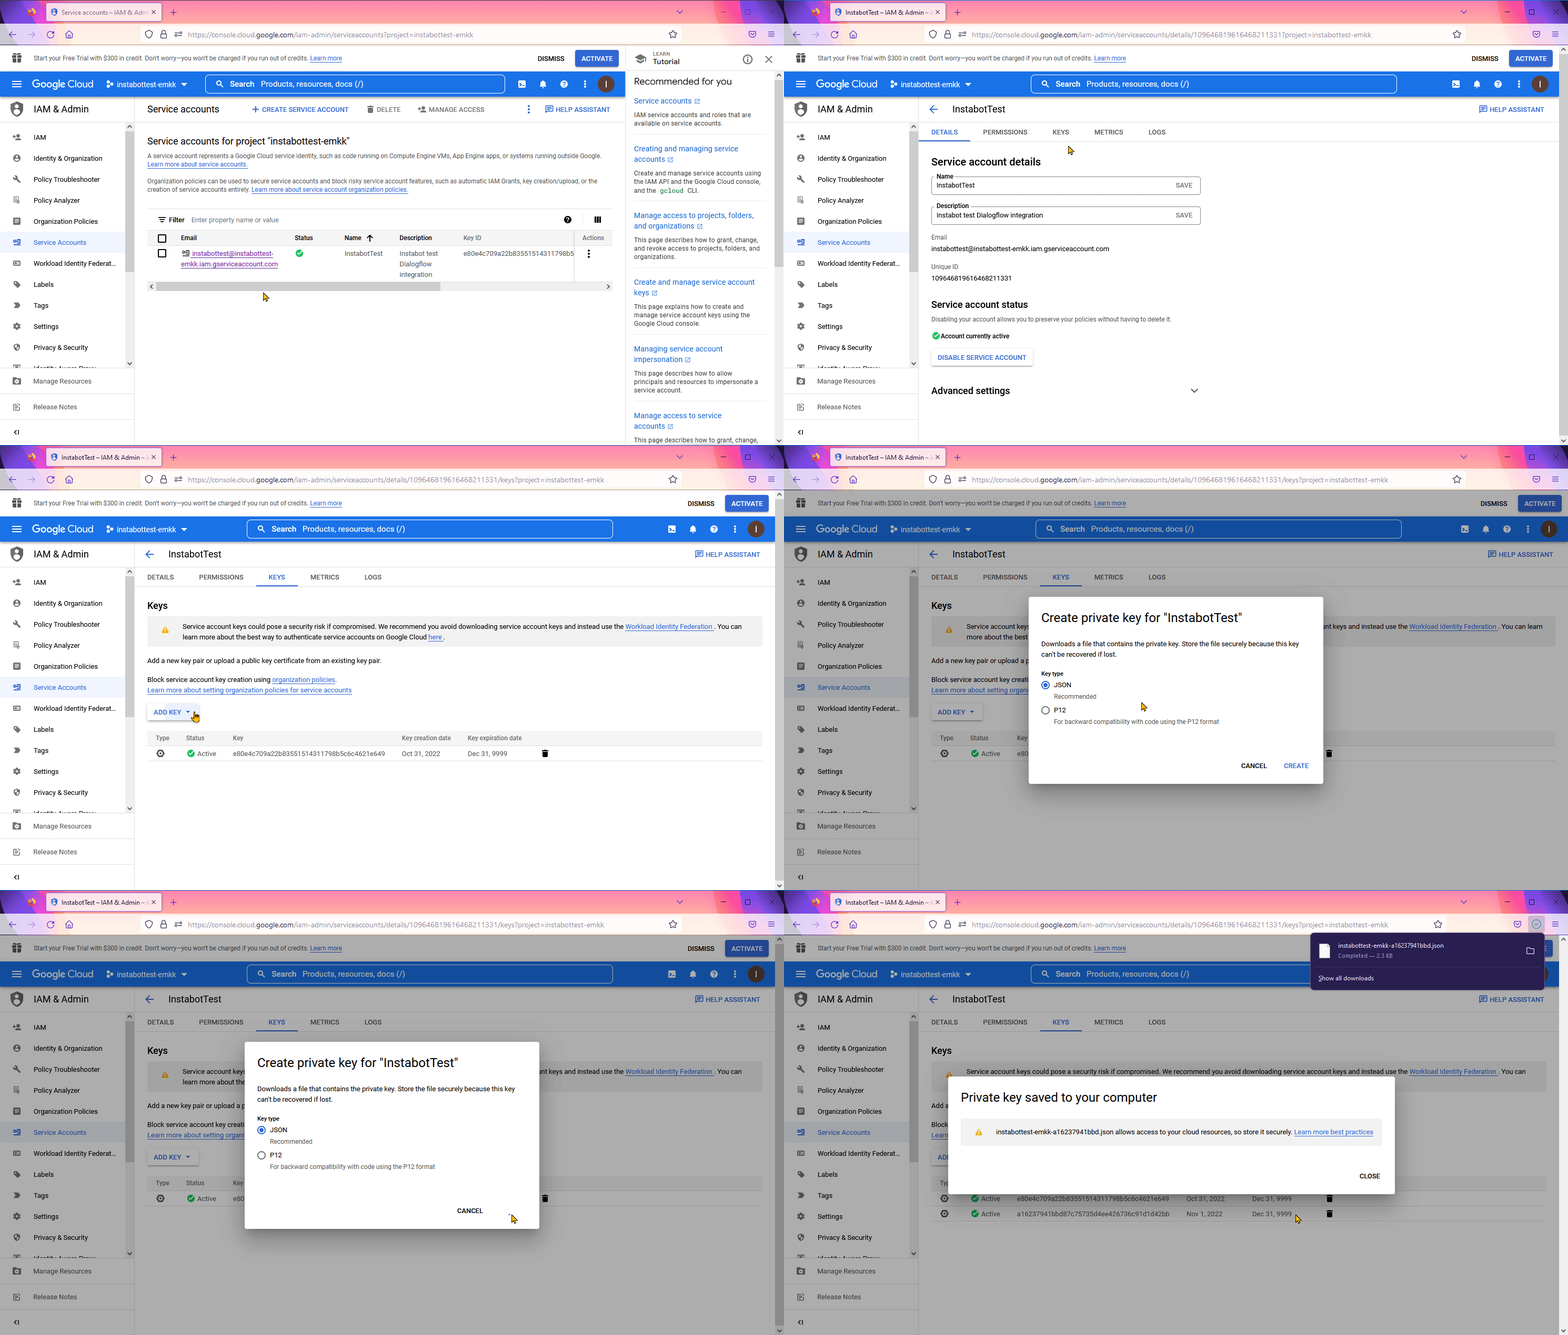
Create an Account Key
6. Set up Dialoglfow integration in Instabot
Now you are ready for setting up the Dialogflow integration into Instabot. You only need to upload your Dialogflow Account Key (located in the file downloaded in the step above). Let’s see how to do it.
You will notice that this page has a summary of all steps that we did up to now. You just need to upload the file. Don’t forget to click the Save button for completing the uploading.
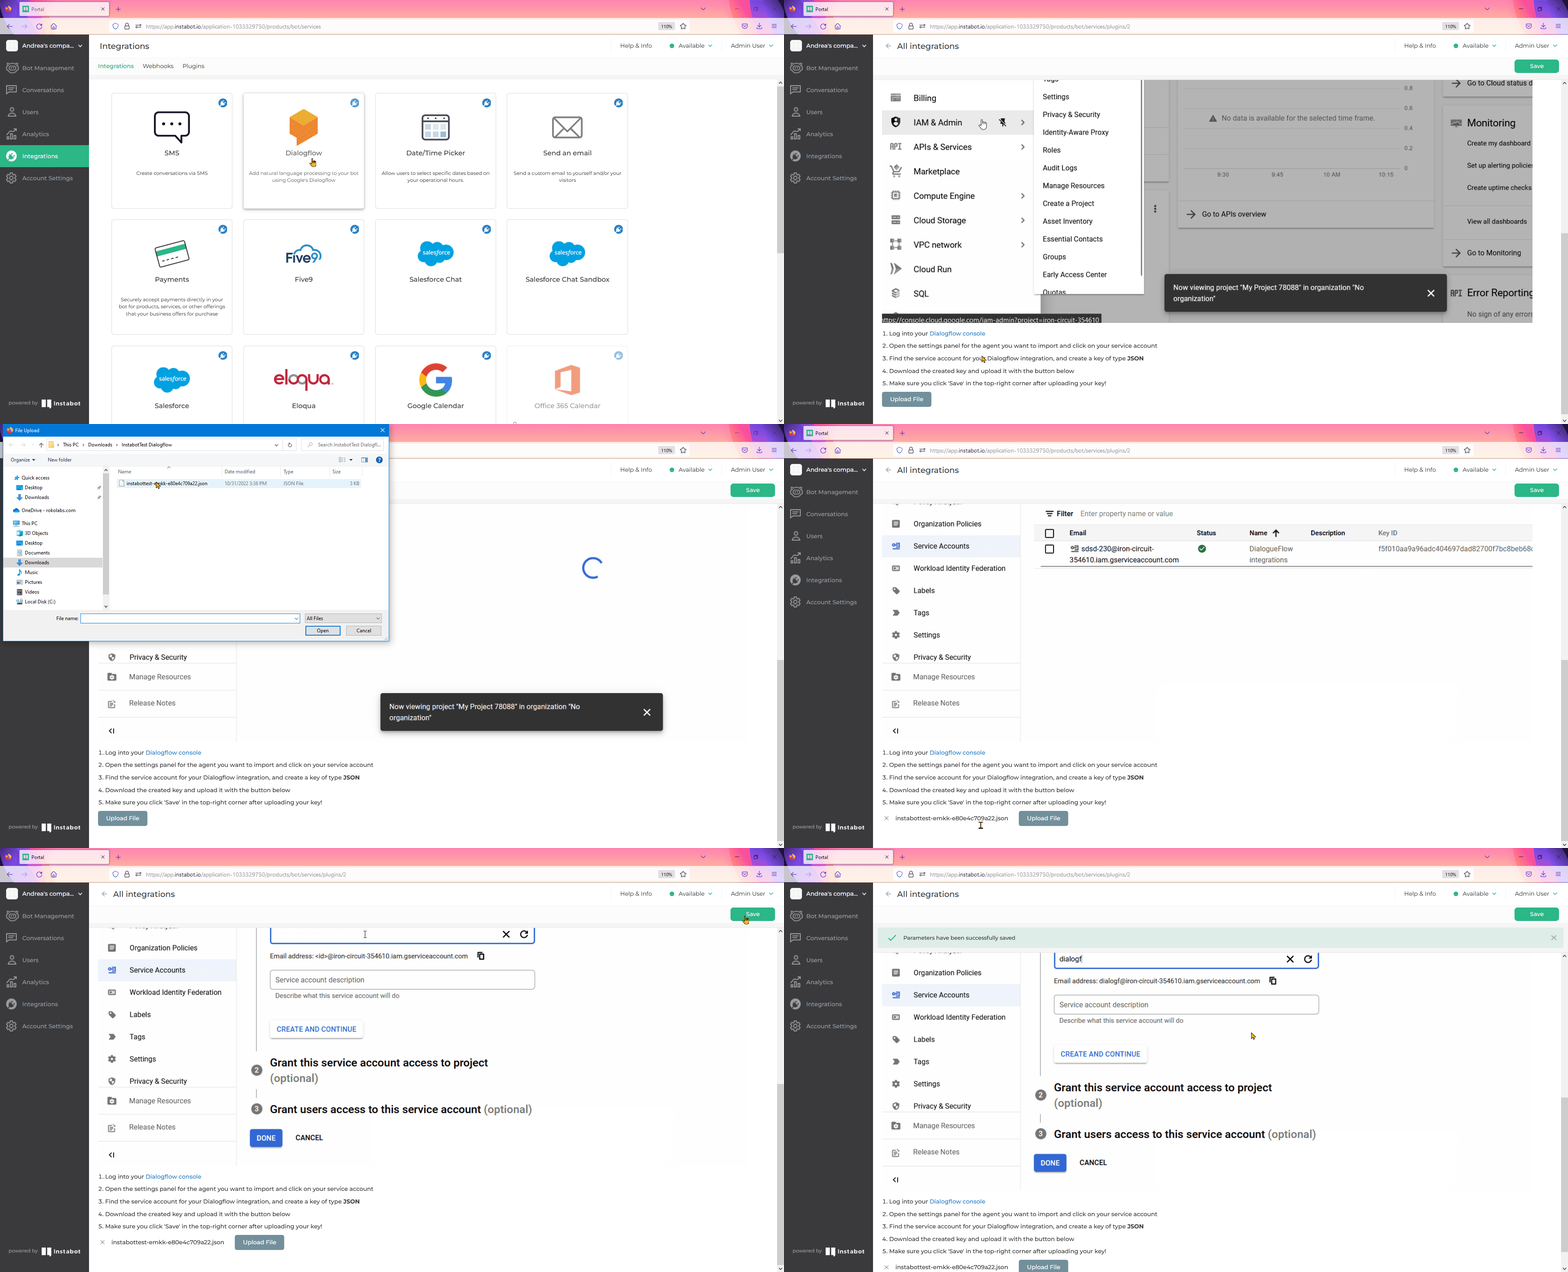
Upload Account Key to Instabot
Now your Instabot Account is ready for introducing the Dialogflow node in your bot! Let’s see in the following articles how to add the power of Dialogflow in your bots.
Updated over 3 years ago
