Groups
Don't have an Instabot account yet?
Contents
- Overview
- Creating Groups
- Assigning to Groups in Live Chat Conversations
- Creating bots that can auto-assign to groups
1. Overview
Live chat users expect fast responses and helpful solutions, so a lengthy waiting time or multiple handoffs can soon cause frustration.
That’s where our live chat groups feature comes in, allowing you to create groups of agents and assign users to the right group to address their needs.
This feature essentially further streamlines operations. For example, a user with a customer support query can be automatically assigned to the “Customer Support group”, which can monitor and take over the chat if need be.
Group assignments can be done manually, within a live chat stream at the point of the takeover, or automatically by setting the assignment up within a bot flow and based on the assignment rules configured on the group.
In this article, you will learn how to create groups, the different ways for assigning live chat conversations to groups, and how to create bots that can auto-assign to groups using our new Auto-Assign to Group template. Let's get started!
Groups Feature requires your Instabot account to be on the Standard tier or higher
The number of custom groups that you can create depends on the plan selected. Please check here the options.
To upgrade, click here, or email [email protected]!
2. Creating Groups
Please note that to create a group you will require to have turned on the Admin permissions on your User profile.
Logged in to the Instabot Portal as Admin User, go to the Account Settings tab, and select the option “Groups” on the top menu. Click on the “New Group” button for creating a group.
Group Name is a required field whereas Description is optional.
Members can be added to a group at any time, so you can create first the group and afterward add the teammates to it.
To add your teammates to the group, use the drop-down list. Here you can search by typing a username in the field and the system will help you find the agent you want to add.
The same person can be added to several groups.
Note that assignment to a group is not a required or enforced field, so it is possible to have users in your team that is not assigned to any group.
You can also delete teammates from the group. Please note that this action does not delete them from your company, just remove the user as a group member.
Let's see how to create the group “Support” and assign members to it
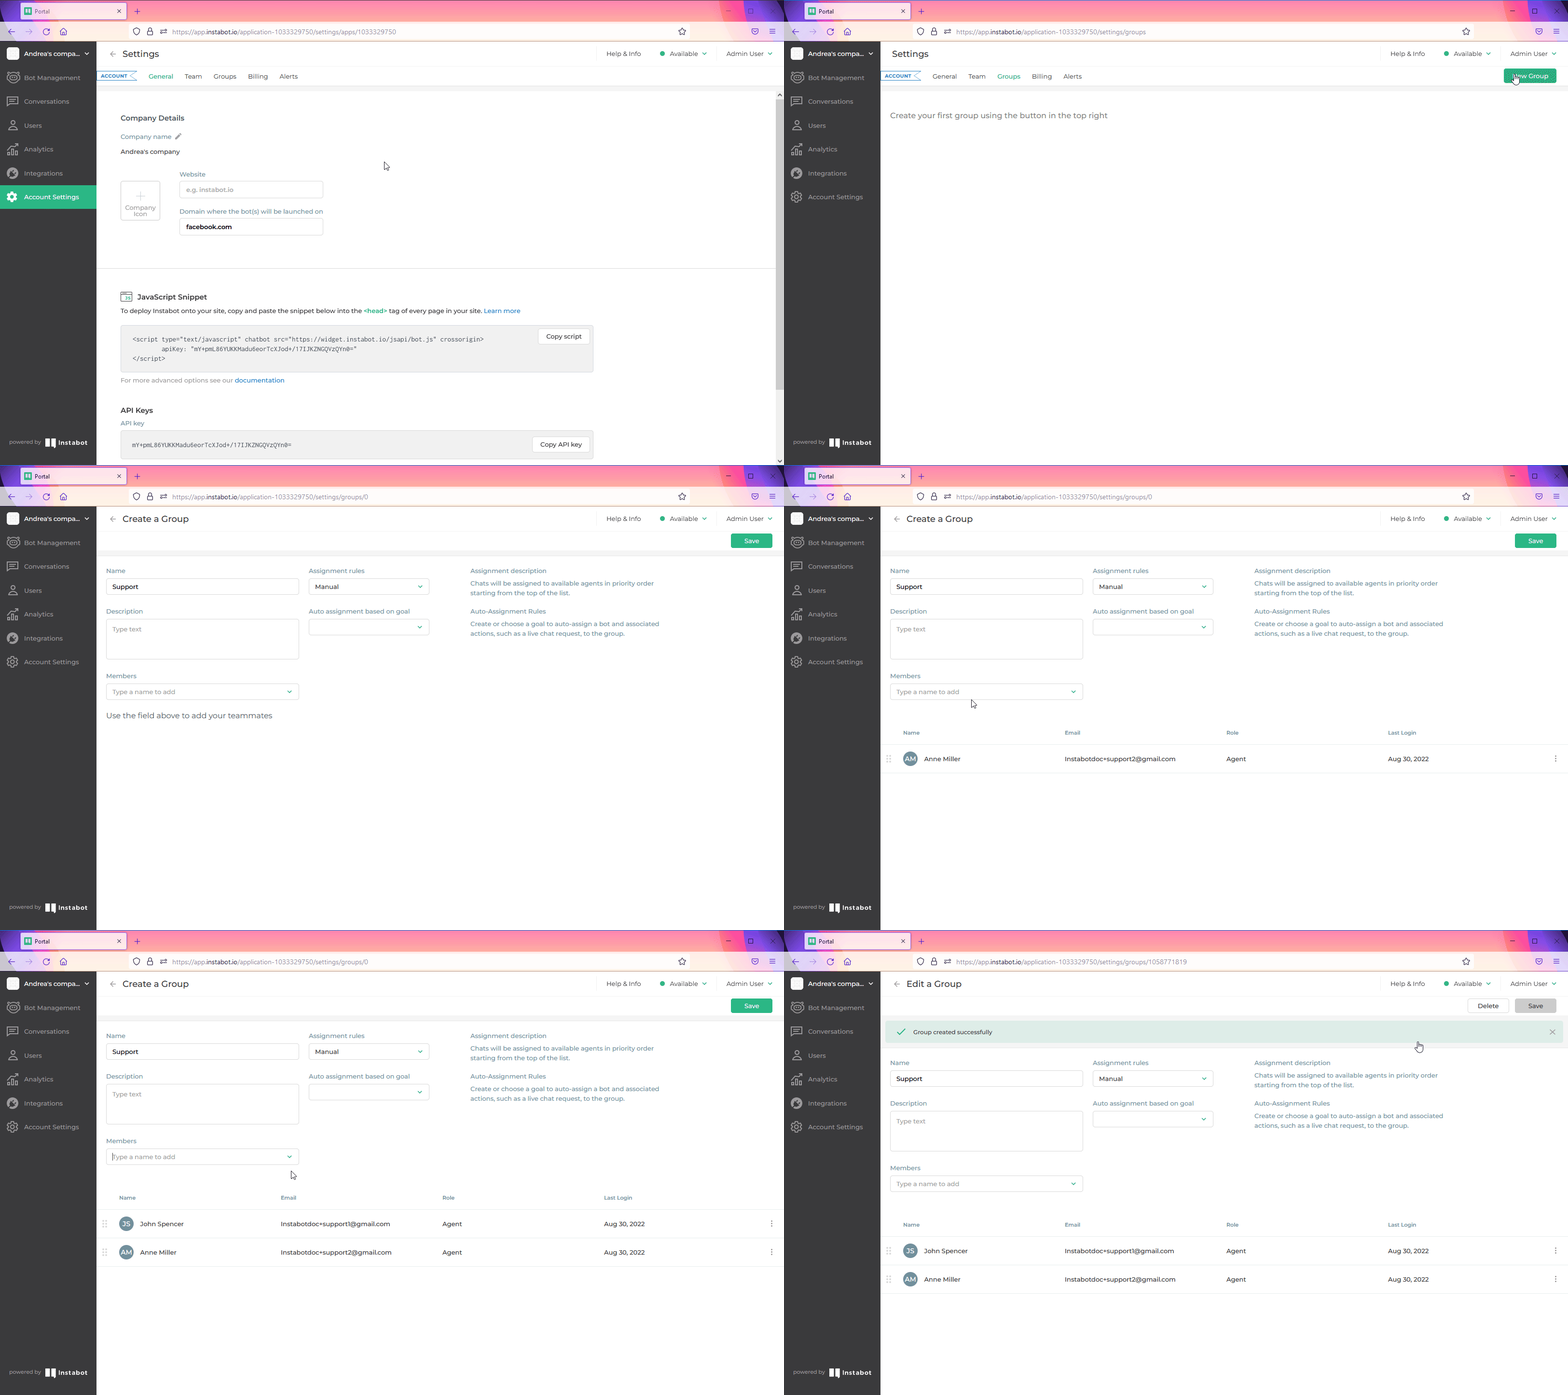
Create a group
Now, let's see how to add a teammate to an existing group and how to delete another teammate from that group.
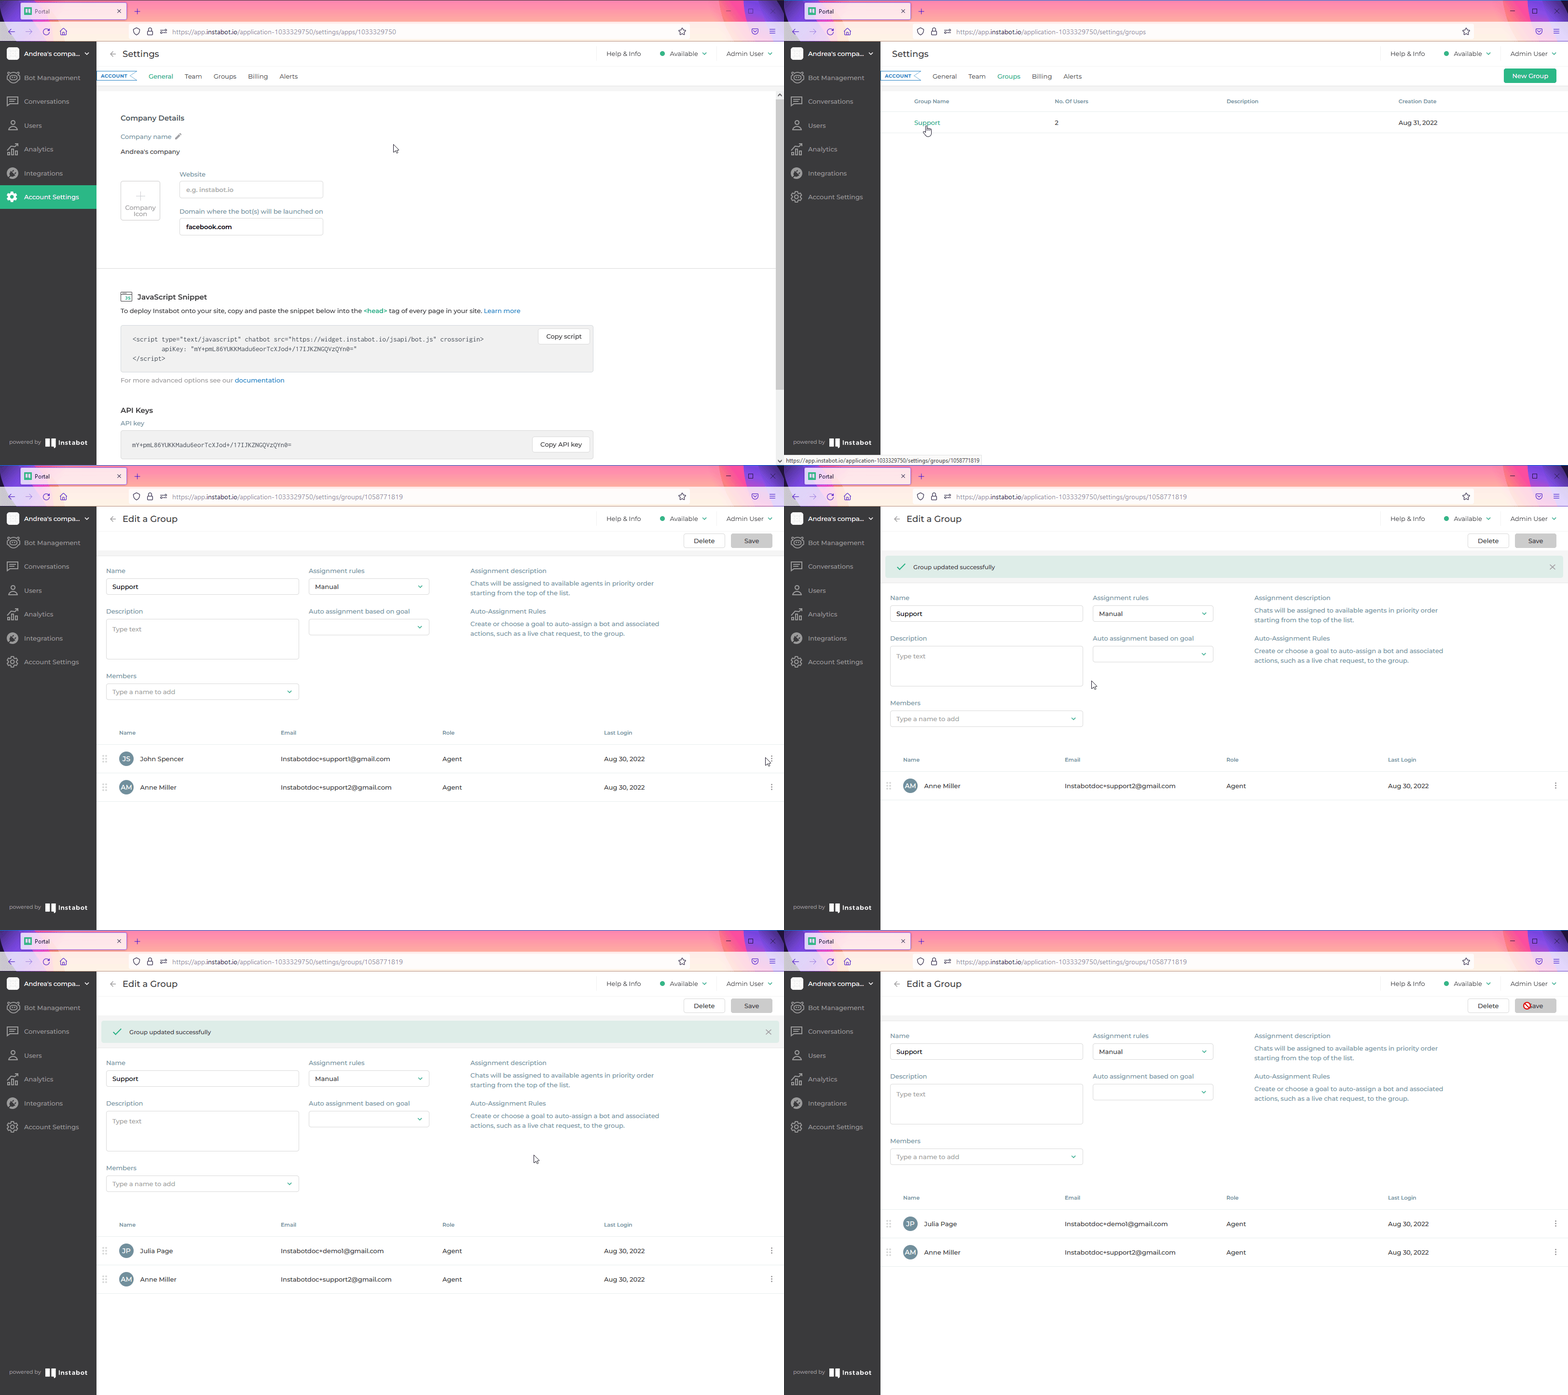
Adding and deleting group members
3. Assigning to Groups in Live Chat Conversations
The main role for groups is a group-based assignment. In many cases, it's very helpful to assign a conversation not to a certain person directly but to a group of them (e.g. a support team), and the logic of the group's construction will then assign to an individual member of the group.
A group assignment means that the system will assign a live chat to a member of a selected group according to certain, defined rules.
To use this feature, you need that the teammates in the group have live chat permission turned on. You can check and turn on/off the live chat permission on each user’s profile. Please note that you will need to be an Admin user for changing other users’ settings.
To set rules up for group assignments, go to the group details page and chose one of the three possible options available in the field Assignment rules.
3.1 Assignment rules
This setting determines how chats will be assigned to available agents in the group. The possible options are:
- Manual: chats will be assigned to available agents in priority order starting from the top of the list. This is the default value when creating a group.
- Least Busy: chats will be assigned to the least busy available agents based on the live-chat counter. In case of a tie, chats will be first assigned to agents based on priority order starting from the top of the list.
- Round Robin: chats will be assigned to available agents in rotating order starting from the top of the list.
Due to the assignment rules, the order in which each teammate is located in the group list is important.
By default, new members are added to the top of the member list, but you can change the member's location on the list manually with drag & drop. Or you can use the three dots menu on the left to place users at the top or bottom of the list.
Let's see how to set up the group assignment rules and change the order of the group members list.
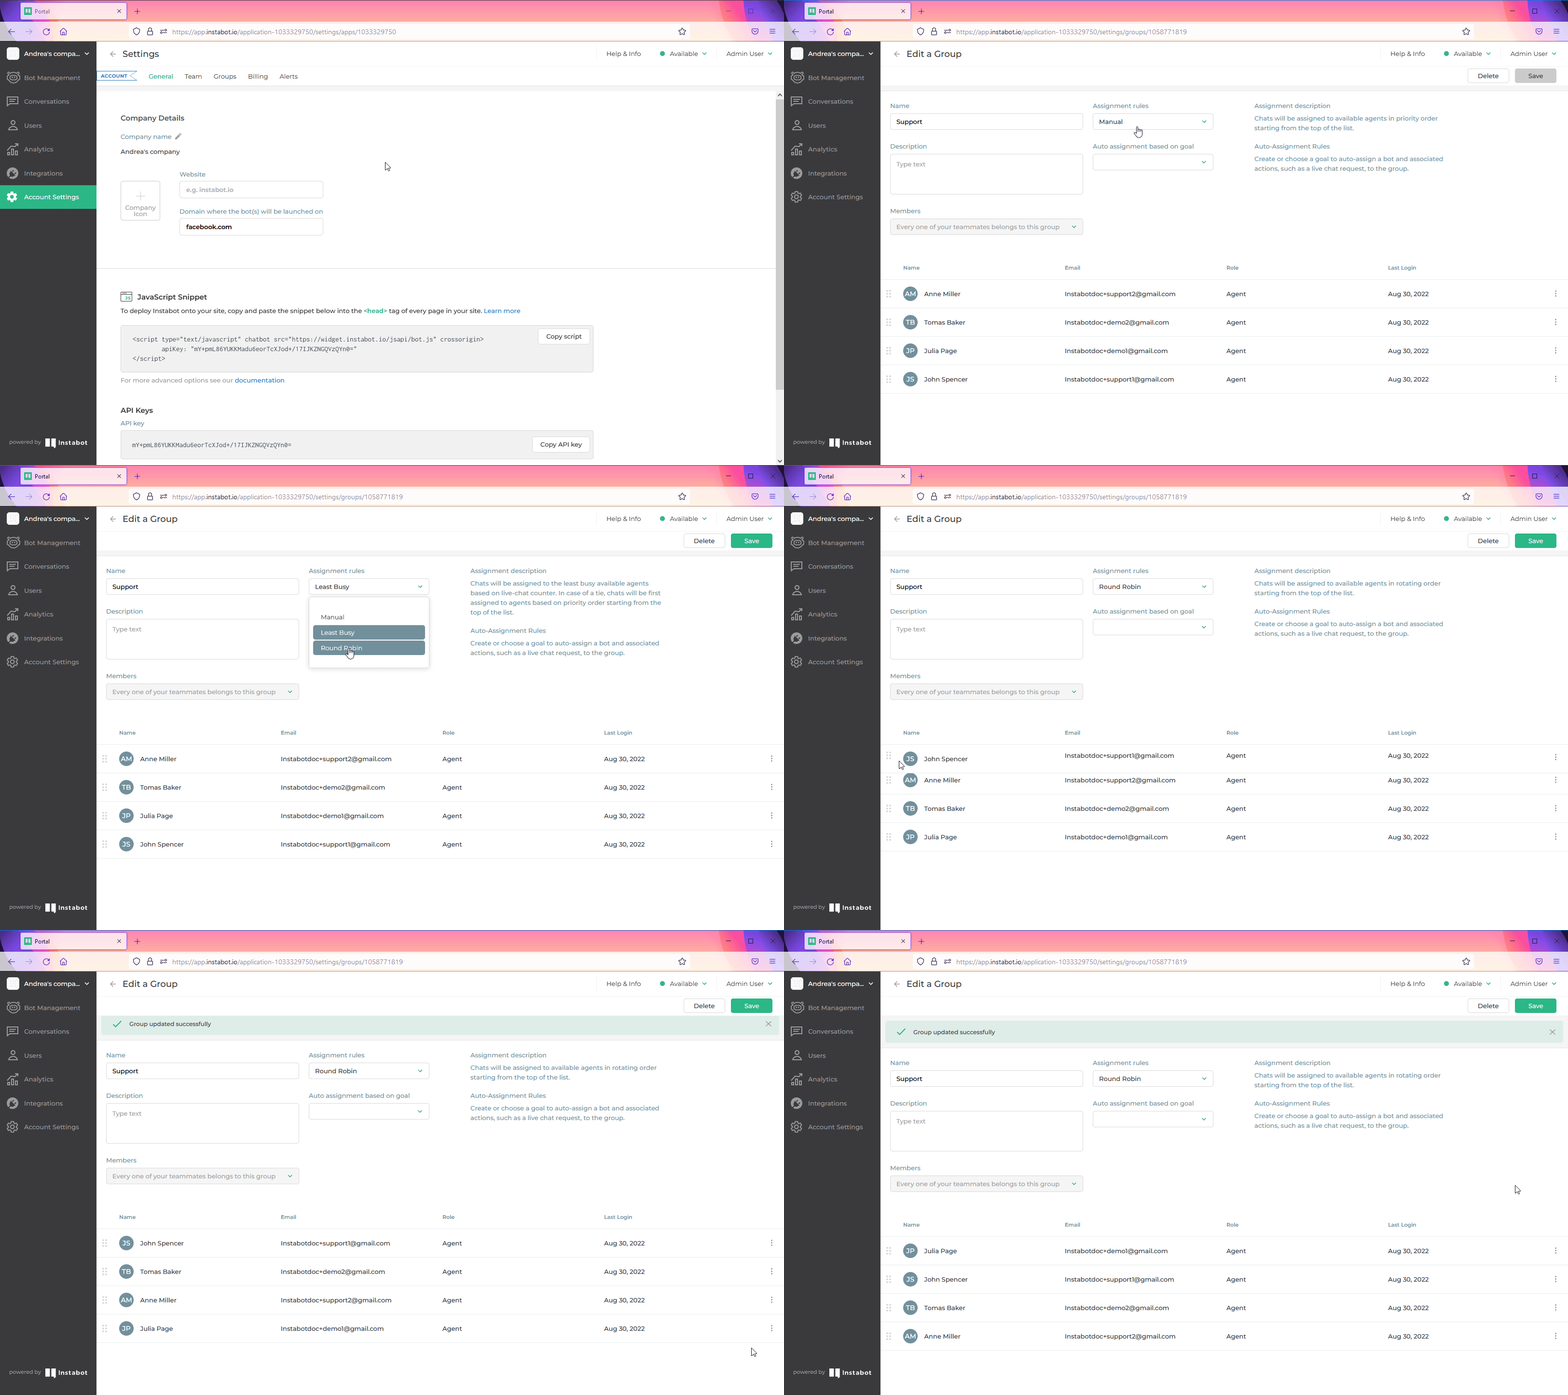
Set assignment rules and change the order of the group members list
3.2 Group assignment during chats on Instabot Portal
Group assignment works in the same way as individual assignment.
After you have created one or more groups, then you can pull up the Assign chat window, and toggle to the 'Groups' tab. There you can see a list of all groups and a display of available agents in the group.
To make an assignment, just choose a group and confirm your selection.
Let's see how it works.
First, we will see how a user assigns a live chat to a group.
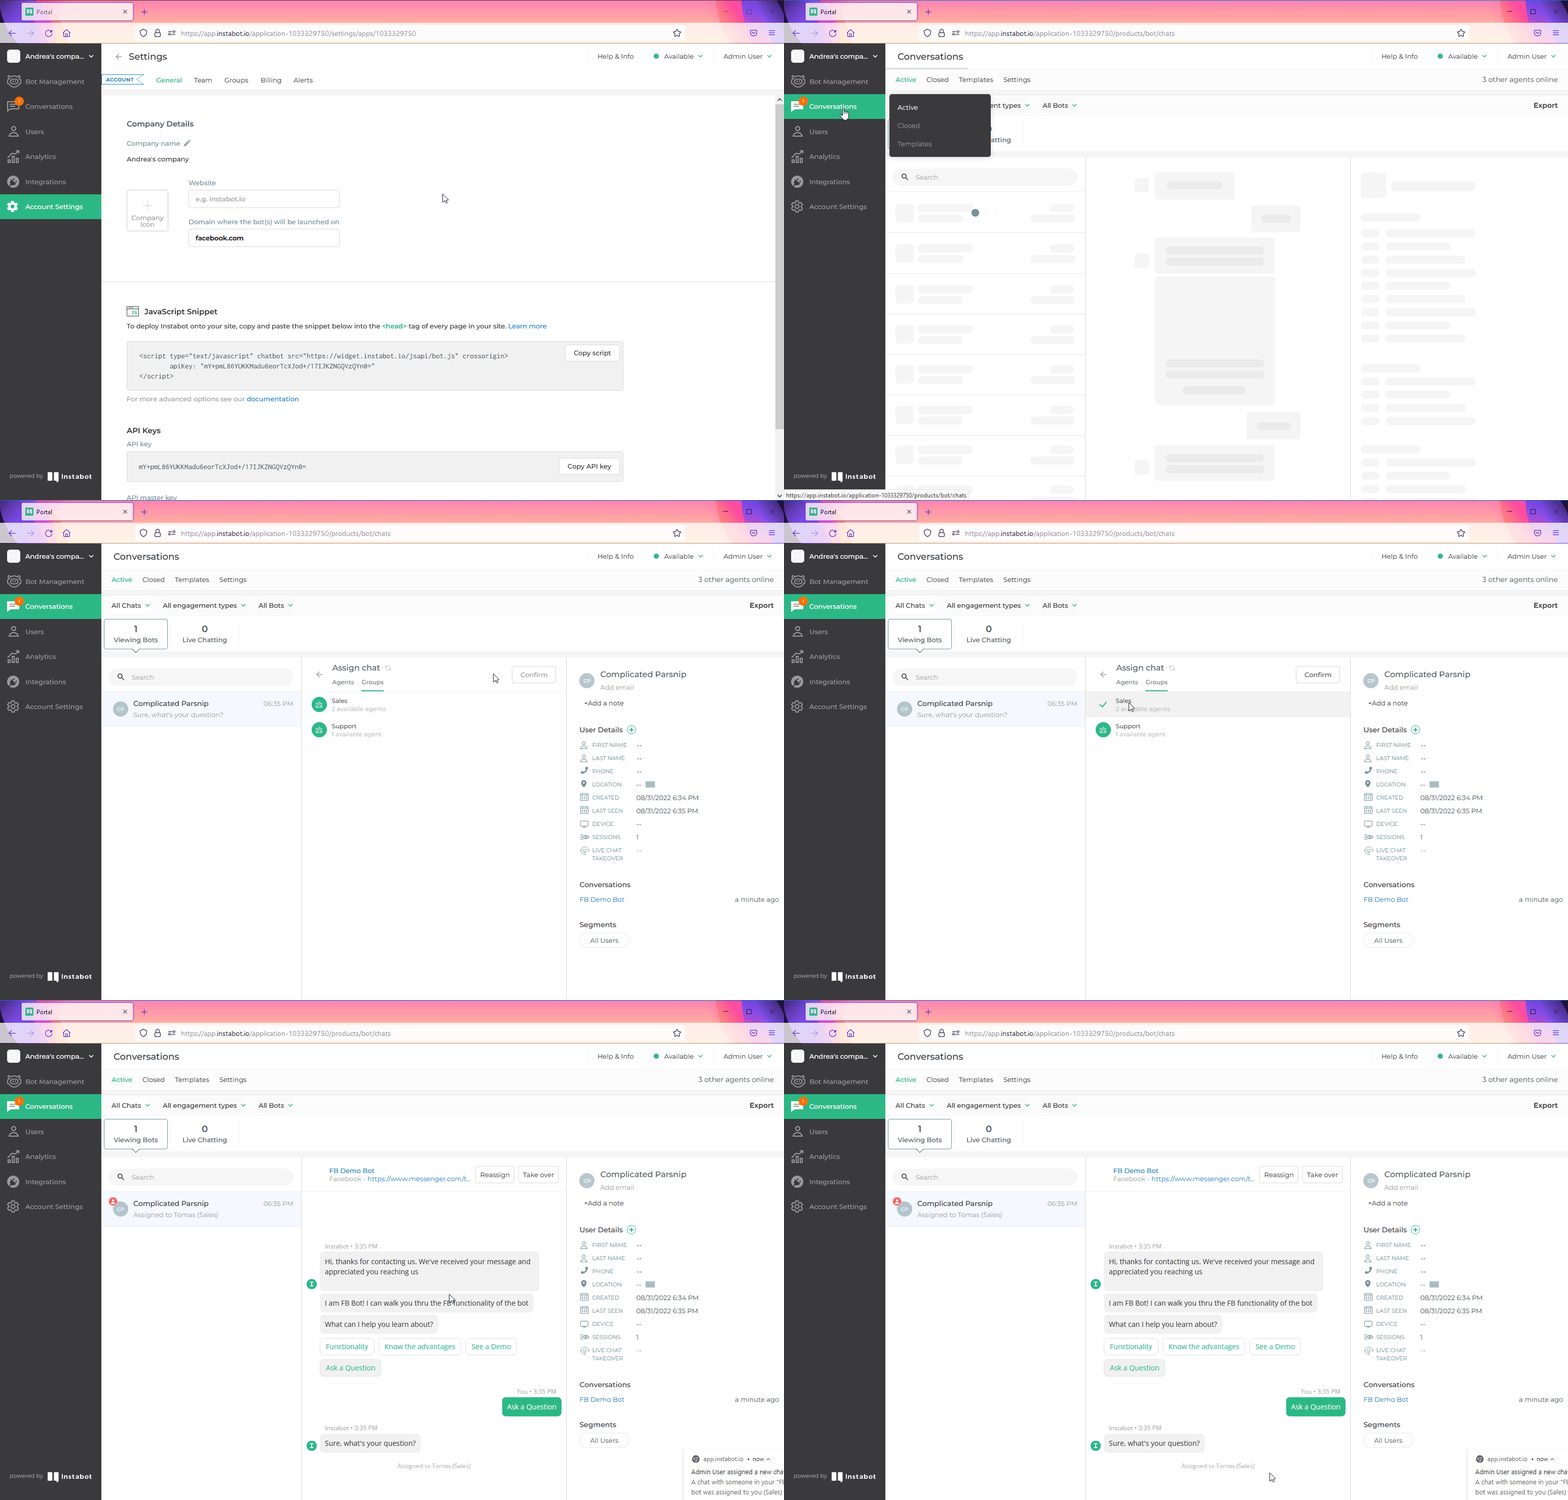
Assign live chat to a group
Once a chat conversation is assigned to a group, the assigned agent gets a push notification and also service message appears in the chat window.
Now, let’s see how the agent in the group takes over the live chat
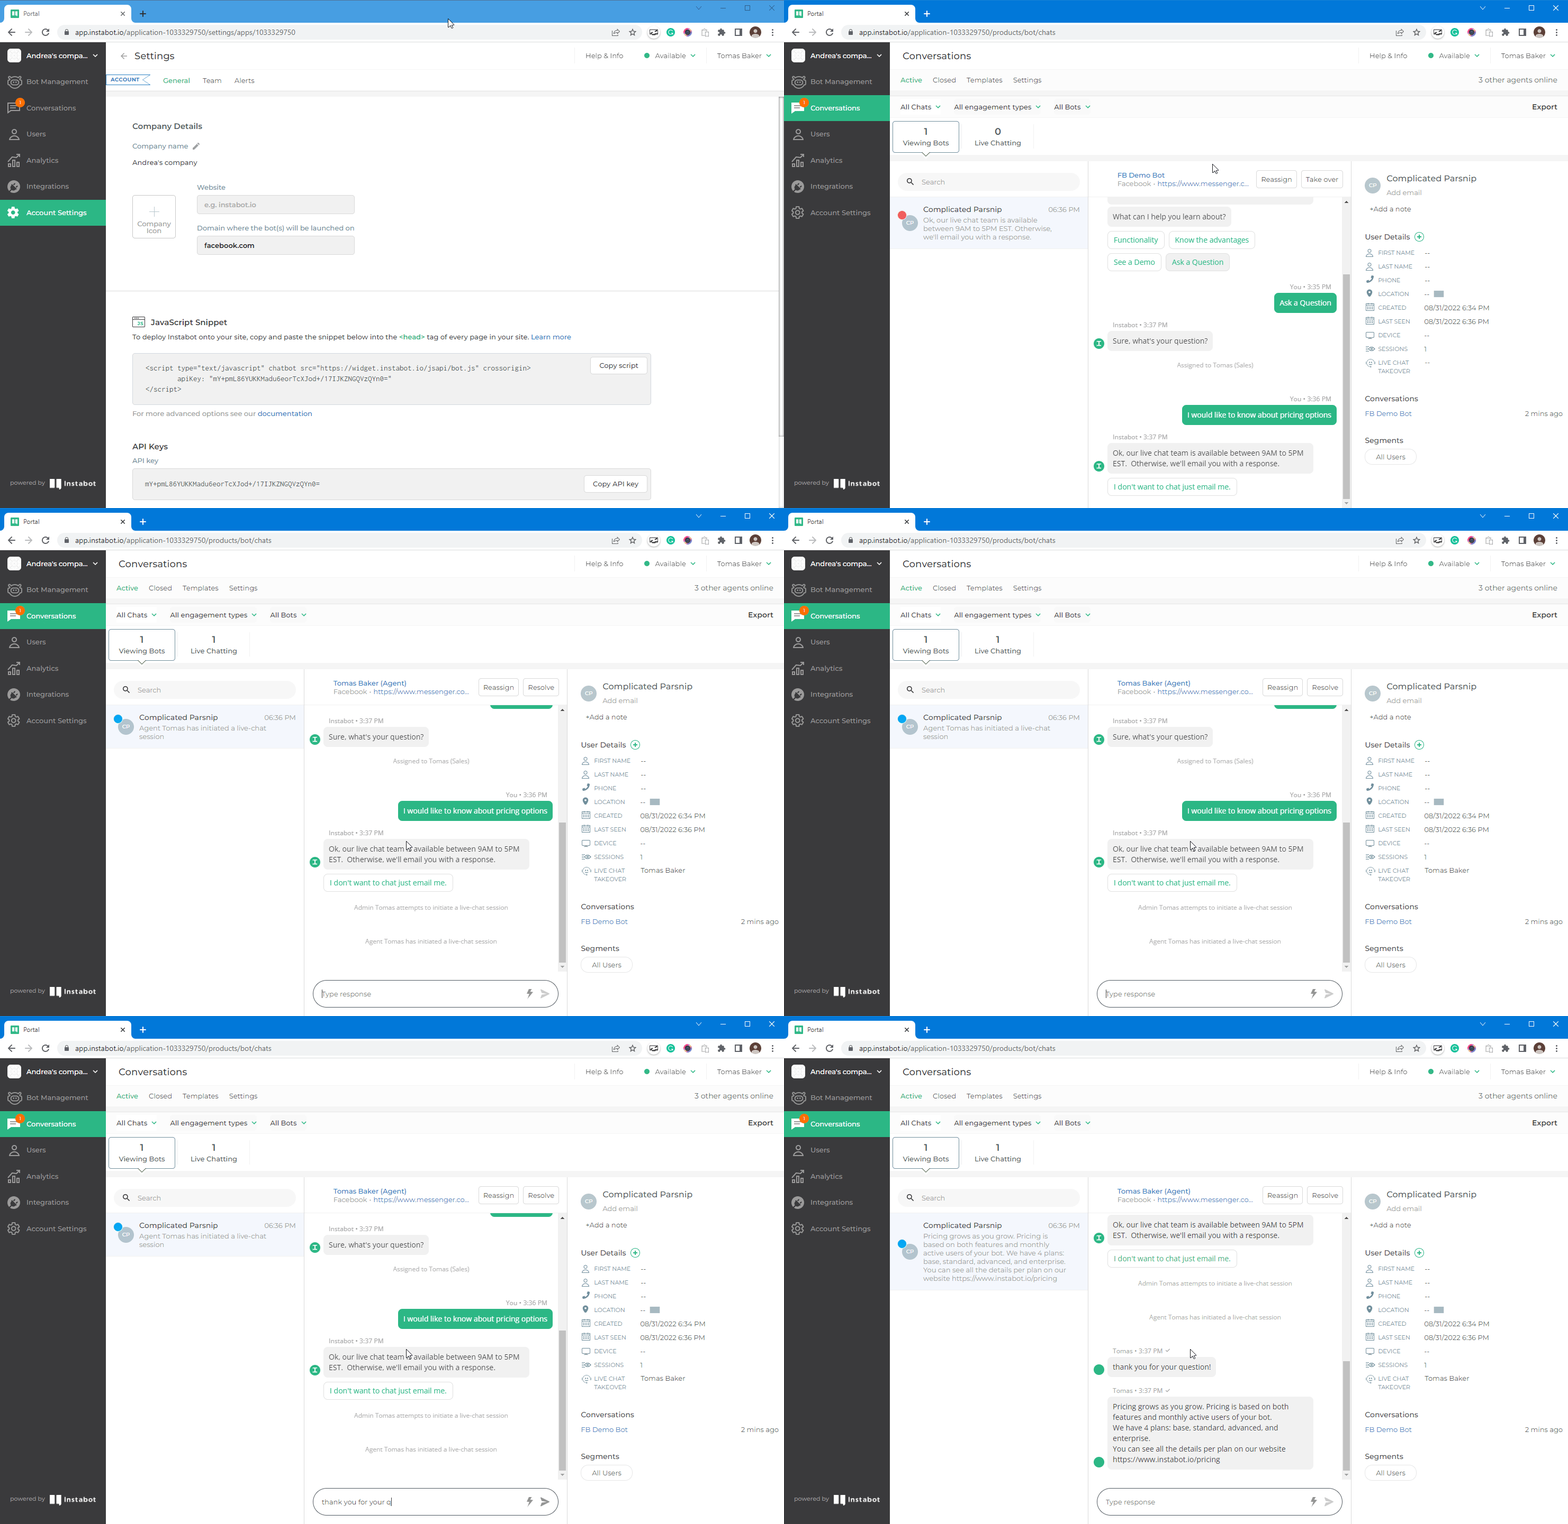
Agent takes over the live chat
For the case of a group assignment, the group name is placed beside the assignee name between parentheses. Note these system messages related to assignment details are visible for companies only, not for end-users.
Also, the re-assignment frame lets you know if an agent had been assigned under a group assignment rule by displaying the group name between parentheses.
3.3 Group assignment during chats on the mobile app
The mobile application also has group assignment functionality within the live chat display.
However, please note that all group setup must be done in the Portal on the web.
In the app, the group tab can be found in the assignment drawer. Select the group to assign a conversation to and once the group assignment is done then a group name in parentheses appears beside the agent's name.
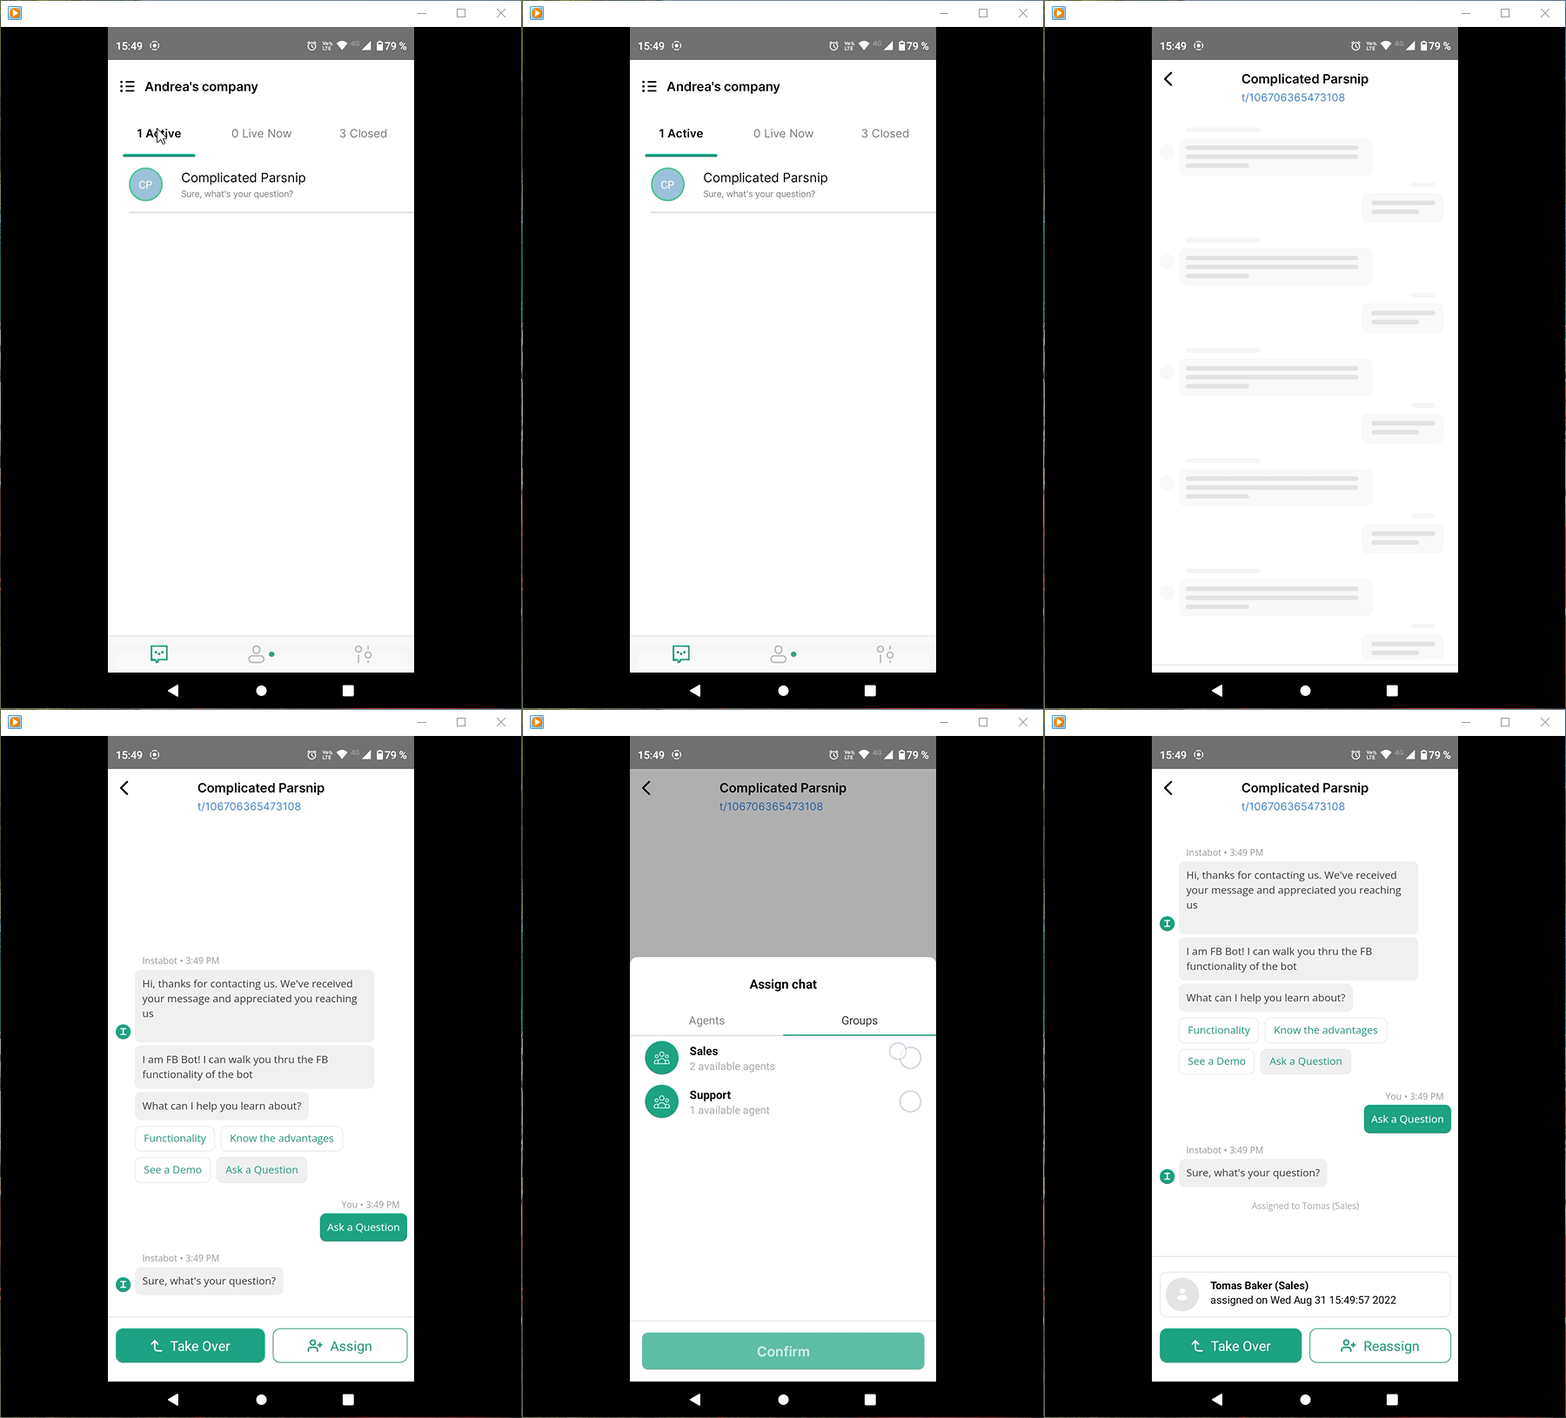
Assign live chat to a group (mobile app)
Please note that different groups may have different assignment rules.
3.4 Auto assignment based on goals
Please note that this feature is available for Advanced & Enterprise tiers only.
To upgrade, click here, or email [email protected]!
With this option, you can set conditions to assign live chats automatically to a certain group once an end-user gets to a specific node.
One of the main utilities of this function is for assigning human takeovers (or live chats) to specific groups of agents based on a user's previous replies.
To set automatic assignment rules based on goals, go to the group details page and chose one of the options available in the field Auto assignment based on a goal.
This drop-down list shows all current goals defined for your bots and also allows you to create a new goal. Let’s see how this option can be set.
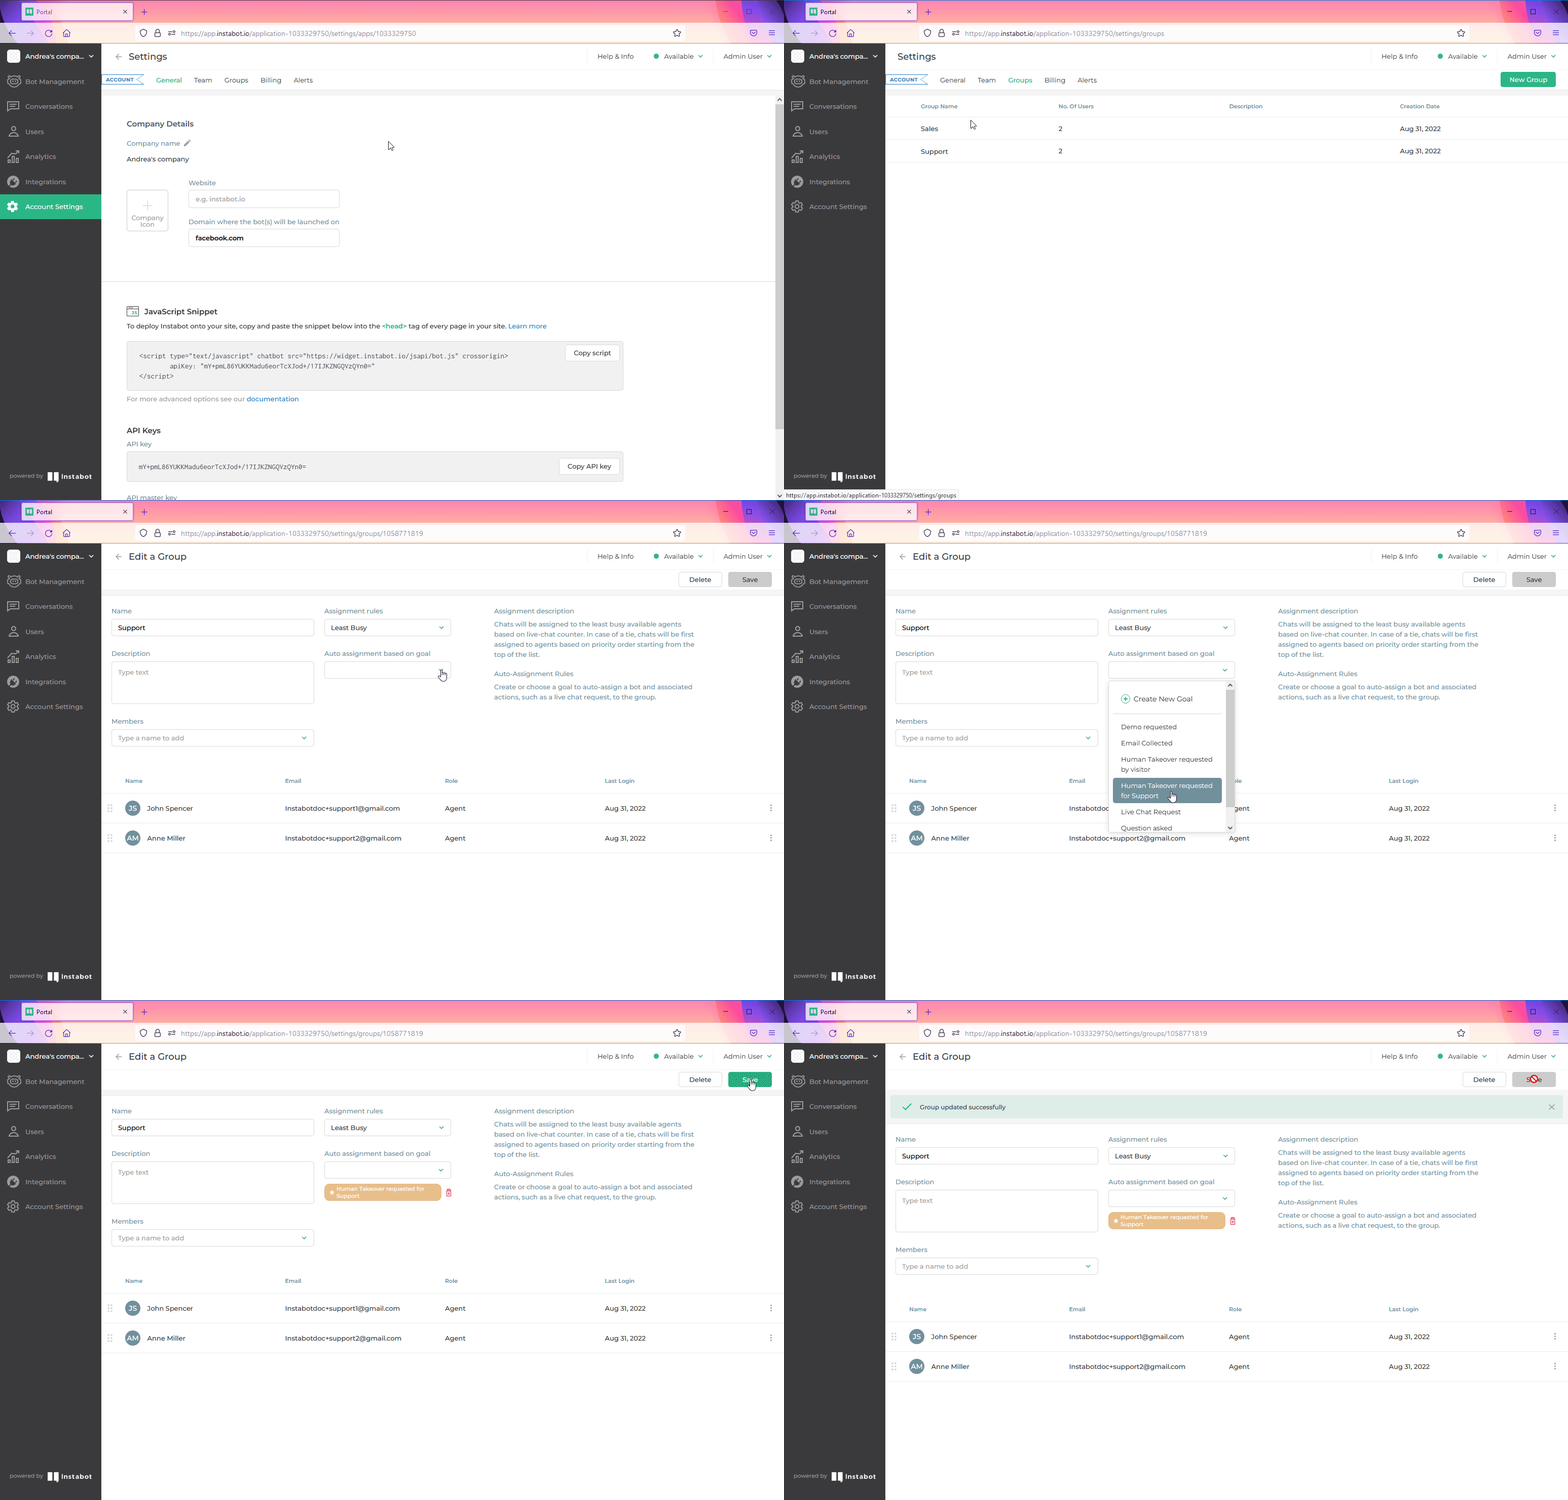
Set auto-assignment based on goals
We will see more details about how this option works in the next topic “Creating bots that can auto-assign to groups”.
4. Creating bots that can auto-assign to groups
For setting auto assignments based on a goal we recommend creating a separate node for each group.
To create these nodes, go to the bot management page and edit the bot flow for adding them.
After that, go to the group detail page and select the new node on the auto-assign based on a goal dropdown. Don't forget to publish the bot.
After publishing the bot, the next time that a user reaches the node with a goal associated with a group, a group member will get an assignment according to the assignment rules explained above.
But you don’t need to start from scratch for having a powerful bot with auto-assign to groups nodes. We have created a specific template for doing that!
For using the auto-assign to groups template, just go to the bot management tab, clicks on the “New Bot” button, and select the option New bot from a template.
Here you will see the list of the available templates according to your plan. Please note that auto-assign to groups template is available for Advanced & Enterprise tiers only.
Let’s see how to create a bot using this new template.
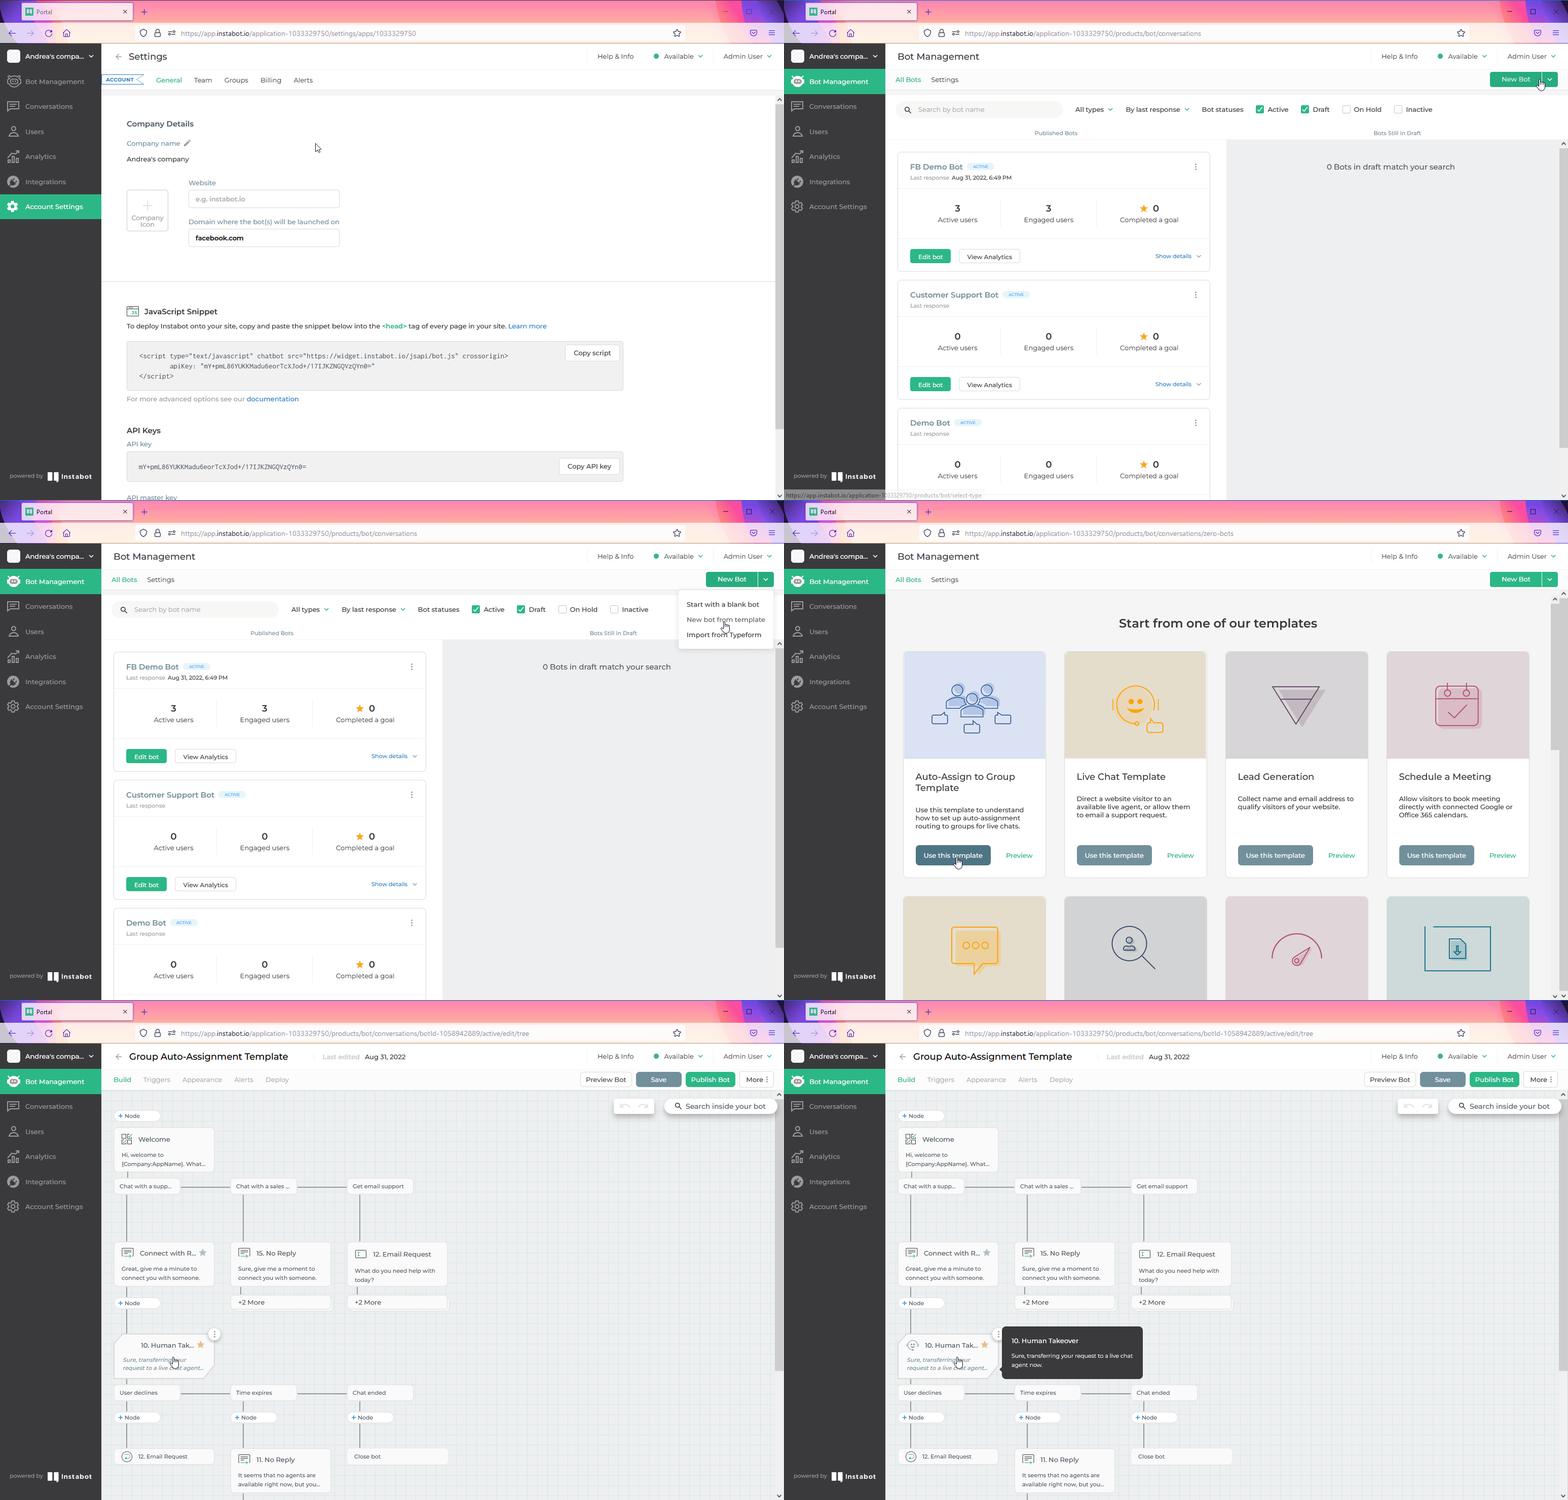
Create auto-assign group bot from template
Now, that we have created the bot, let’s see how it works.
This bot has a “Human takeover” type node, and this node has been associated with the “Human takeover requested for support” goal.
When a user reaches that node, the conversation will be automatically assigned to the groups that have selected that goal in the “Auto-assignment based on goal” option. In the case of this example, the only group that has set up the goal is the “Support” group.
The group assignment is automatically made based on the option selected in the “Assignment rules” field.
In the following video, we can see how the same goal is configured in the node and also in the group.
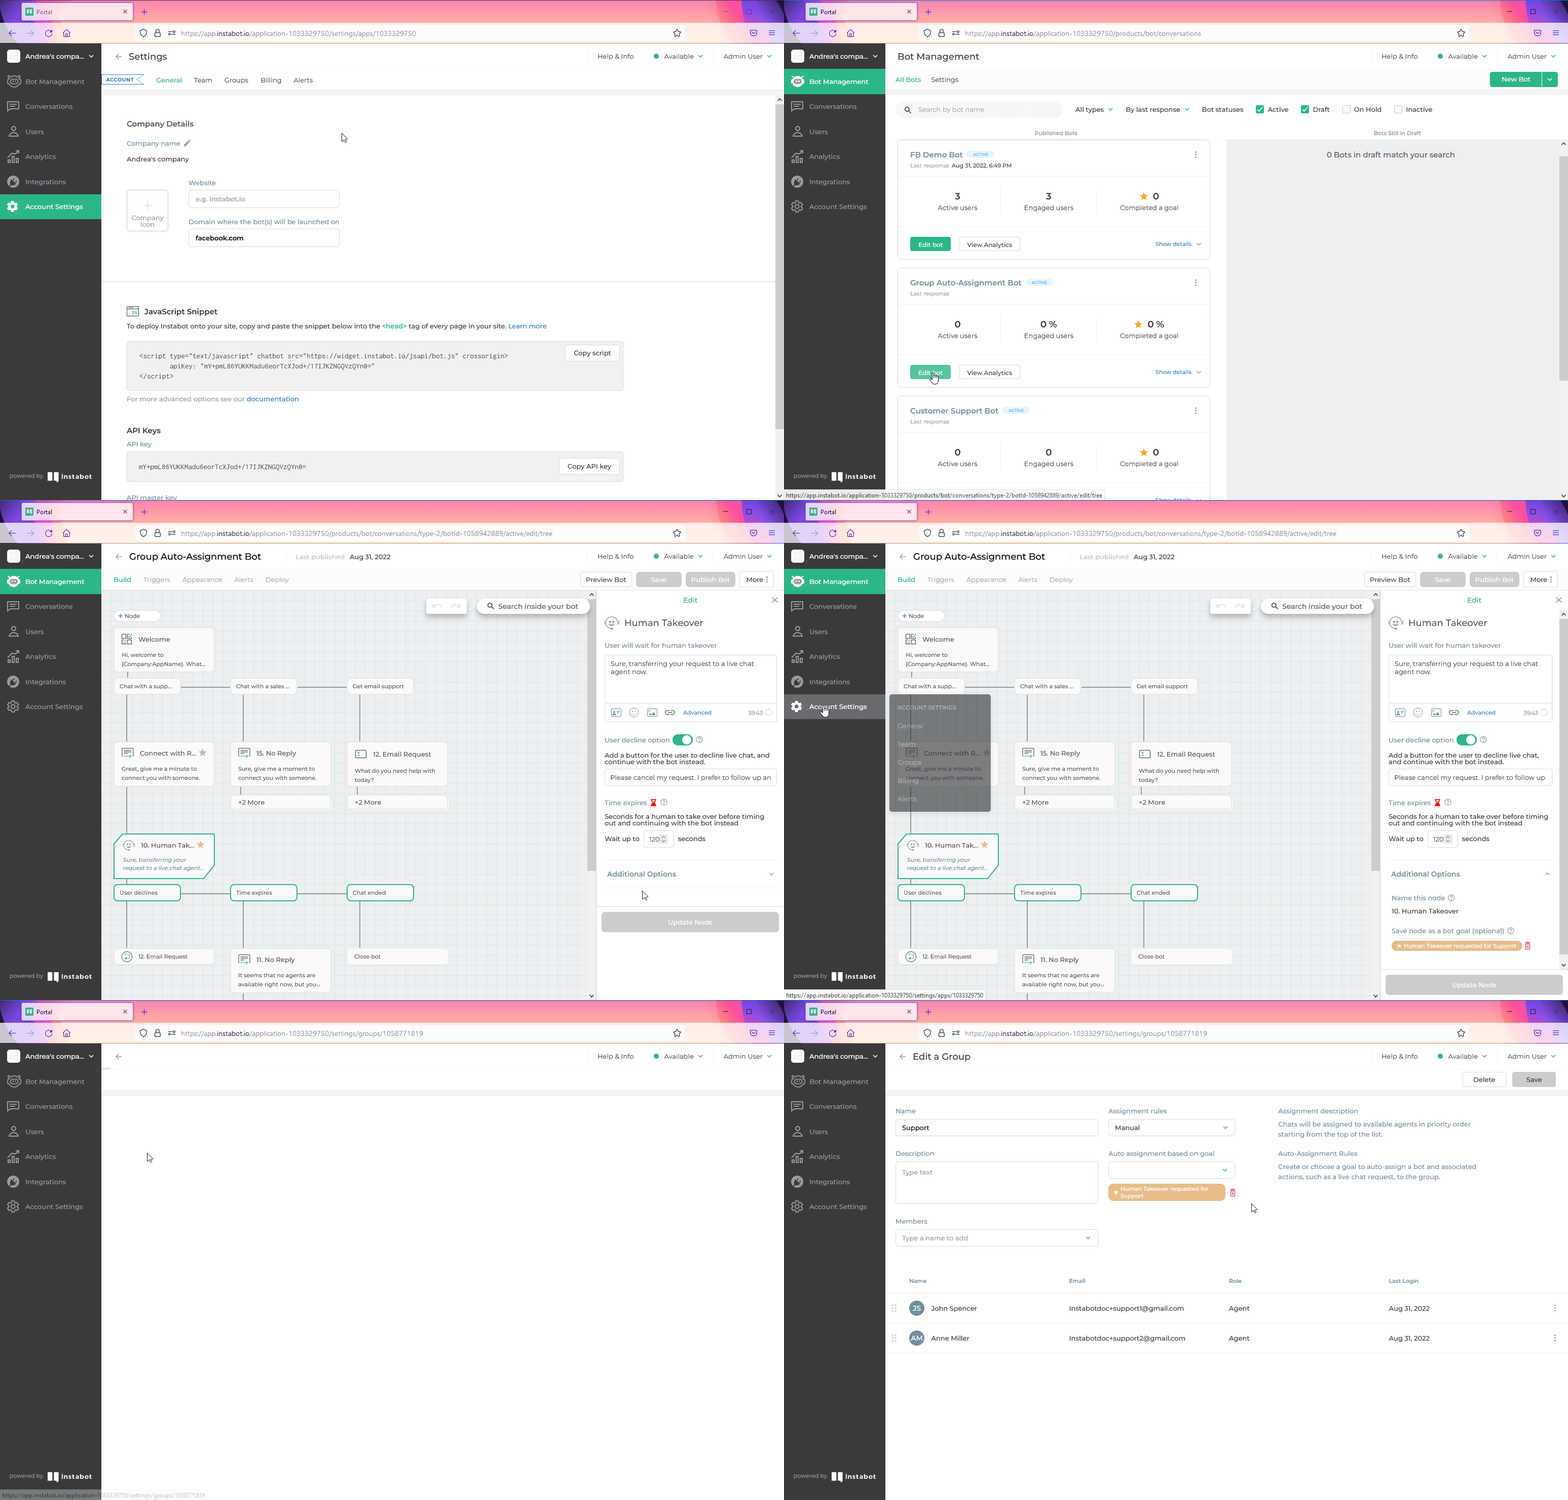
Auto-assign group node and goal configuration
In the following video, we can see how the automatic assignation is done when a user reaches the node.
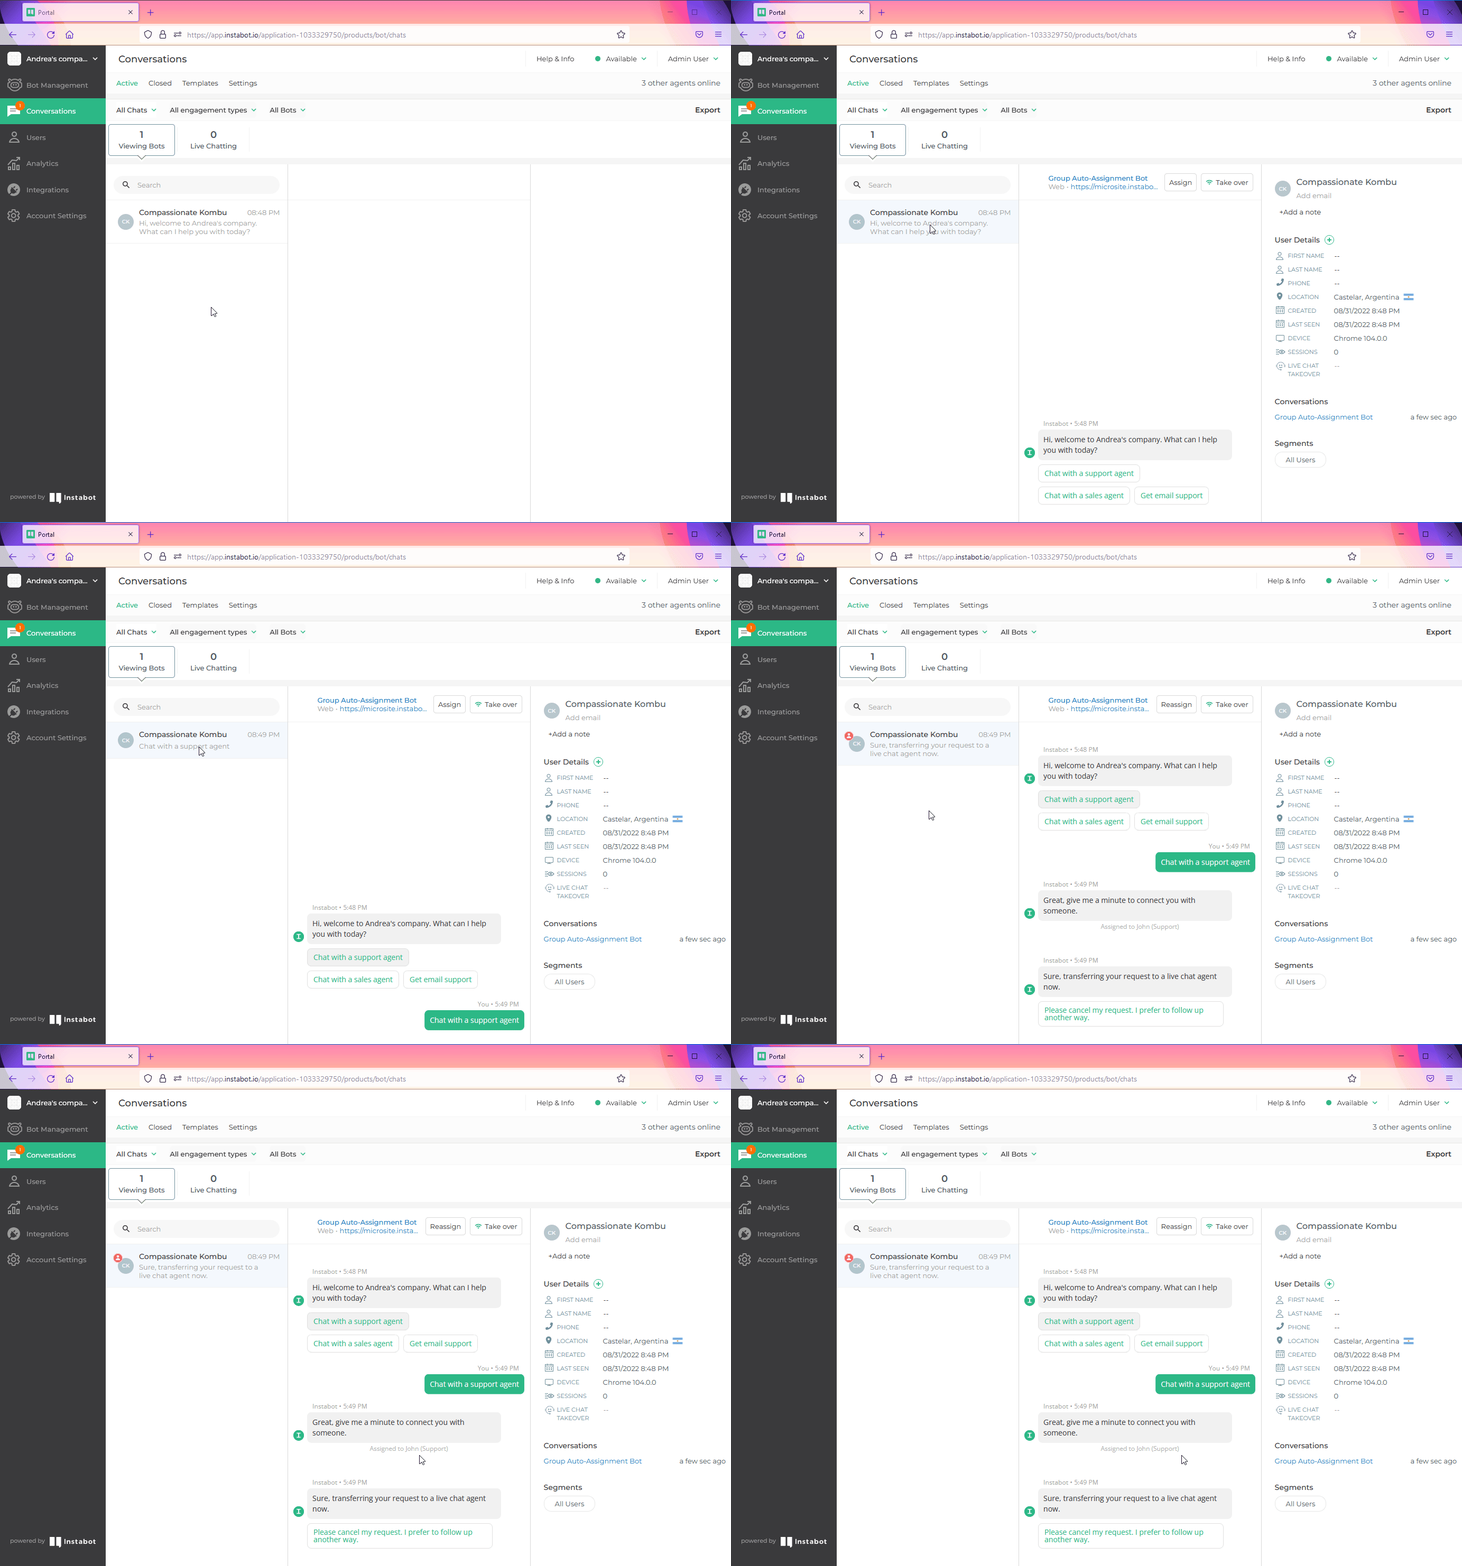
Auto-assignment based on goals bot in action
If you need help with anything here, please email us at [email protected]!
Updated over 3 years ago
