Zapier
Use Zapier integrations to automatically export Instabot data and simplify your workflows
Don't have an Instabot account yet?
- Getting Started
- Instabot as a Zapier trigger
- Set up Filters on User Properties
- Webhooks as a Zapier action
1. Getting Started
Zapier is very easy to integrate with Instabot. It can be used to connect your Instabot data with hundreds of other applications. This makes Instabot an extremely powerful data integration to add into your portfolio of workflow tools.
Create a Zapier Account
If you haven't already done so, make sure to create a Zapier account here.
Once you have an account follow the steps below to start using your Instabot conversation data in your other applications.
2. Instabot as a trigger
Instabot currently can only be configured as a trigger event for Zapier. This means that data is only sent from Instabot to Zapier and does not receive data from other applications.
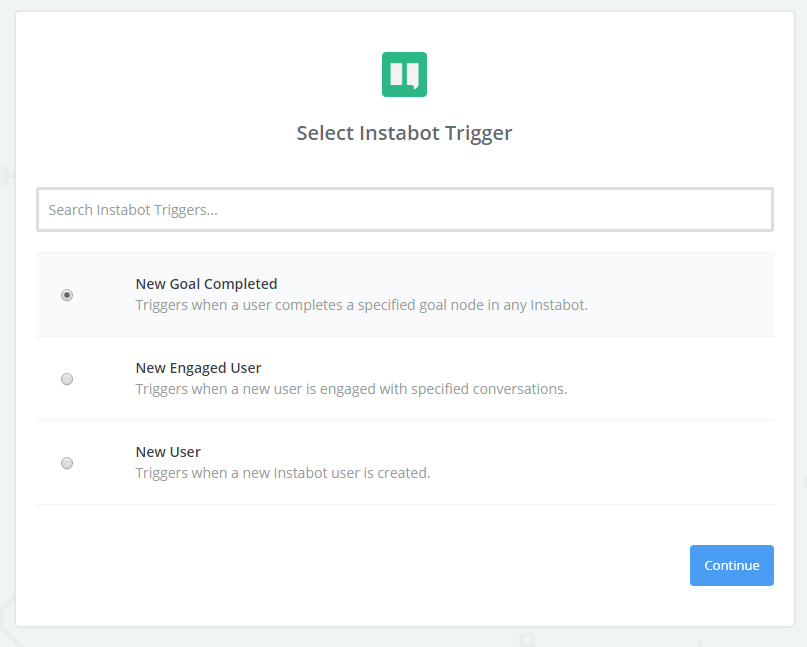
There are three trigger types of Zaps that you can create:
- New User - Get notified when a new user is created in your Instabot application.
- New Engaged User - Get notified when a user engages with an active Instabot conversation on your site or in your app.
- New Goal Completed - Get notified when a user engages with a node that has been marked as a bot goal. (Only get notified when someone leaves an email address)
They are all configured the same way from Zapier.
Step 1
Choose the "Make a Zap!" button when you are logged into Zapier.

This will lead you to the Zap wizard that walks you through each step of creating a Zap.
Step 2
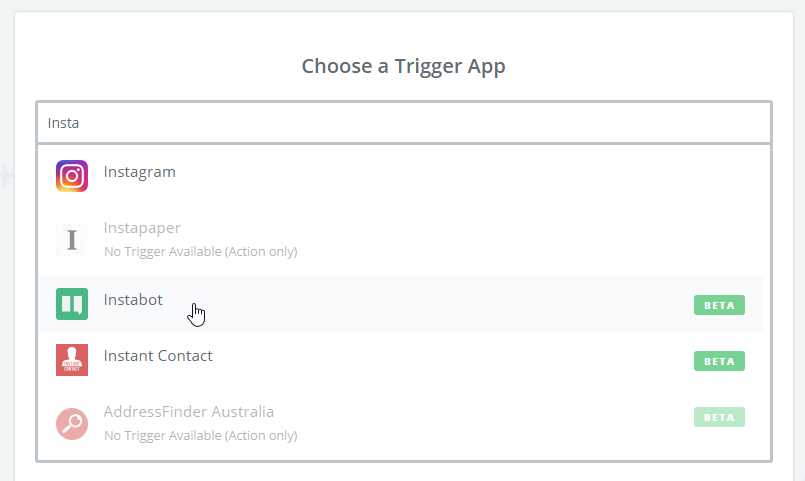
Search for the Instabot trigger App by typing in "Instabot" in the search bar.
Step 3
Choose one of the two triggers that you want to be notified on.
Step 4
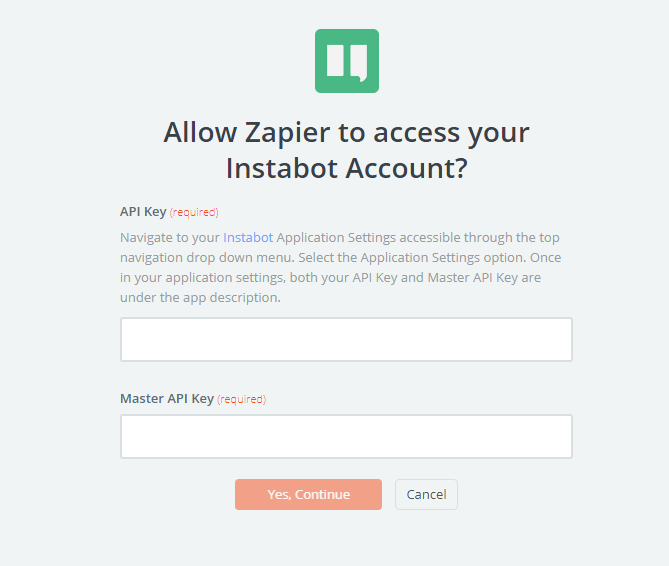
Connect to your Instabot application by entering the API Key and API Master Key found within your Instabot account's application settings.
Step 5
Choose your Action app to complete the Zap. Once you have tested the Instabot connection to Zapier, you must look for the desired action app that will be updated from Instabot.
For example, you can build text templates using user property data to alert you on Slack if a new lead has come in. Enabling you to take action on it right away and reach out to your new potential user.
Or custom systems that are not supported by Zapier but have a RESTful API, you can use Zapier webhooks
3. Set up Filters on User Properties
Filters are used by Zapier to add a condition to the Instabot trigger that checks if some data exists in order to continue to the action step of the Zap.
For example, if you only want to send a Slack notification if the user engaging with Instabot has provided their Full Name.
- Select the Add filter button in the left hand menu.
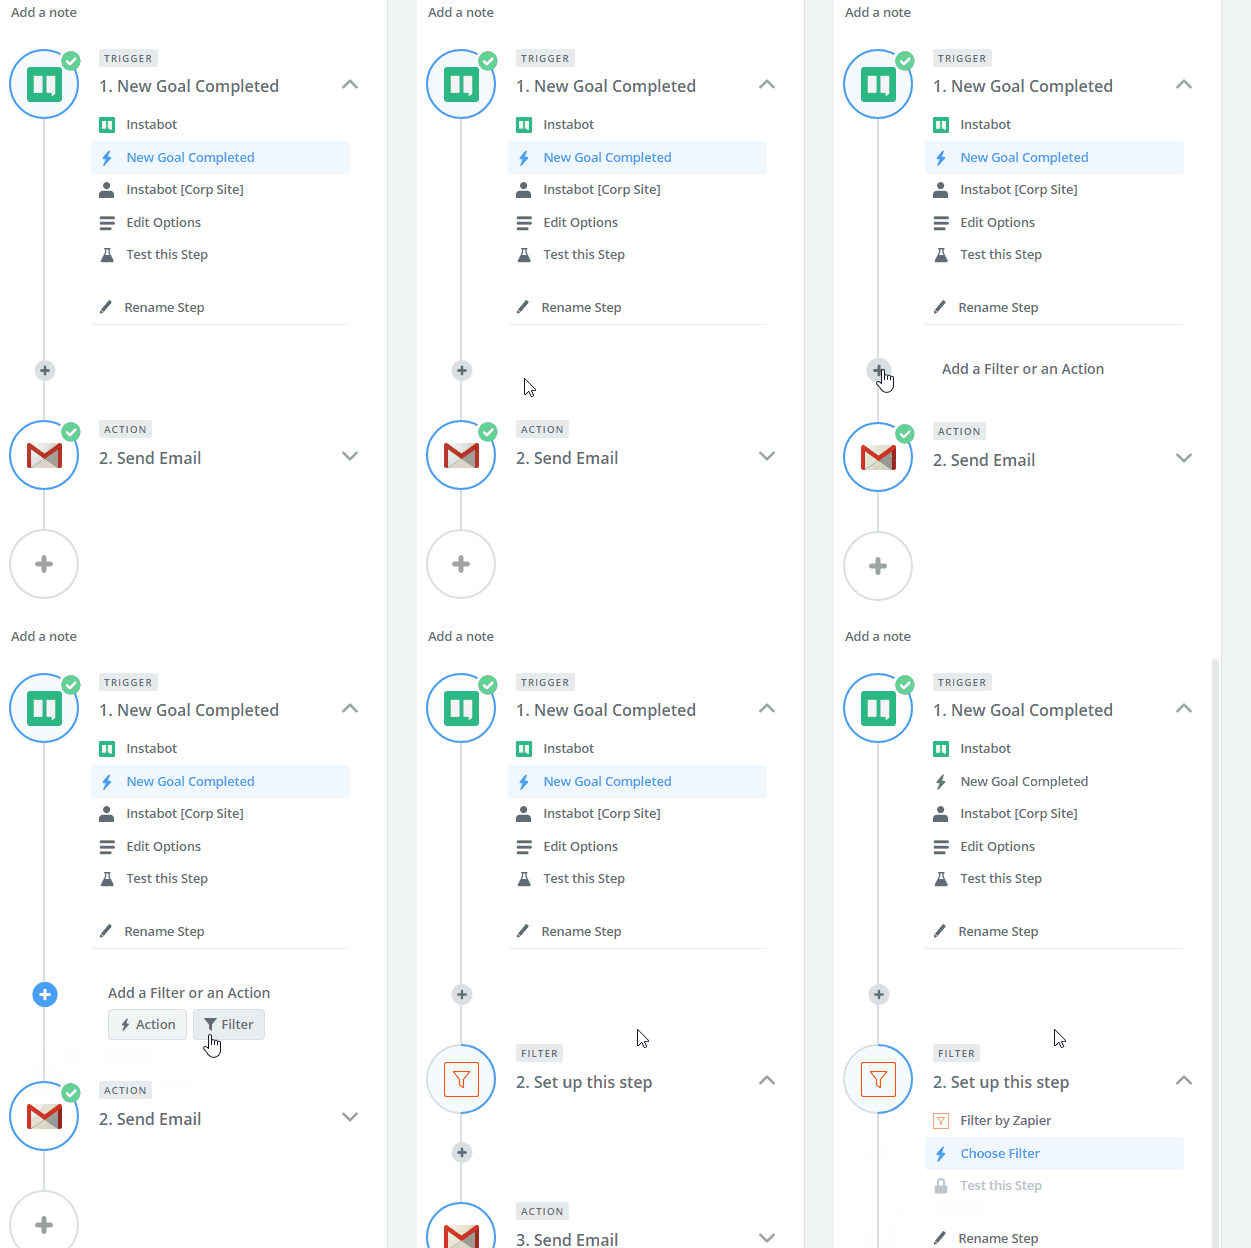
- Select the Instabot User property you want to check for.
- Select the condition that you want to meet. In this example it checks for if "Email Exists" and will continue on if the user who is engaging with the bot has submitted an email address.
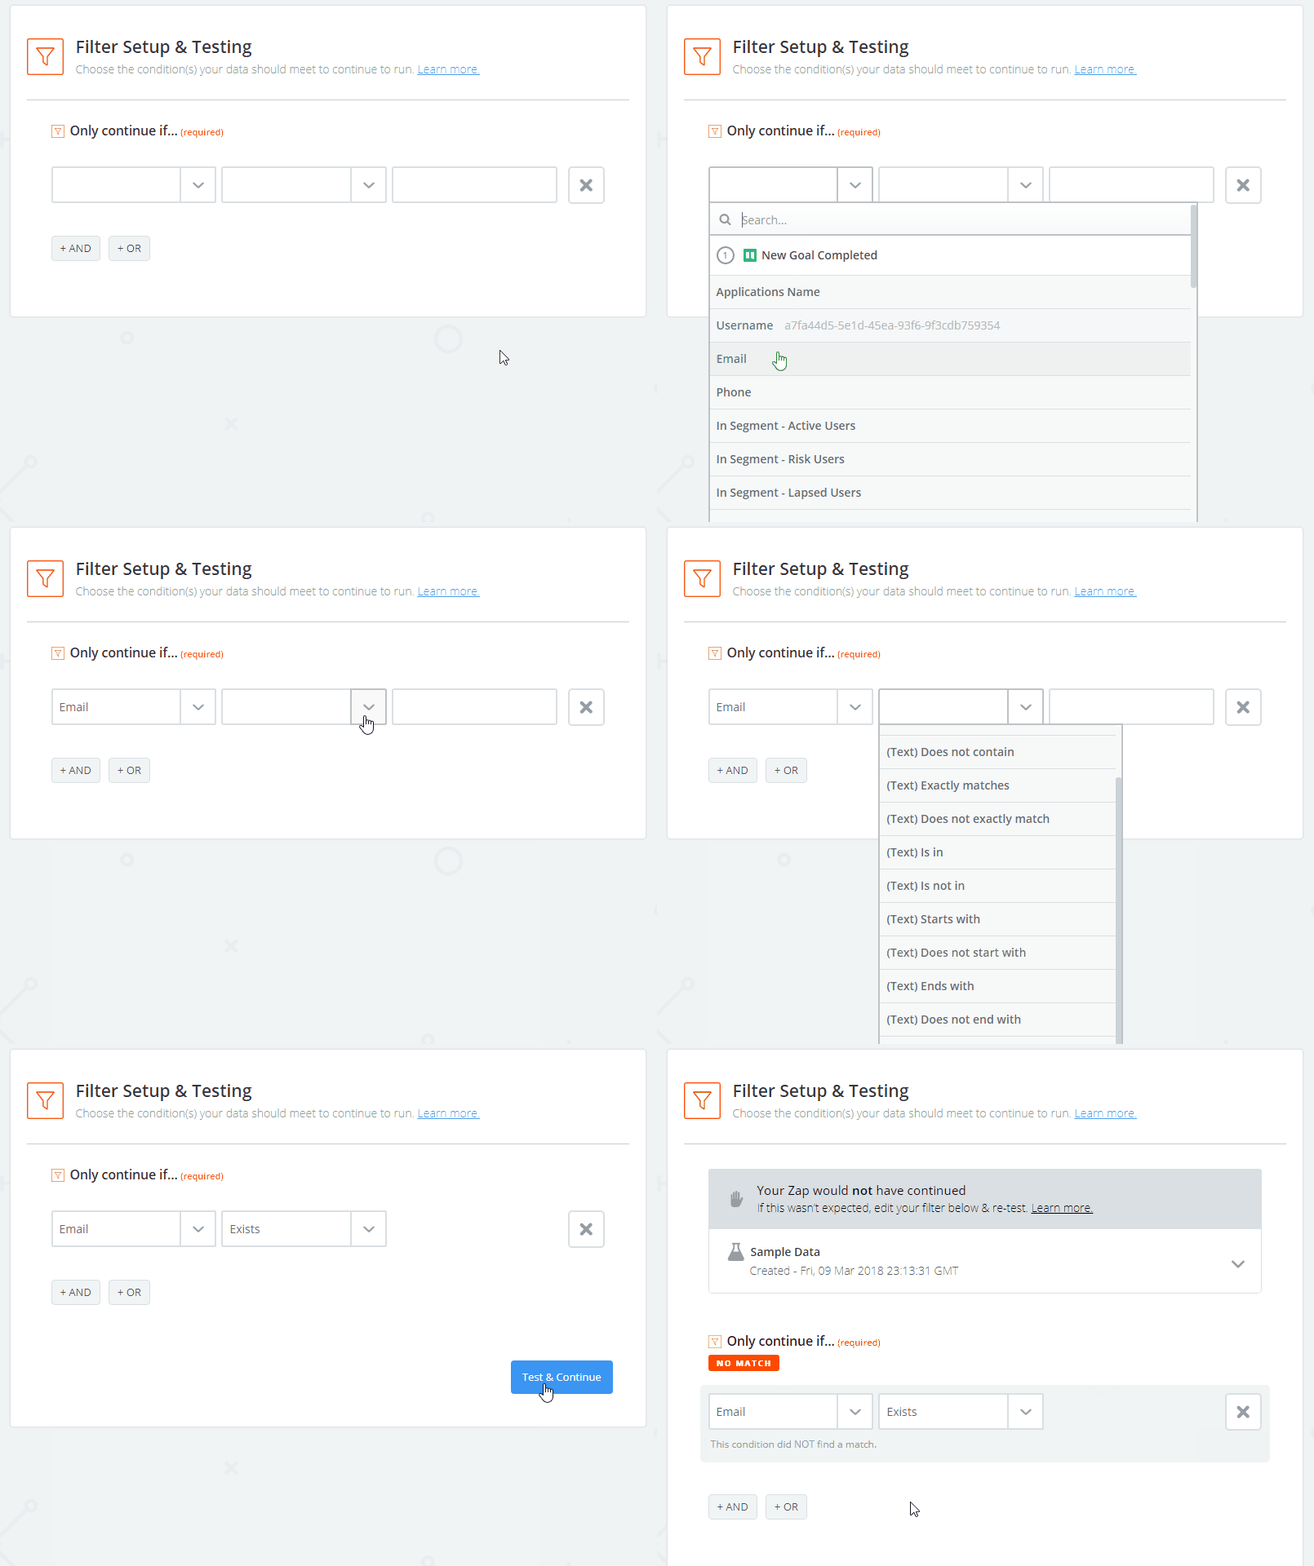
That's it, you are all set! You can now repeat this for any workflows that Zapier provides. We are always improving this integration so continue to check back for new trigger types in the coming months.
Have fun and go crazy!


4. Webhooks as a Zapier action
Your business may use an external system where you need to export Instabot data to that Zapier doesn't support. Don't despair - you can use Zapier webhooks to export Instabot data to any external system that has a RESTful API.
Here's a video that'll help you get started!
Before starting, make sure you've added at least one goal in your bot - see instructions on adding a goal here
- To start, create a new Zap, find Instabot as a trigger app, and select "New Goal Completed" as your trigger.
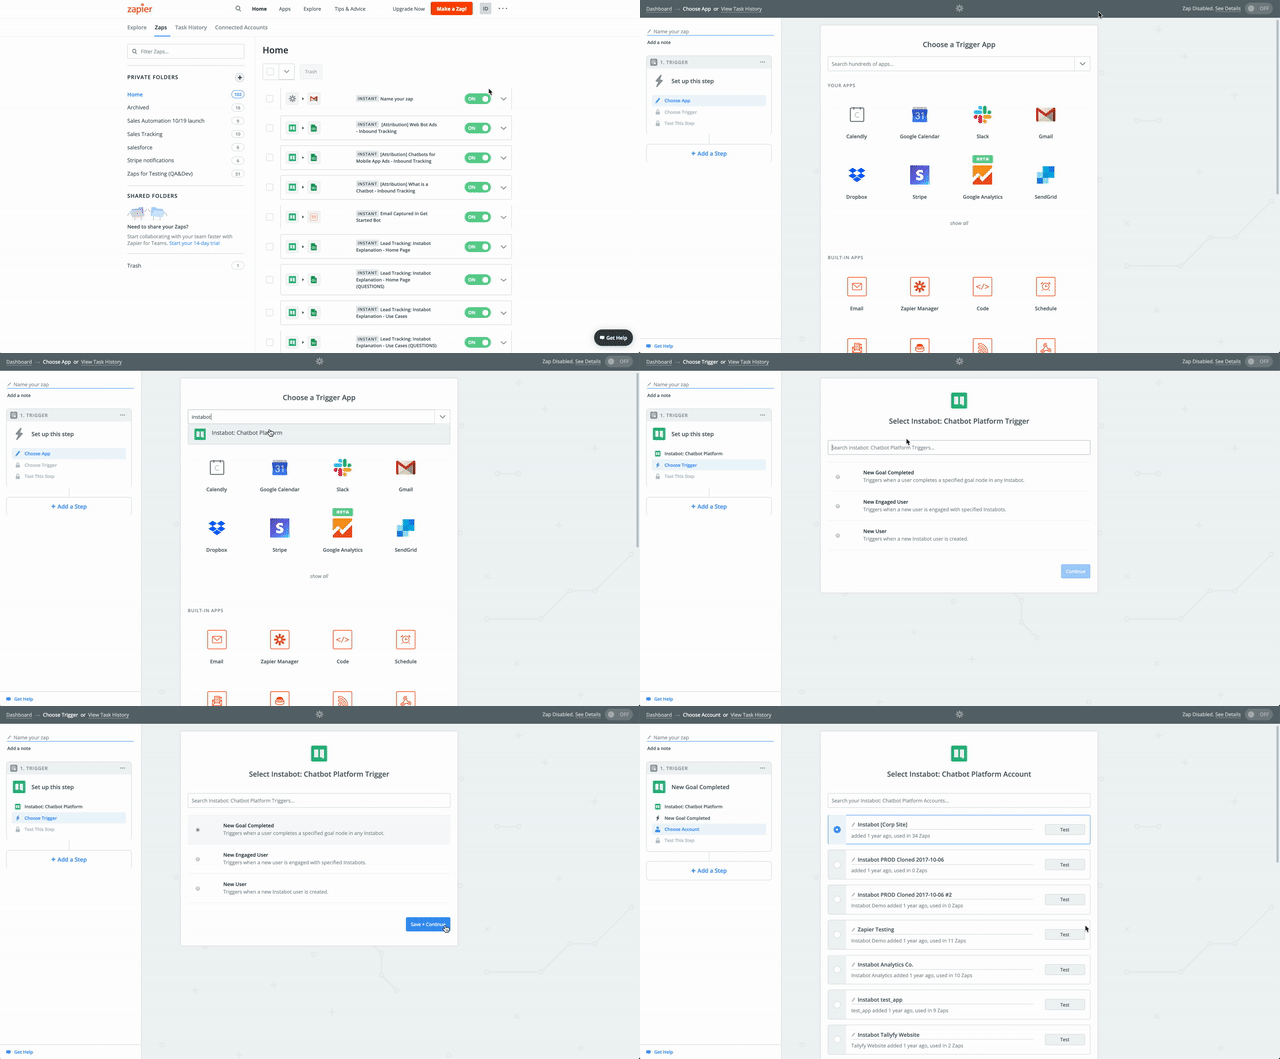
Create a new Zap workflow
- Select your Instabot app (there should only be 1 or 2), find the specific goal that you want to have be your trigger, and confirm the goal.
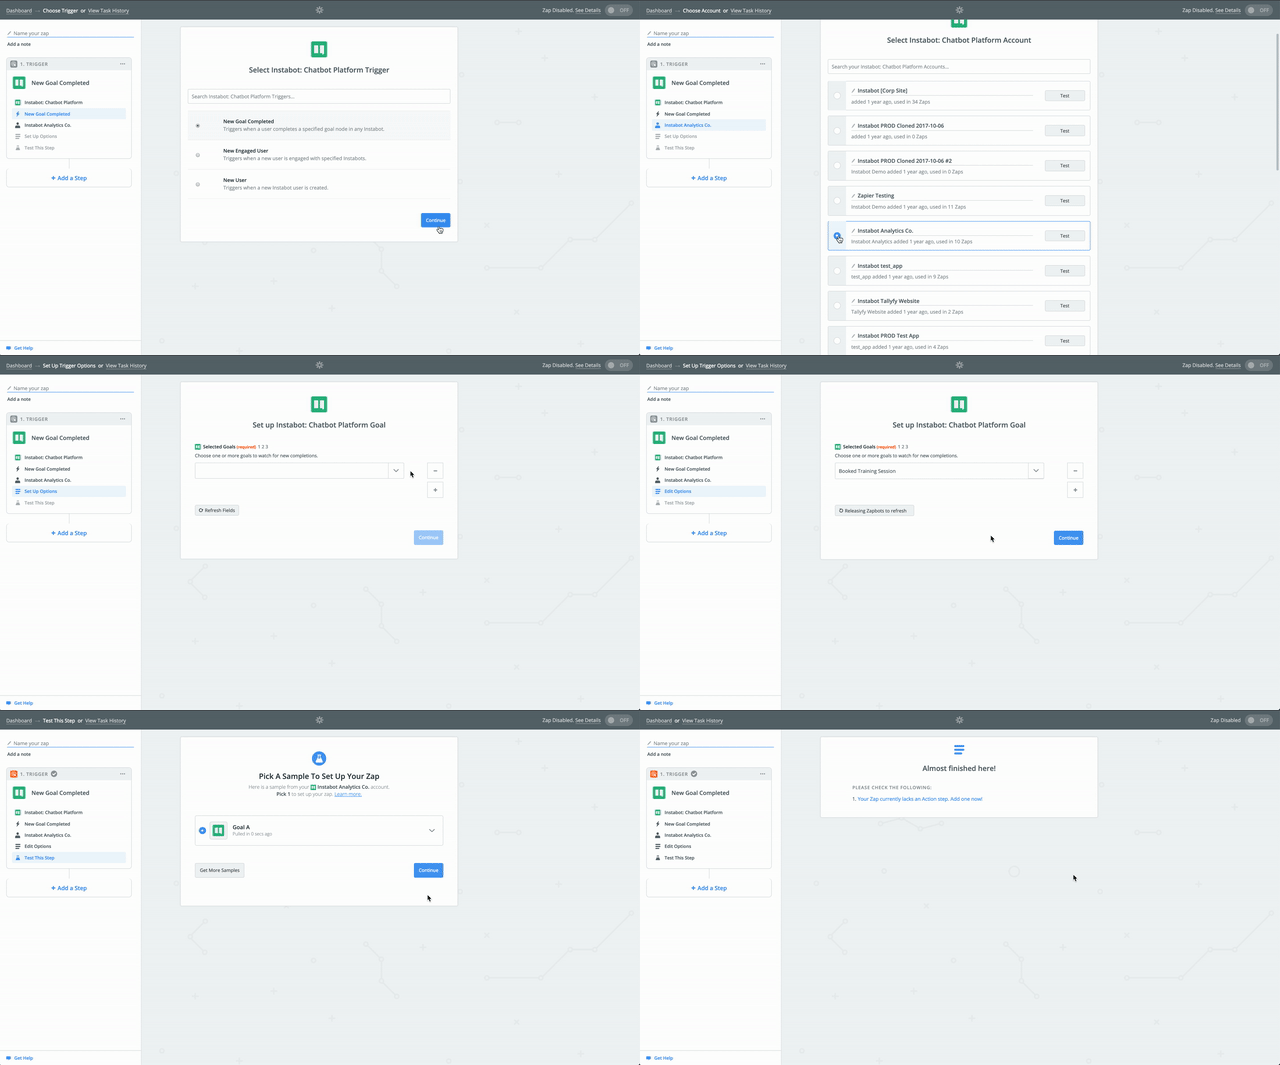
Select the specific goal as your Zapier trigger
- Now, let's add an action. Find webhooks, select the method you want to hit your API with. Finally, configure your API endpoint, and the GET parameters or POST payload to send to your endpoint.
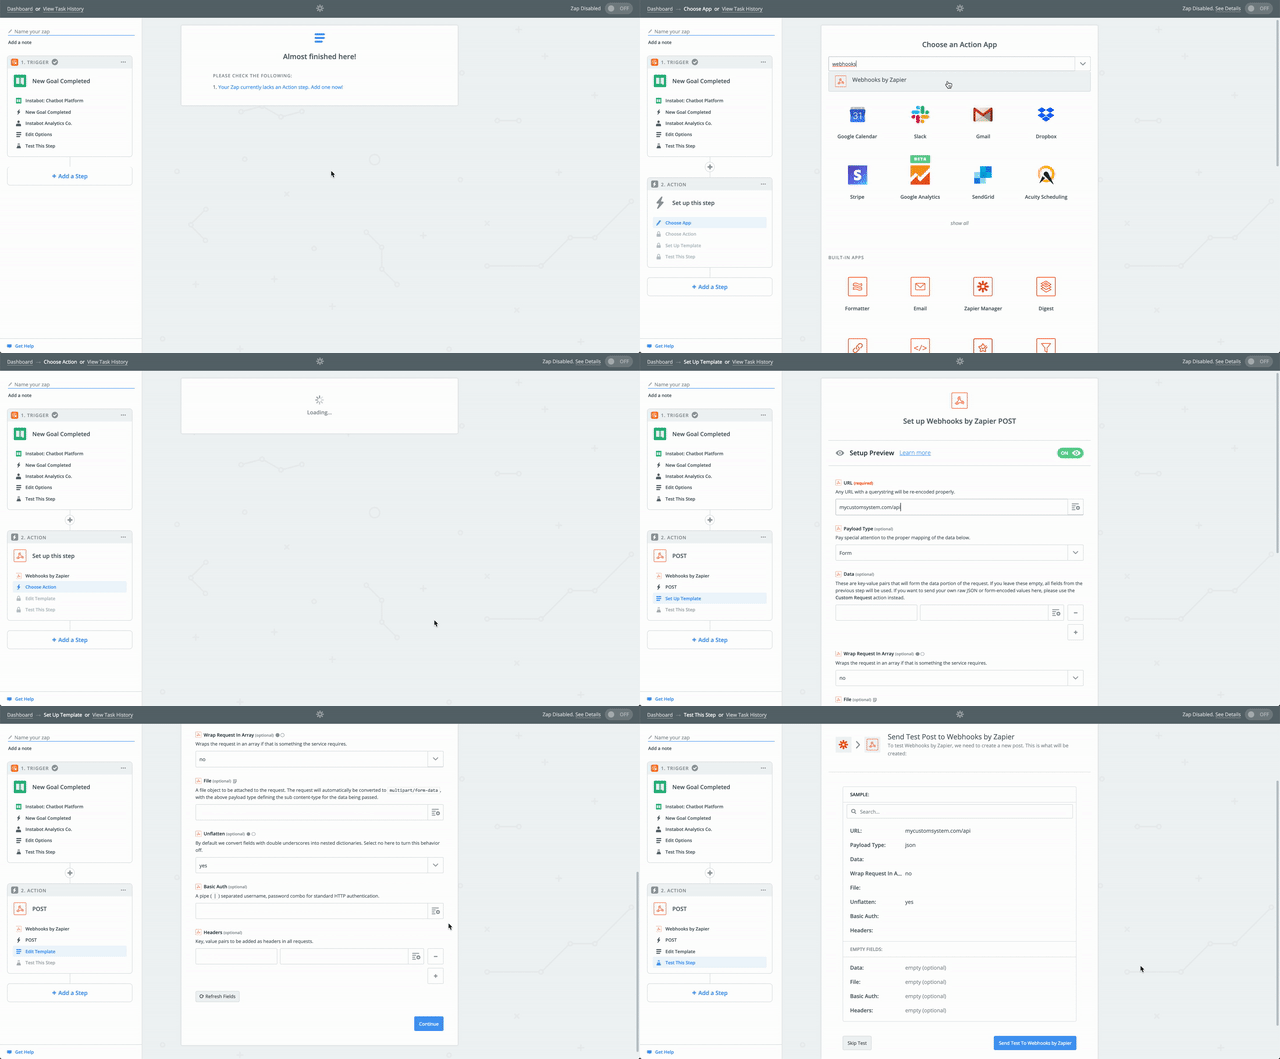
Add the webhooks action and configure your webhook request
Configuring Zapier webhooks
See here for detailed instructions on configuring Zapier webhooks to connect to your custom system's API
Updated over 6 years ago
