Custom Plugins
Create your own node types
Don't have an Instabot account yet?
Custom Plugins from Instabot give you the freedom to create your own node types!
Sometimes your business can face specific situations that require you to implement a special logic or bot behavior. If existing Instabot tools do not cover these cases, you can beef up your 'bot arsenal' by creating a fully customized node suitable for your purposes using JavaScript.
Plugins allow you to integrate Instabot with any external service you want using APIs. In addition, you can use the backend of your website to customize the user experience.
To make custom plugins, you will need technical knowledge of JavaScript. Also, our support team is always here to assist you with embedding code.
Custom Plugins are available on Advanced and Enterprise tiers.
1. Configure your plugin
Build your first plugin:
- In the left navigation menu, select Integrations, then Plugins
- Click Add plugin
Now you can create your first plugin!
General tab
From here you can specify some basic plugin properties:
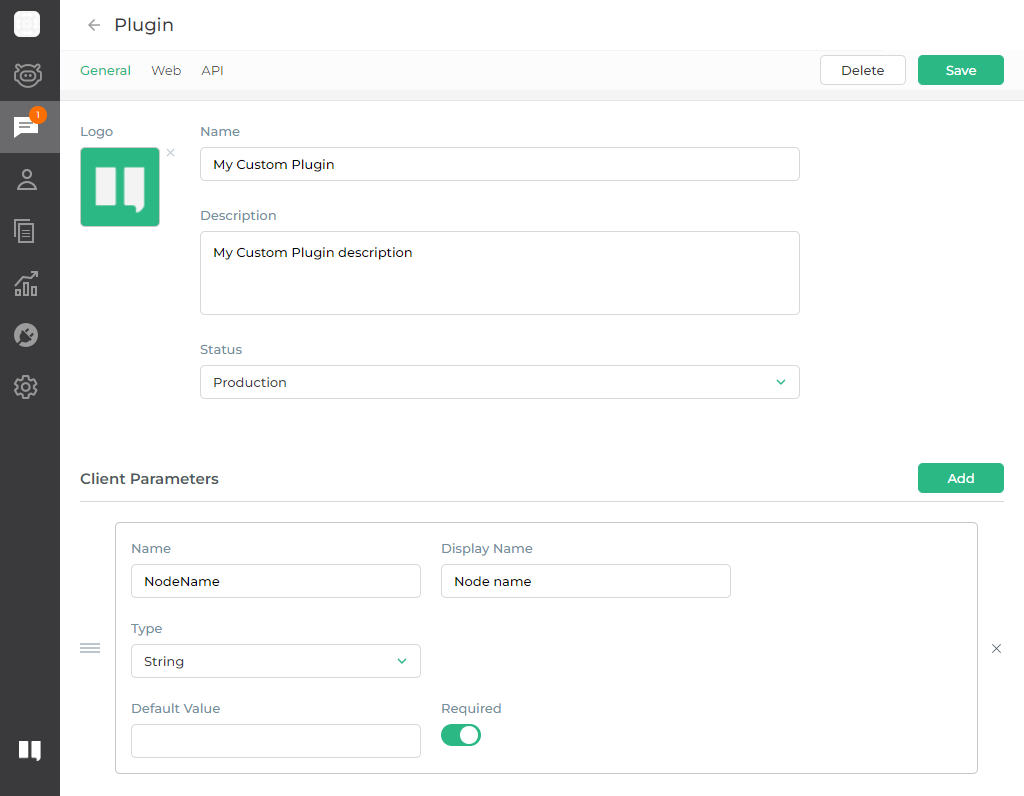
* Name (required)
Name of the plugin
Logo
Logo of the plugin
Description
Description of the plugin
* Status (required)
Status of the plugin
- Disabled - will not be functional
- Release candidate - only admins will be able to add plugin nodes
- Production - admins and agents with Bot Editor permissions will be able to add plugin nodes
Client Parameters
Parameters that will be displayed in the Bot Builder
* Name (required)
The internal name of the parameter that can be used to access its value from the plugin's script
* Display name (required)
Name of the parameter which is going to be shown in the Bot Builder
* Type (required)
Type of the parameter
- String - appears as plain text input
- Boolean - appears as a simple switch
Default value
The value that is going to be prepopulated in the Bot Builder
Required
Indicates whether this parameter is mandatory
Web tab
Here you can specify the scripts that are used when chat is happening in the web widget:
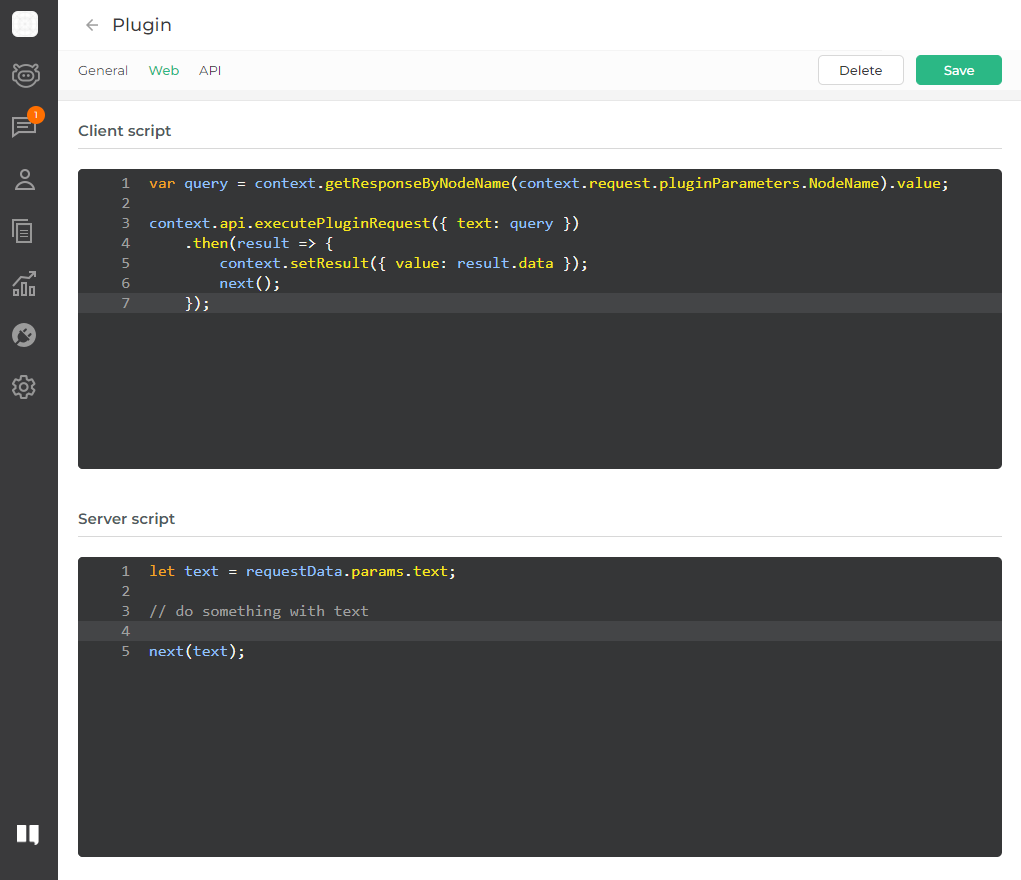
Client script
JavaScript that will be executed when this plugin node is reached in conversation. This works similarly to a script node.
Server script
JavaScript that is executed on the server-side when context.api.executePluginRequest (somedata) is called from the Client script (this feature is not available out of the box, please contact support to activate it)
Sample
var query = context.getResponseByNodeName(context.request.pluginParameters.NodeName).value;

context.api.executePluginRequest({ text: query })
	.then(result => {
  		context.setResult({ value: result.data });
  		next();
	});
let text = requestData.params.text;

// do something with text

next(text);
API tab
Here you can specify the script that is used when chat is happening via API (this feature is not available out of the box, please contact support to activate it)
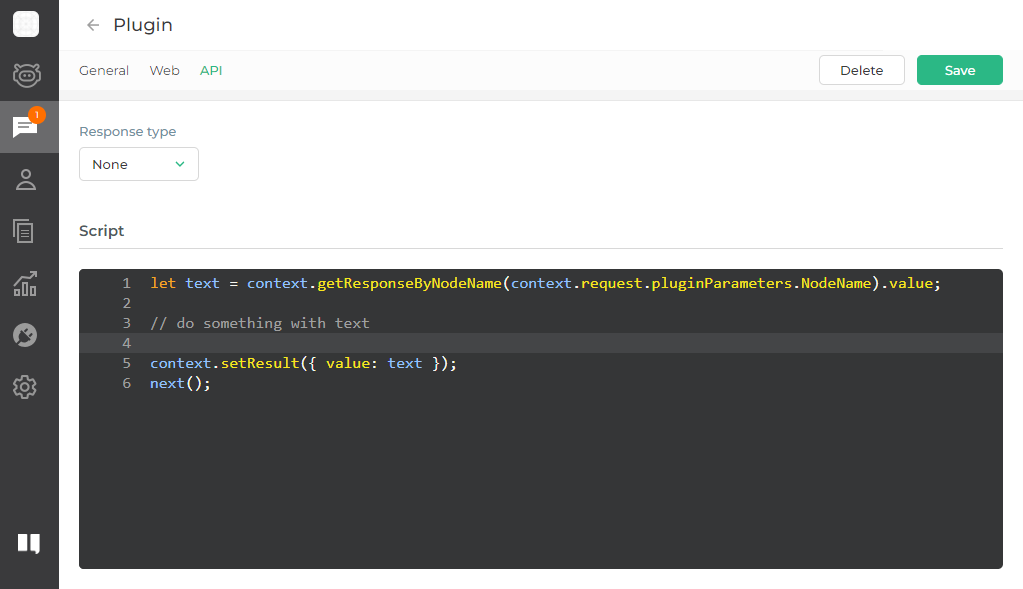
Response type
Indicates how node result should be handled
- None - node result is set via context.setResult({ value: somevalue })
- Include - same as None but result is also returned in API response if context.setResult({ objValue: someObjValue }) is called
- Require - node requires response from user which is going to be node result
Sample
let text = context.getResponseByNodeName(context.request.pluginParameters.NodeName).value;

// get metadata
let metadata = context.getMetadata();

// do something with text

context.setResult({ objValue: { text: text } });
next();
Script
JavaScript that is executed on the server side, the context is quite similar to what we have for Client script, but some things aren't supported
2. Add your plugin into your bot
In the bot-builder, add a node --> Advanced:
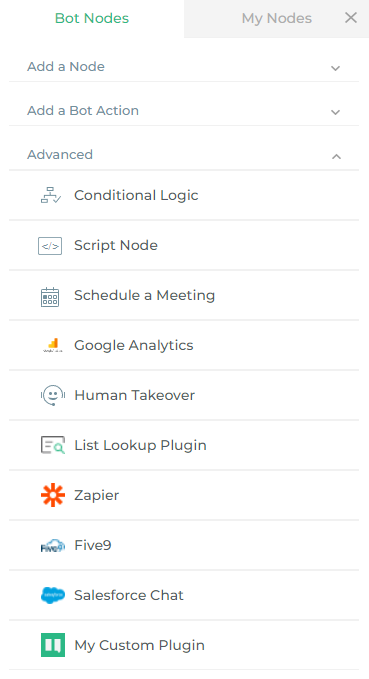
Find your plugin by name and click on it:
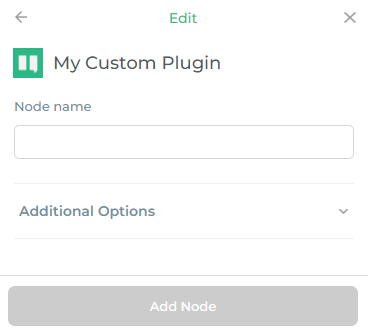
Fill out the values for Client Parameters that were defined for plugin and you're good to go!
Updated almost 3 years ago
