WIX
Integrate web Instabot into your WIX website
Don't have an Instabot account yet?
Overview
This page will guide you through inserting web Instabot into any page of your WIX hosted site.
Prerequisites
WIX requires you to have a Business account. See subscriptions here
Your WIX site must be published on your domain.
Add Instabot to your WIX site
IMPORTANT
You only have to perform these steps once! Once the Instabot code is inserted into your website, you can change your Instabot's location, behavior, and content in the portal without touching any code, ever again!
- After you log into your WIX site search for the Tracking and Analytics page. It is found in the side menu after selecting Manage Website.
-
From here, select the + New Tool button in the top right.
-
Select the </> Custom Option
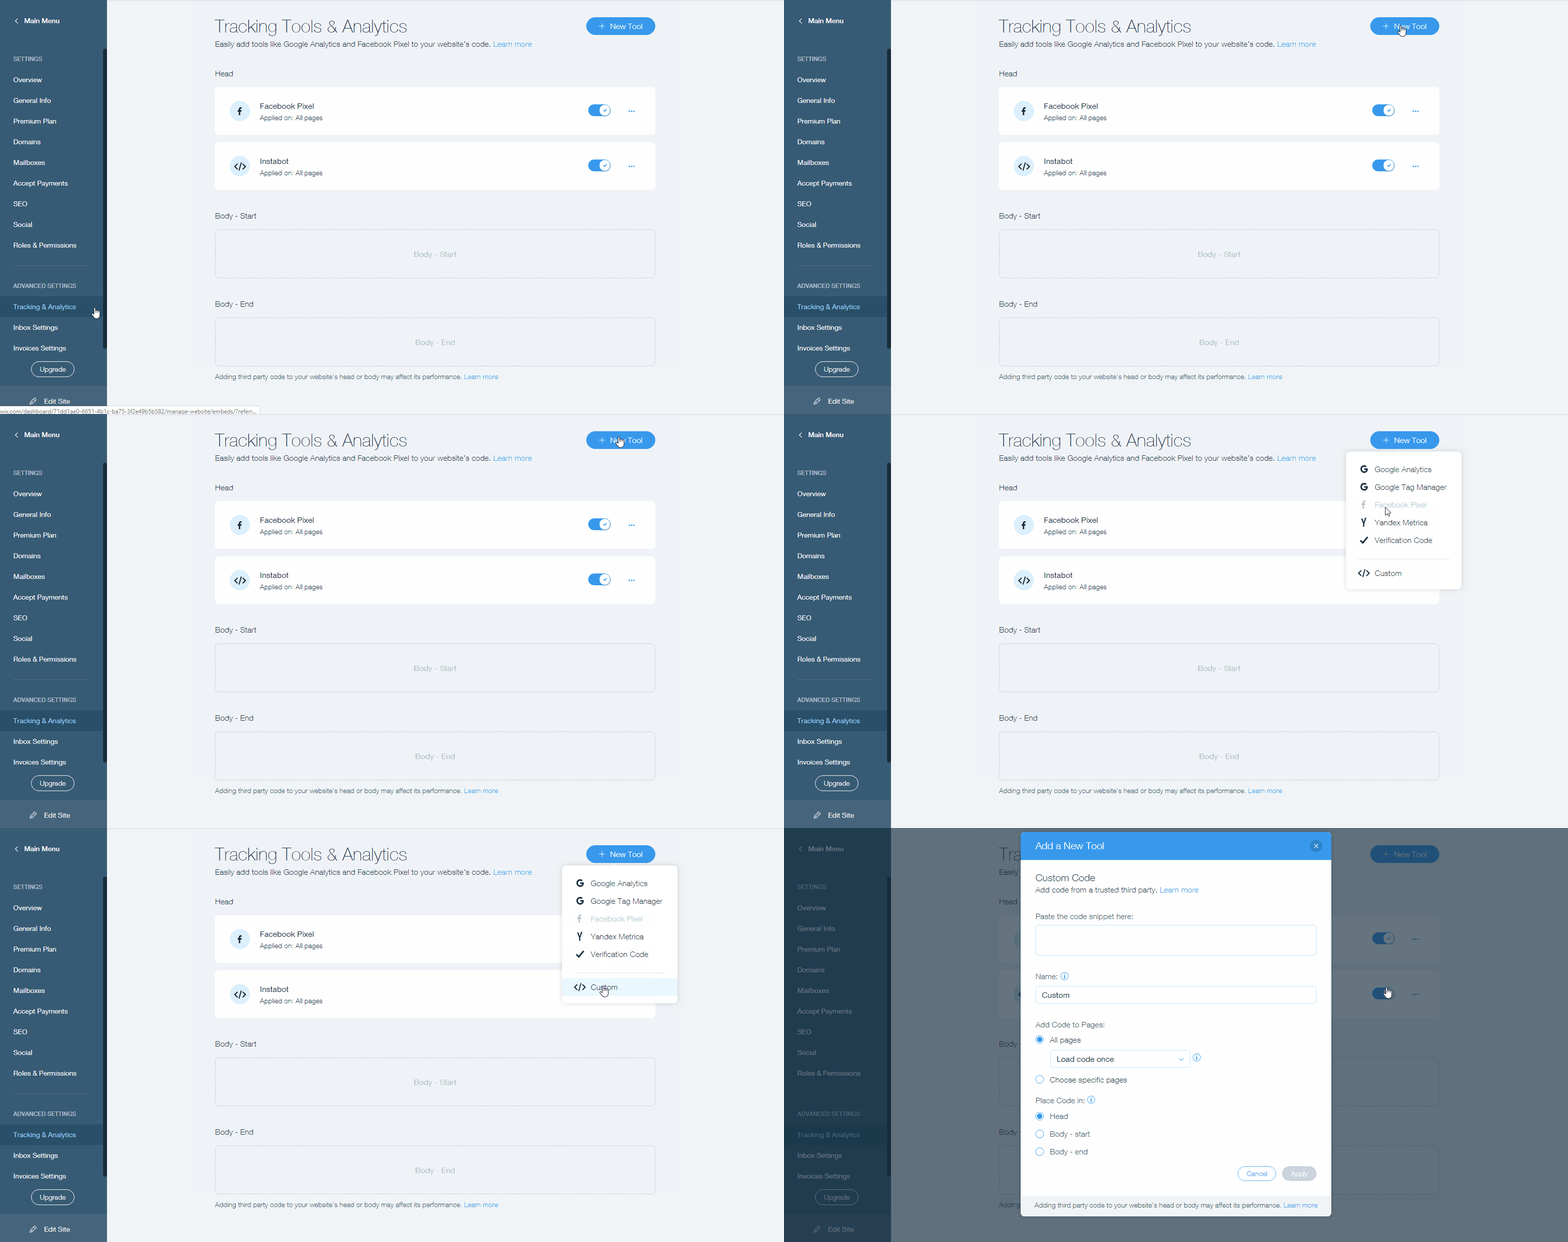
If you do not have a WIX business subscription or have not published your bot yet on your domain, you will not be able to continue.
- In the Instabot portal, click 'Settings' in the side-panel - this is where you will find your Instabot JavaScript
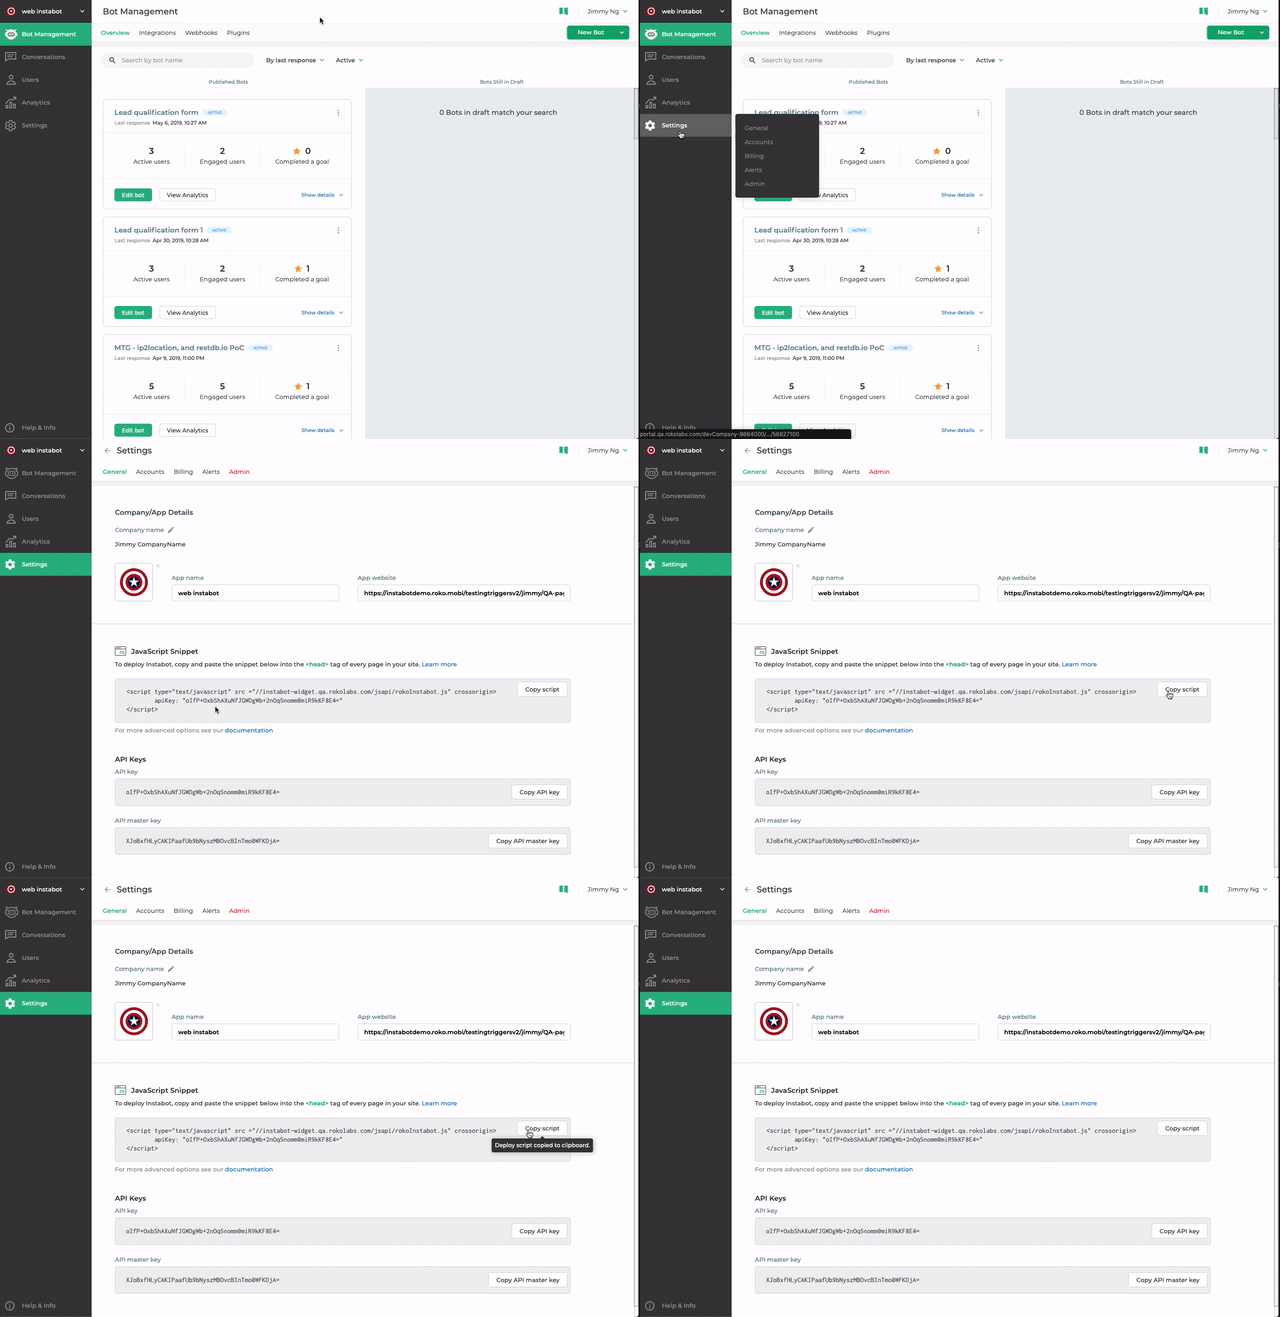
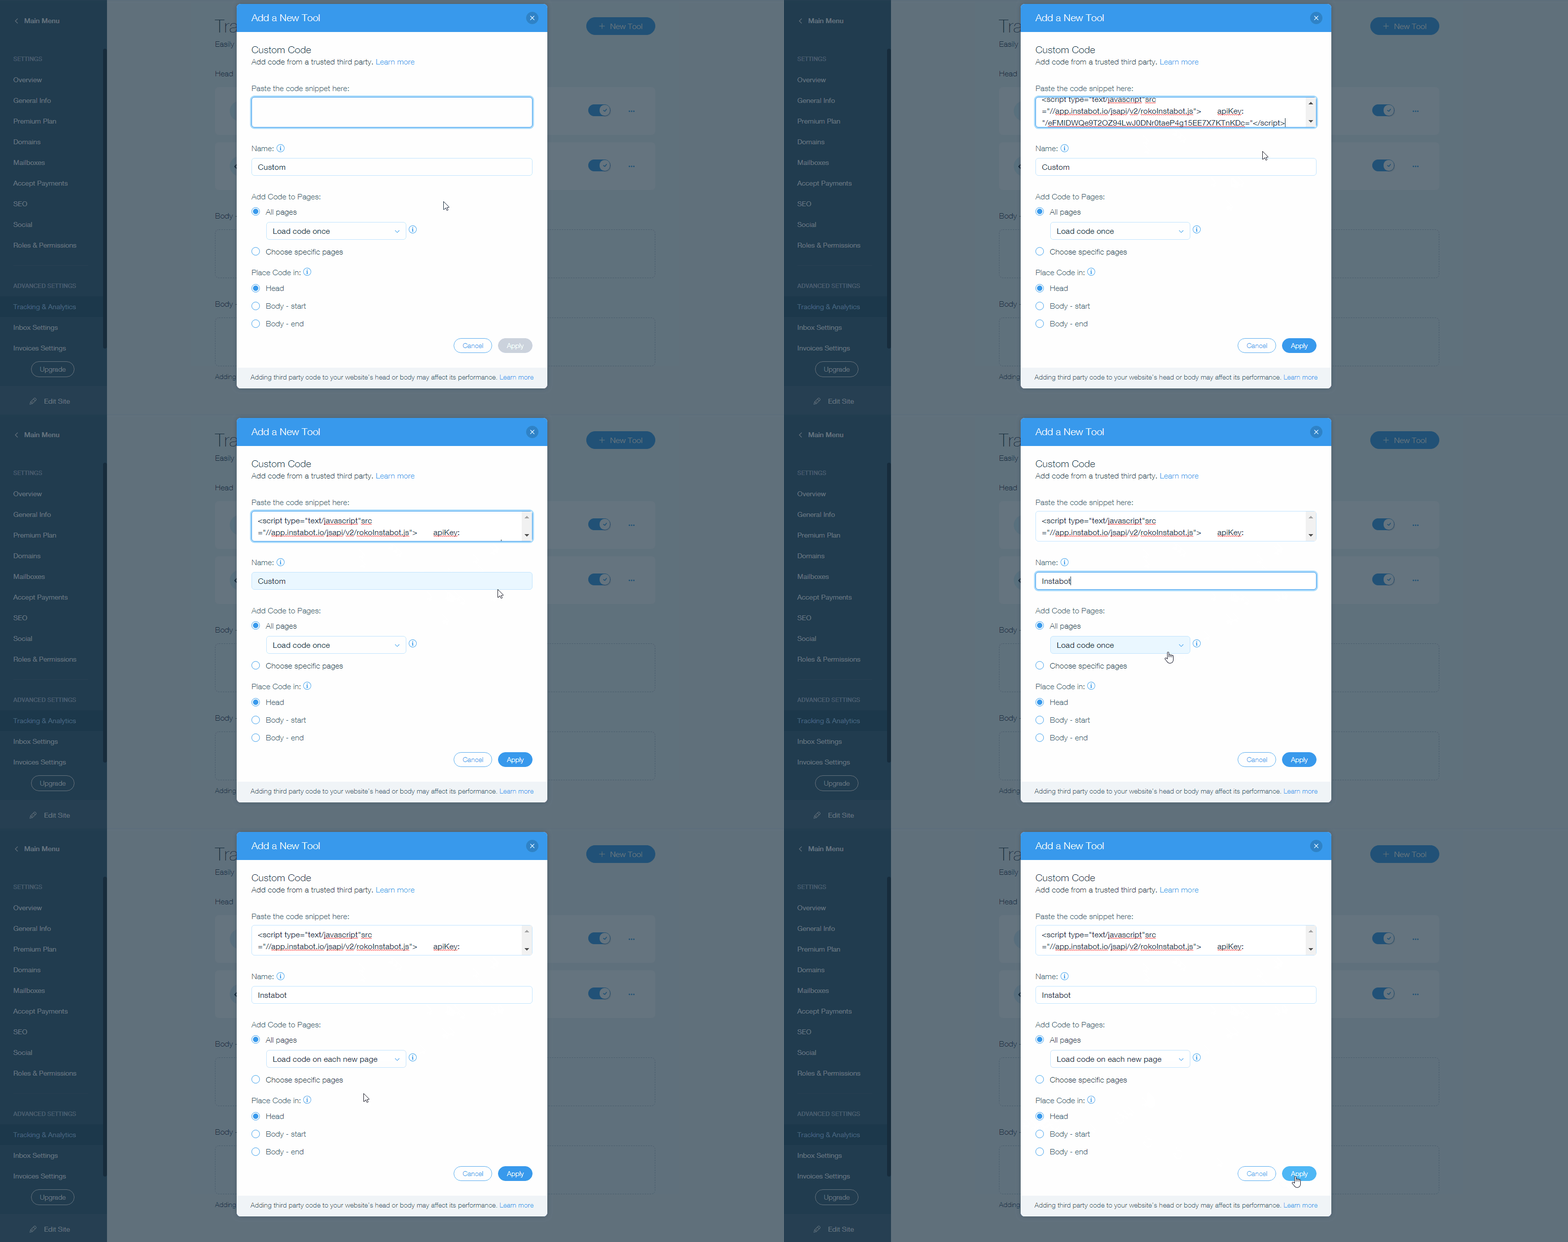
- Paste the JavaScript in the Custom Code field in WIX.
-
Set the name of this custom code to "Instabot" for your reference later.
-
Select Load code on each page
-
Make sure that the code is placed in the Head.
-
Apply the code. You will see it listed in the Tracking Tools & Analytics list.
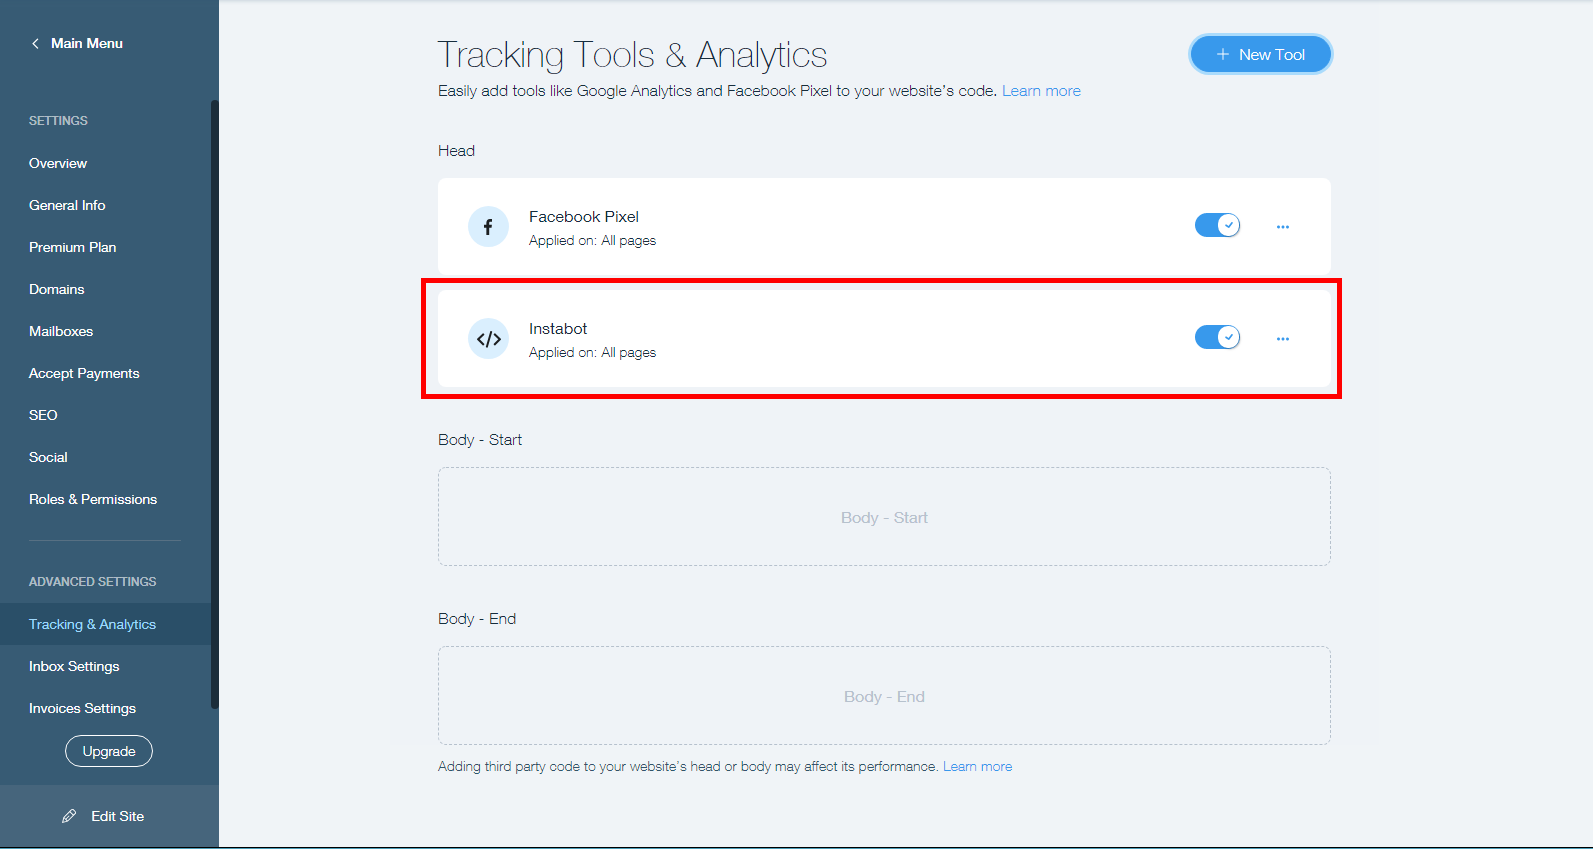
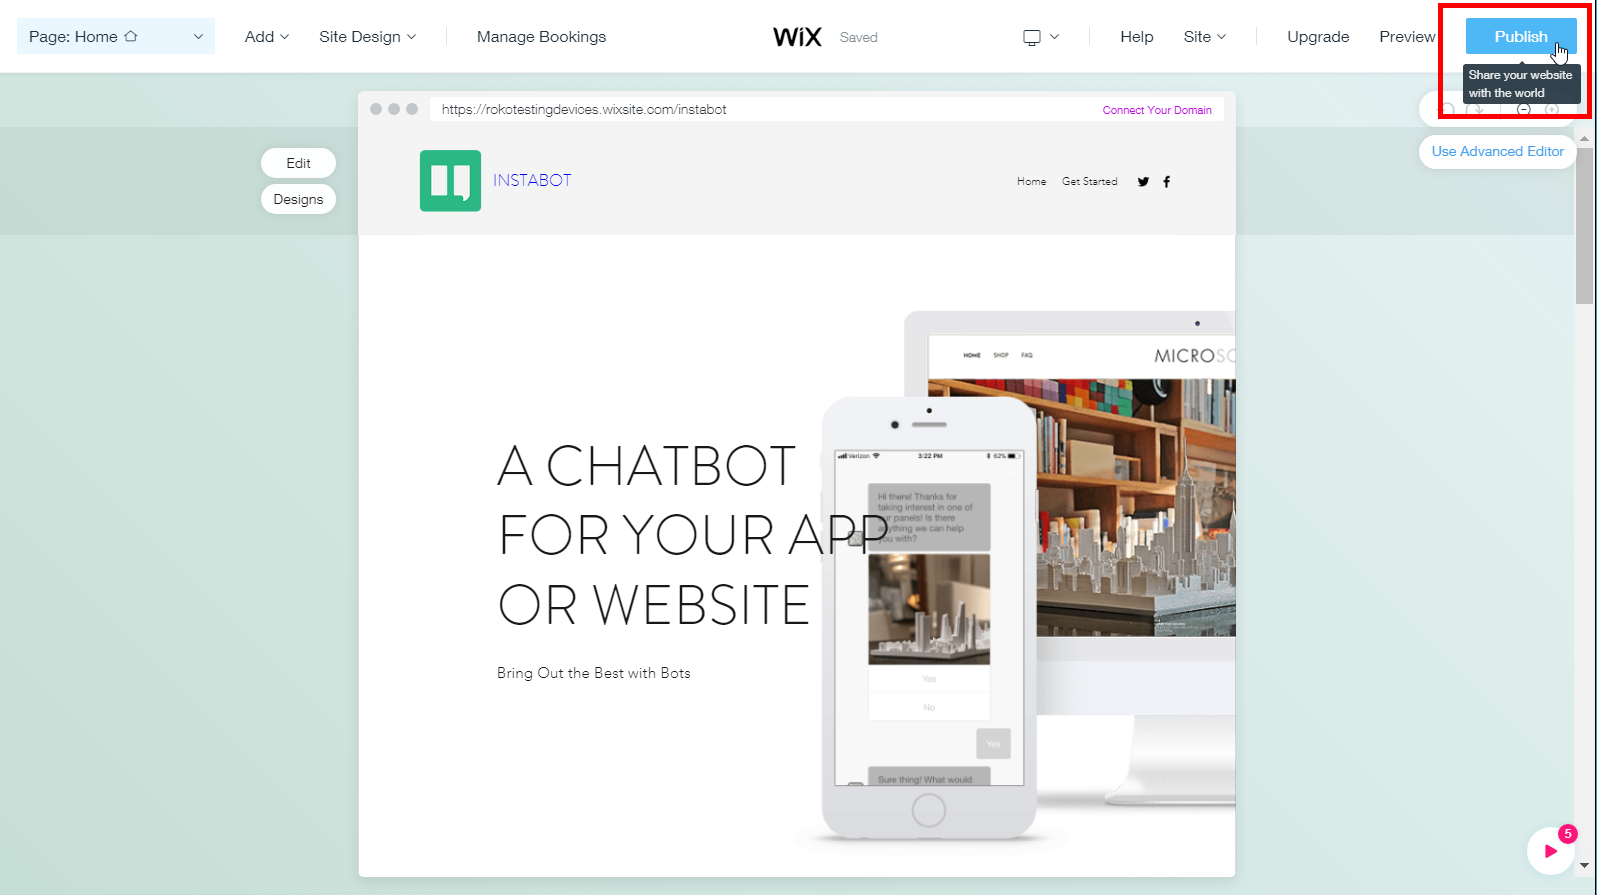
- Go back to your site editor in WIX and publish these changes.
That's it! Now, open your conversation in the Instabot portal, finalize the triggers, click deploy, and Instabot will begin appearing in your website!
Updated about 3 years ago
