Prepare and set up the intent in your Dialogflow account
It is important to note that incorporating successful NLP will require some effort to train and curate the data so it gives correct responses to the questions your visitors are asking. By continuously monitoring your Dialogflow input phrases, you can make your bot smarter and more dynamic over time.
Unlike the generic NLP node that we learned to use in the article above, the Dialogflow node will require data preparation and work on the Dialogflow console for setting up your data and training the NLP algorithm.
We recommend starting with a simple strategy which:
- Use a decision tree in your bot scenario and layer in NLP little by little over short time frames, as you gain more insights from users
- Start integrating only NLP for one node
- Use NLP for only one skill set
To implement this strategy, you will need first:
- Identify the objective that you would like to achieve with the NLP node, for example, to answer questions about pricing.
- Collect common questions/phrases/expressions from users when they ask about the objective, in this case, different ways that users can ask/request pricing information.
Then, you have to set up the intent in your Dialogflow account. This action includes the following tasks:
- Create the “Intent” in the Dialogflow console. For this example, the intent will be named “Pricing”
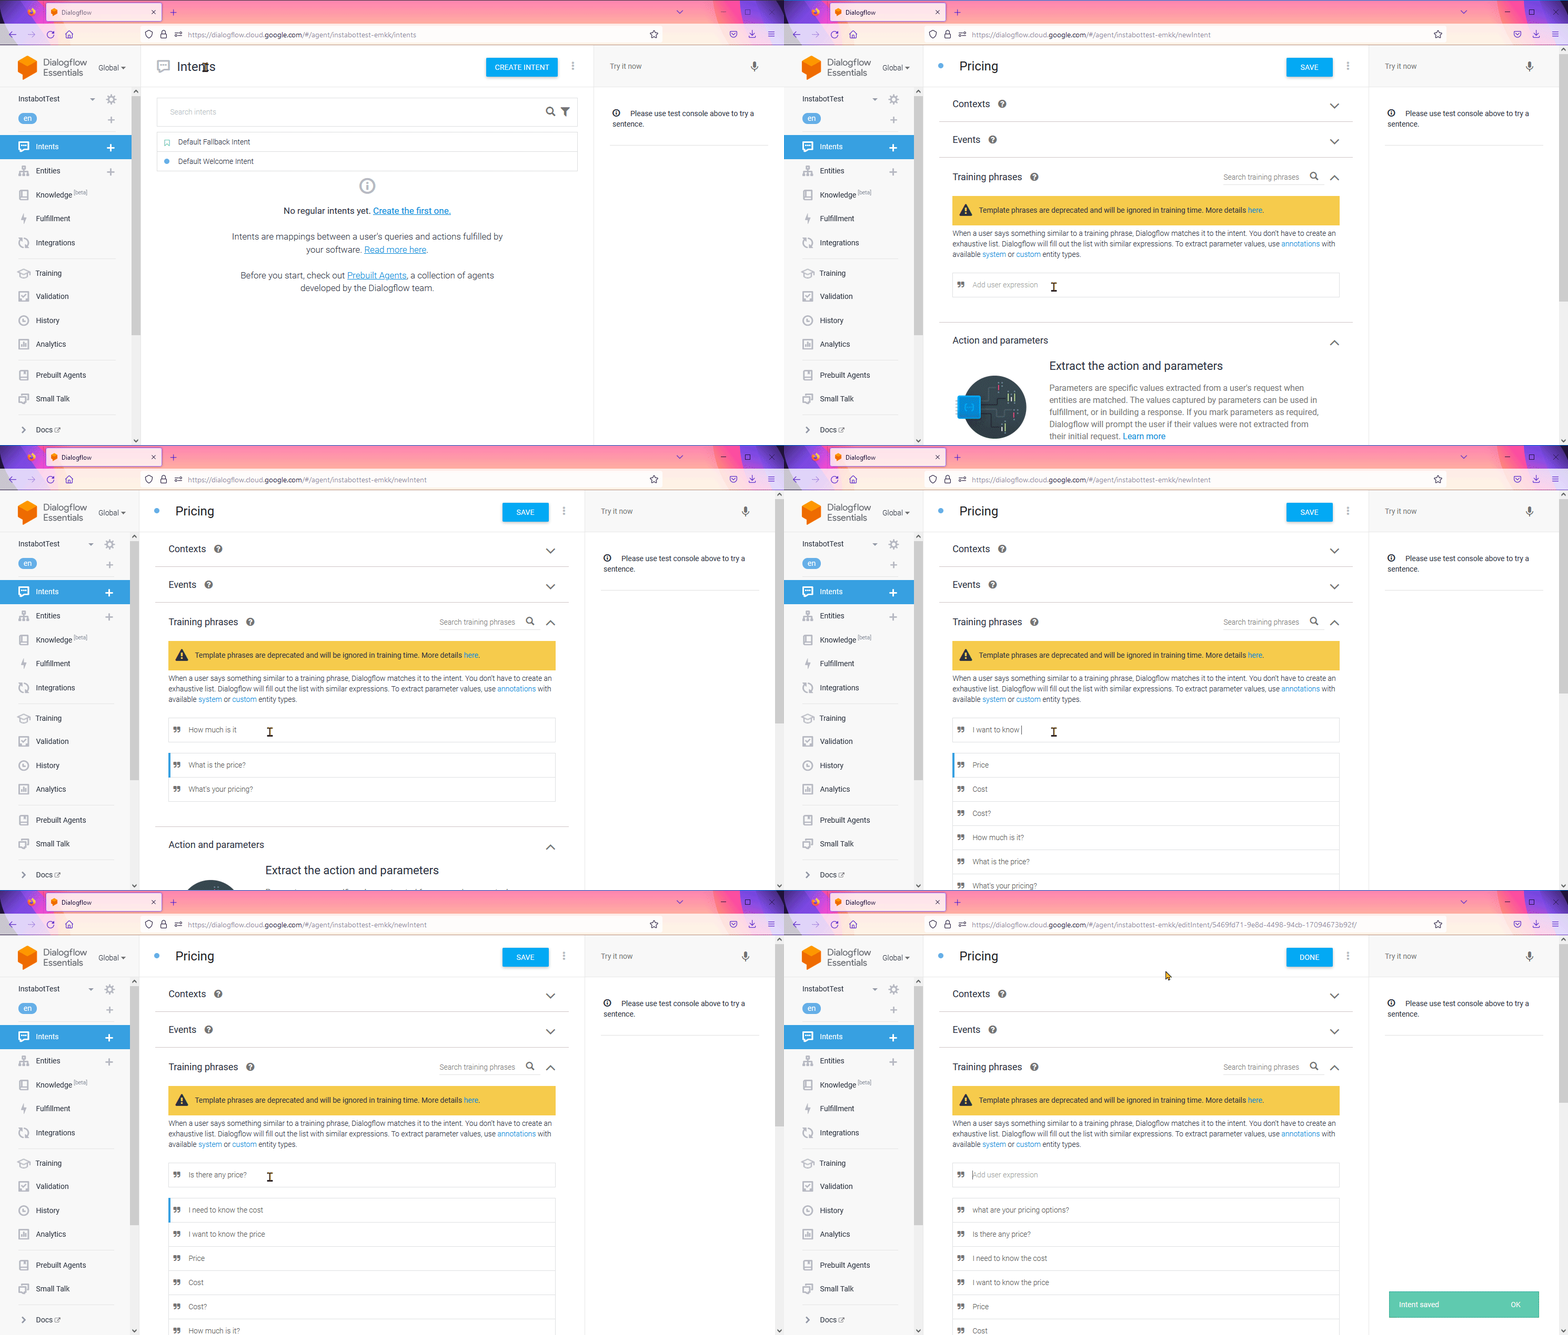
- Add into Dialogflow the questions/phrases/expressions for that specific intent that you collected previously. We recommend at least adding 50 of them. This set will be your training data
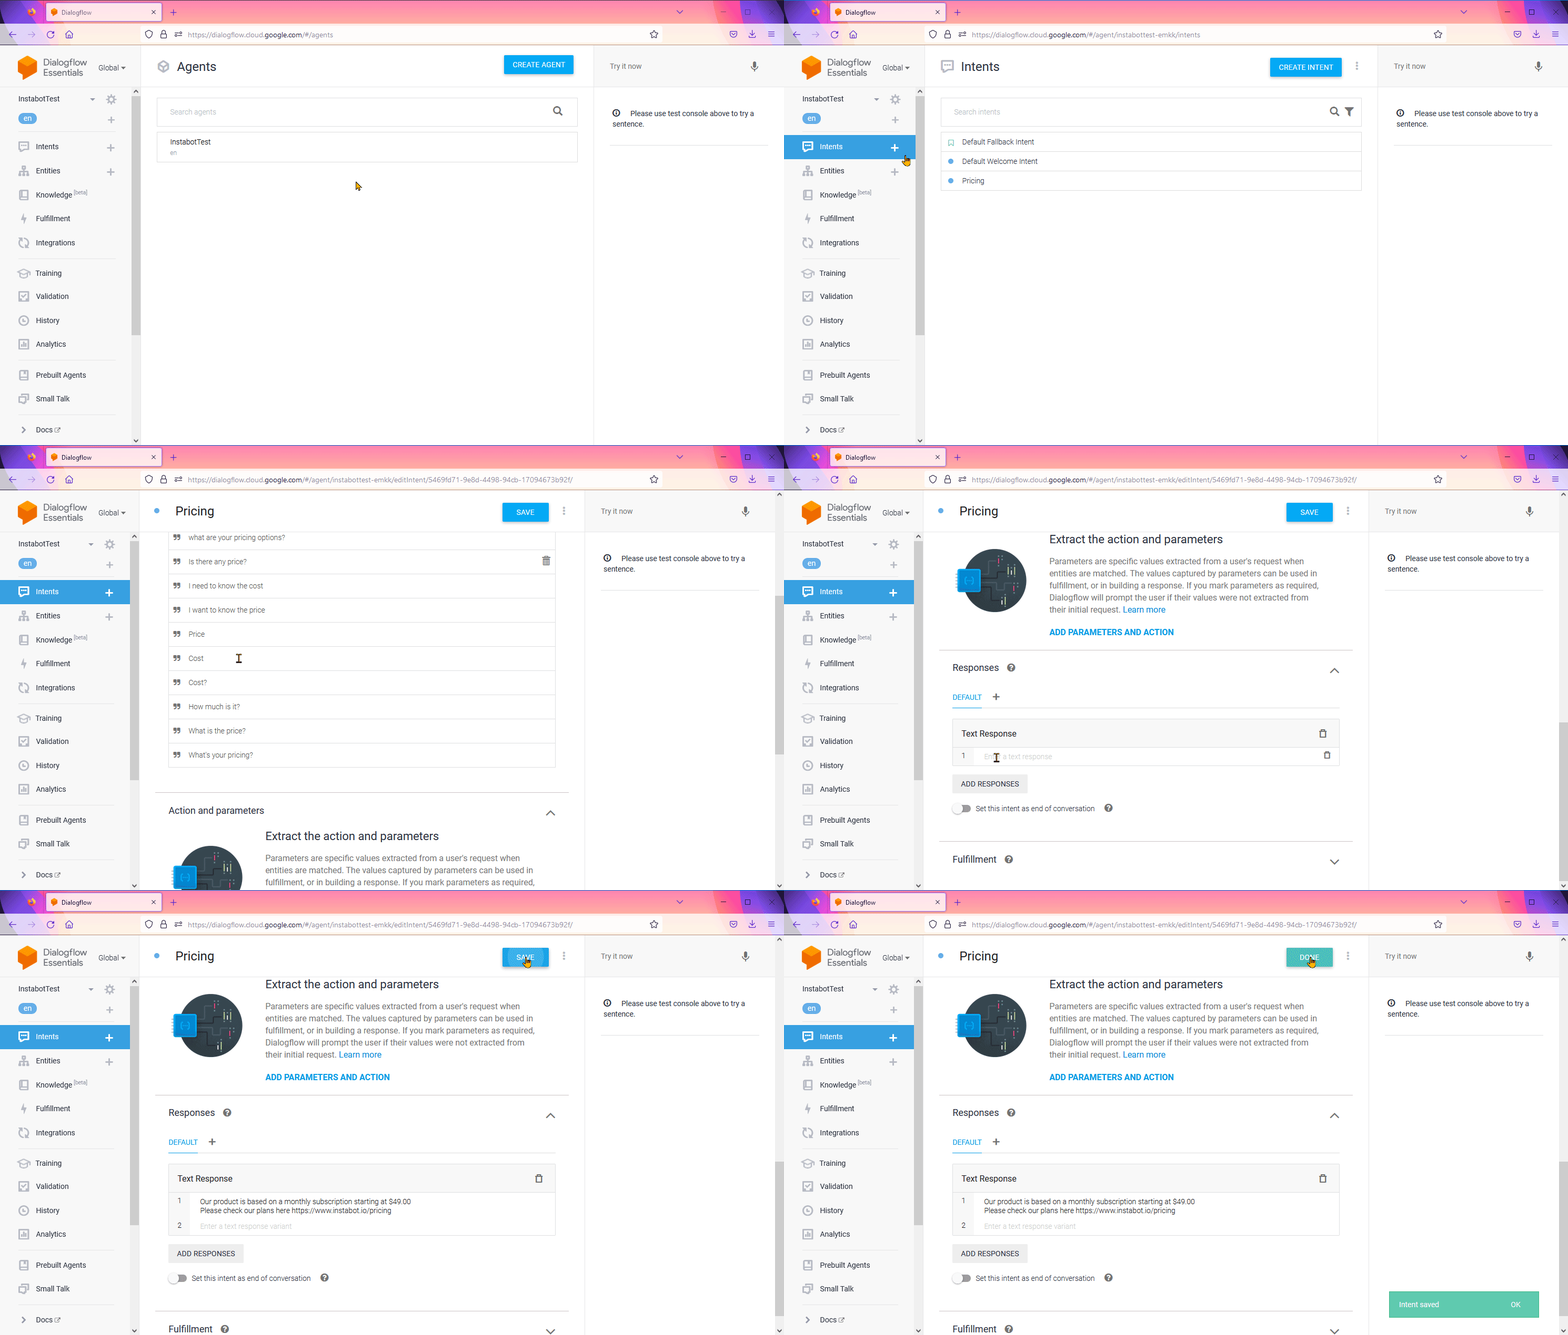
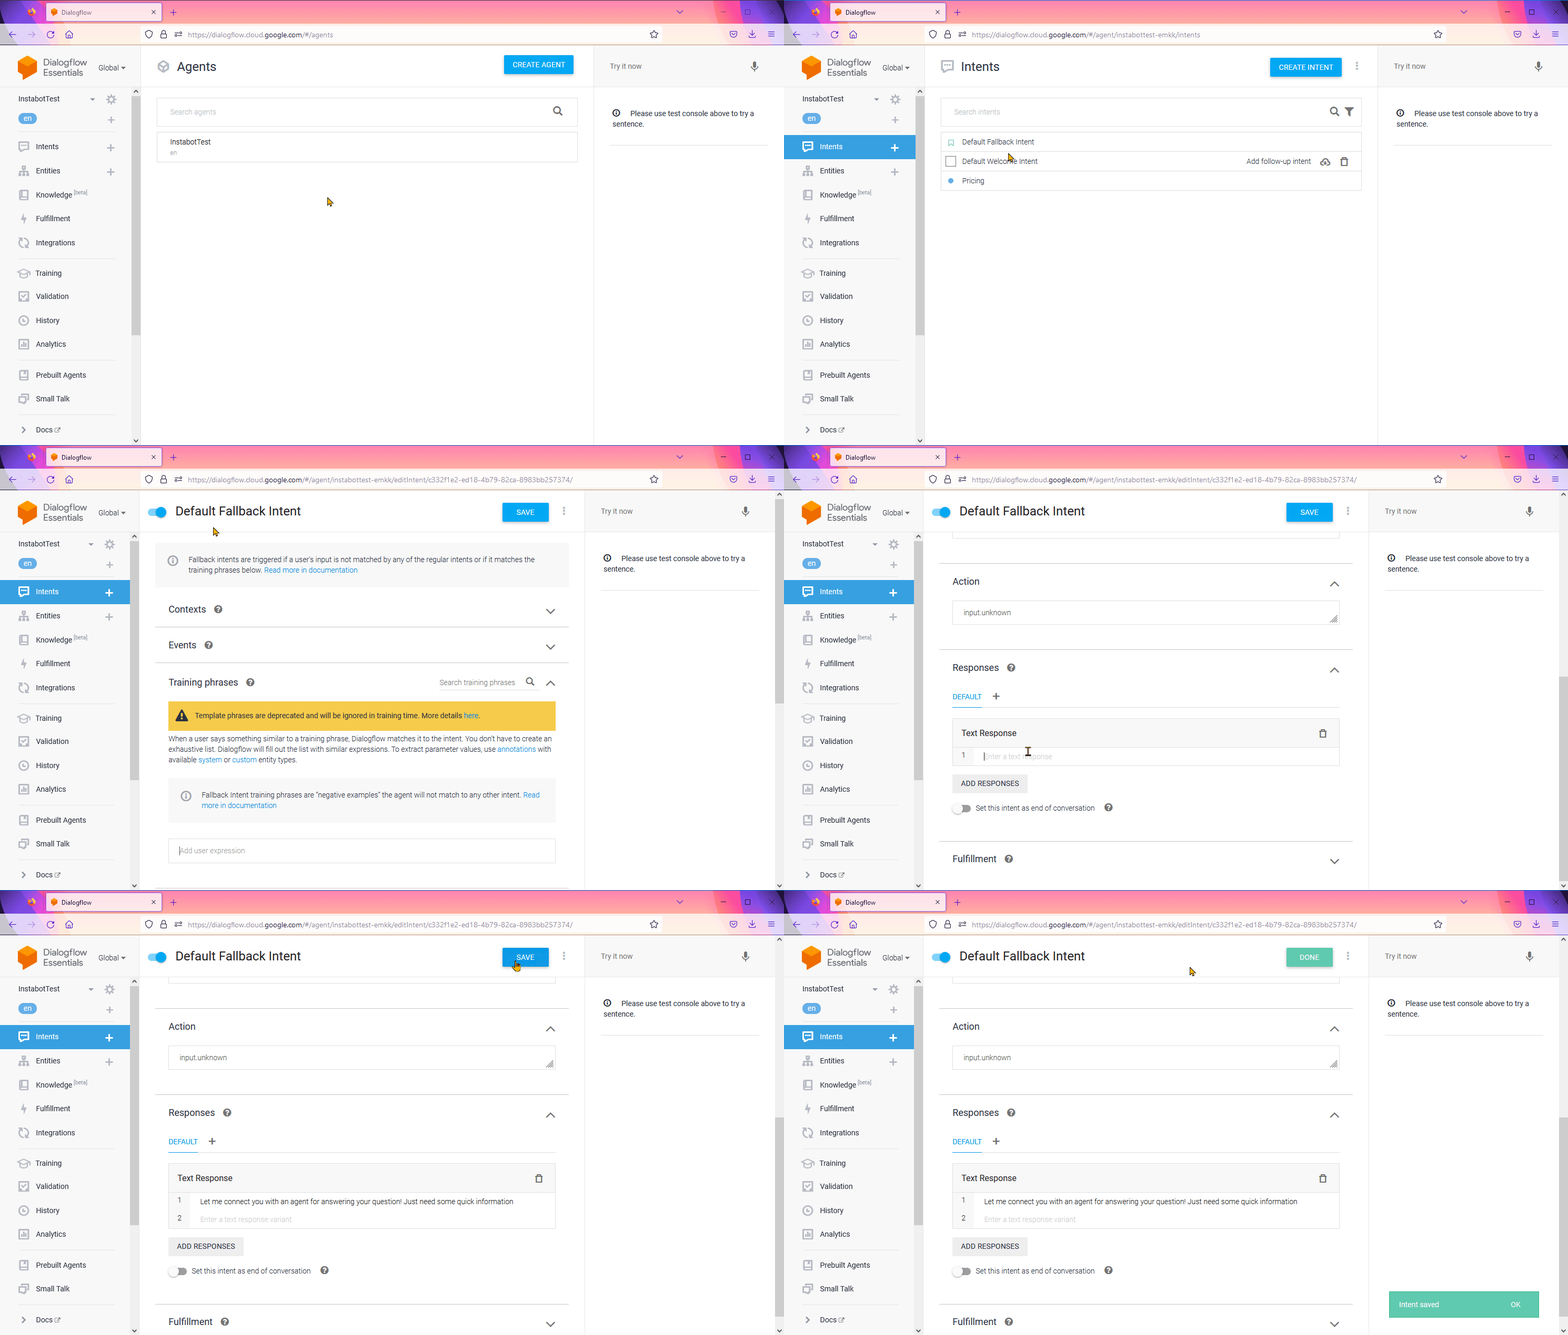
- Create the responses for the intent. You will need 2 responses:
One response for when Dialogflow concludes that the users language has the goal of finding out about the pricing in the case of this example
Another response for the “Fallback Intent”. It will be used when Dialogflow is unsure what the user wants to do and it doesn’t match any “intent” in the system
Let’s see in the following videos how to do these tasks in your Dialogflow account.
1. Log into the Dialogflow console
Be sure to log in with the same Gmail address that you use for creating the agent and generating the account key that you uploaded to Instabot. If you need to check how to do this, please read this article.
2. Create an intent in Dialogflow
In your Dialogflow account, go to Intents in the side panel and click the “+” plus sign. Then let’s name that intent, “Pricing” and click, “Save”. Next, add the training phrases by clicking on the “Add Training Phrases” button.

Create an Intent in Dialogflow
3. Add the response for your intent
In your Dialogflow account, go to Intents in the side panel, select the intent created in the step above, and complete the “Text Response” field.

Add the response
4. Add the response for the Fallback Intent
Dialogflow provides a Default Fallback Intent. You just need to complete the response for that intent by selecting it from the intent list and entering the response in the “Text Response” field.

Add the response for the Fallback Intent
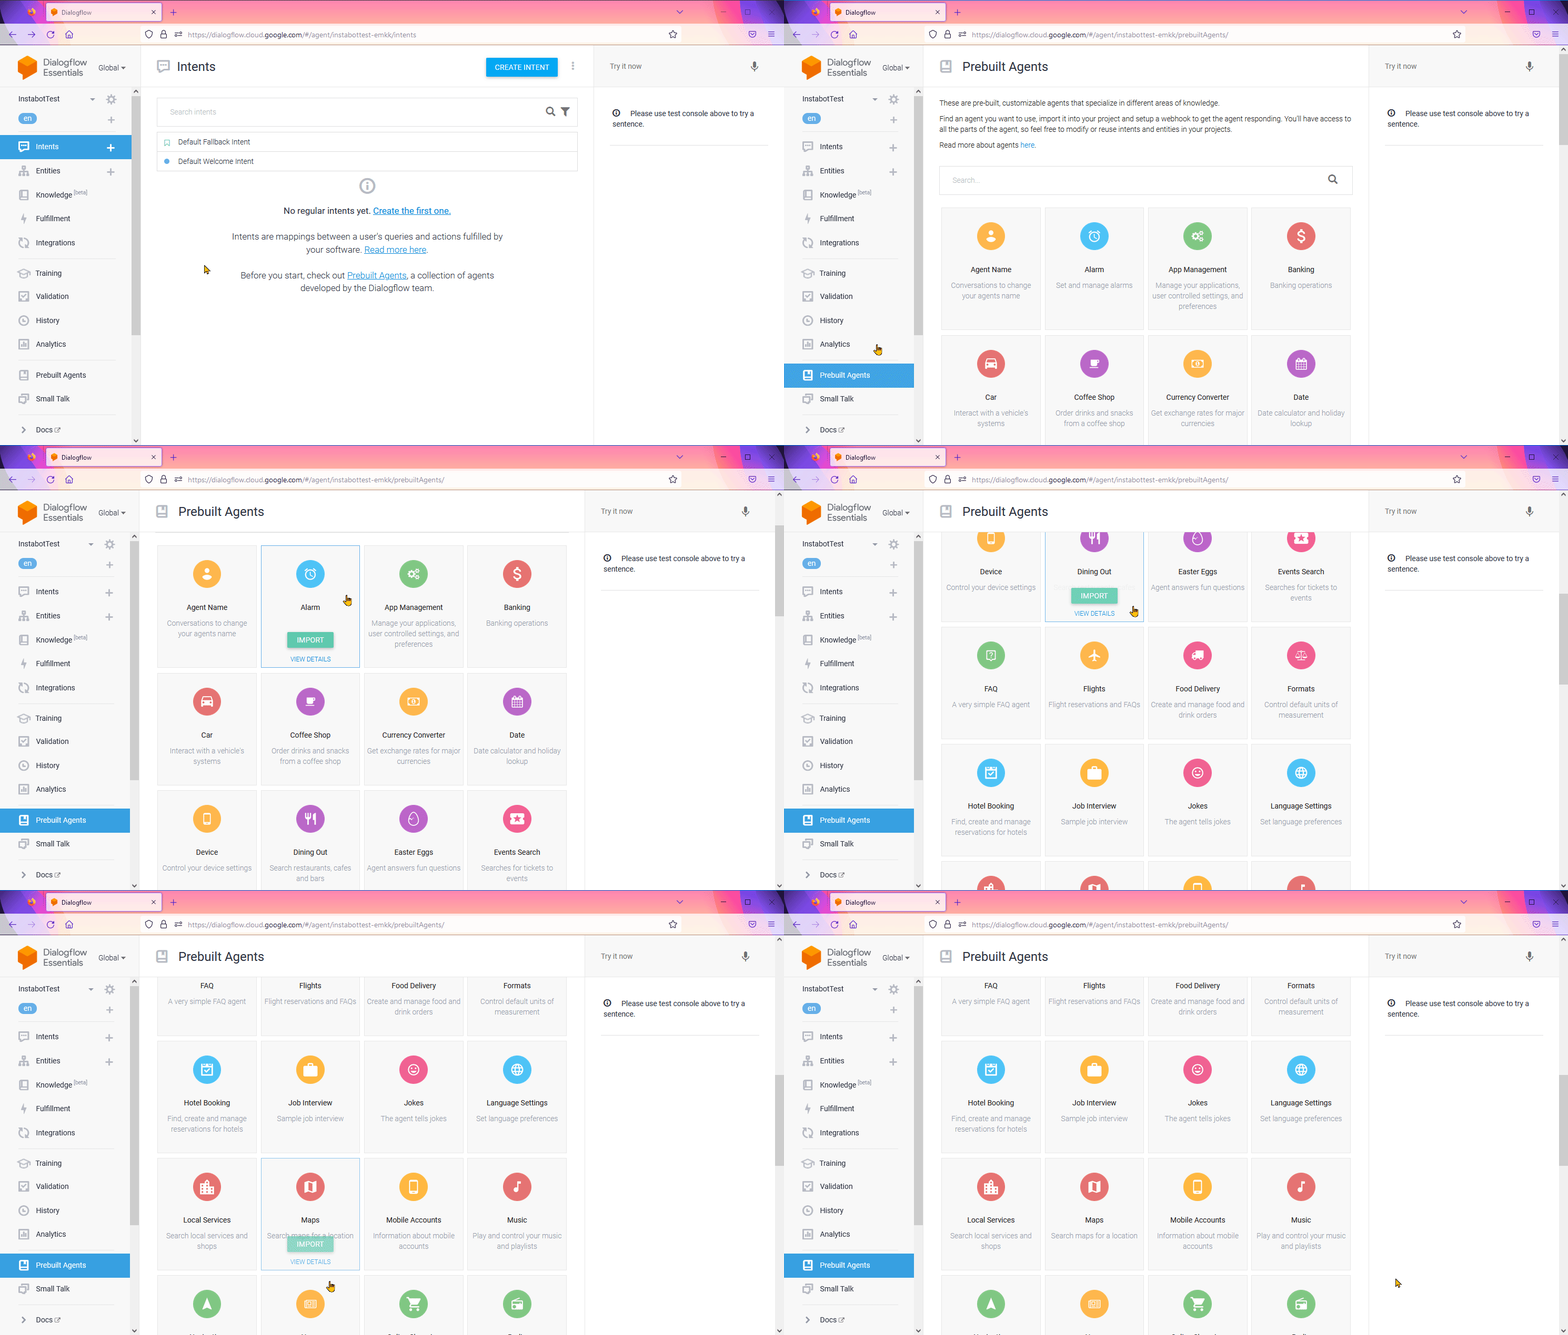
Additional Tip: note that Dialoglfow provides several prebuilt and customizable agents that specialize in different areas of knowledge. You can import them into your account to use or also get some inspiration.

Additional tip: prebuilt agents
Now that your Dialogflow account is integrated into the Instabot portal and you have already set up the intent in your Dialogflow account, you are ready to introduce your Dialogflow node in your bot. Let’s see the next article for learning about that.
Updated over 3 years ago
