Google Tag Manager
Integrate web Instabot using Google Tag Manager
Don't have an Instabot account yet?
Overview
This guide will demonstrate how to integrate web Instabot into your site using Google Tag Manager.
Contents
Prerequisites
1. Prepare the Instabot JavaScript code
- In the JavaScript below, replace the following value with your API key:
- a.
apiKey- Your Instabot API key
<script type = "text/javascript" > (function(i, s, o, u, a, m) {
    a = s.createElement(o);
    a.innerHTML = 'apiKey: "/8MRPdIyb3v35RuvyoQ266b5TnBKej6NvYm53Dg795Q="';
    tags = s.getElementsByTagName(o);
    m = tags[tags.length - 1];
    a.async = 1;
    a.crossorigin = "anonymous";
    a.src = u;
    m ? m.parentNode.insertBefore(a, m) : s.body.appendChild(a);
})(window, document, "script", "https://widget.instabot.io/jsapi/rokoInstabot.js"); </script>
That's it! Now we're ready to insert our Instabot JavaScript into our page via Google Tag Manager.
2. Insert Instabot into your site using Google Tag Manager
IMPORTANT
You only have to perform these steps once! Once the Instabot code is inserted into your website, you can change your Instabot's location, behavior, and content in the portal without touching any code, ever again!
- In Google Tag Manager, click "Add a new tag".
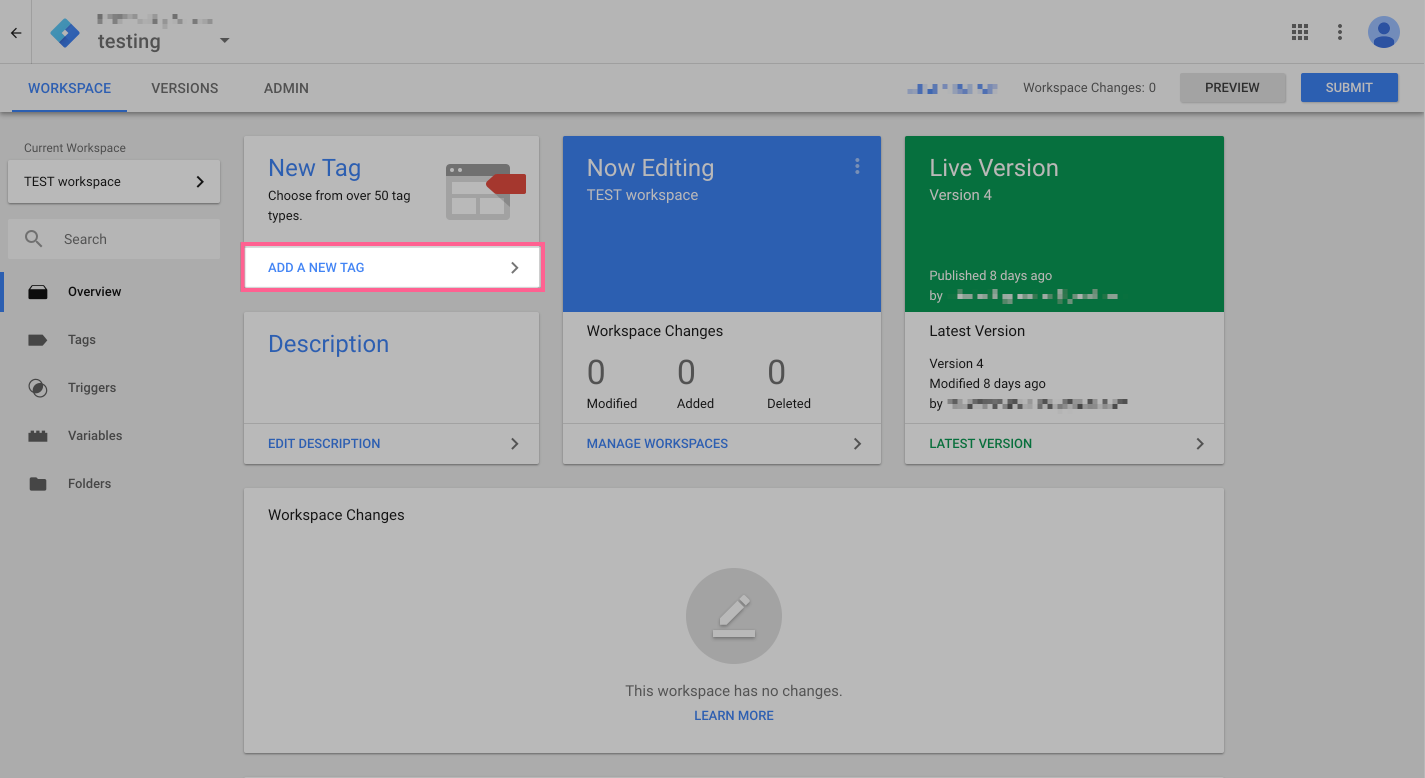
Add a new tag
- Under "Tag Configuration", select "Custom HTML"
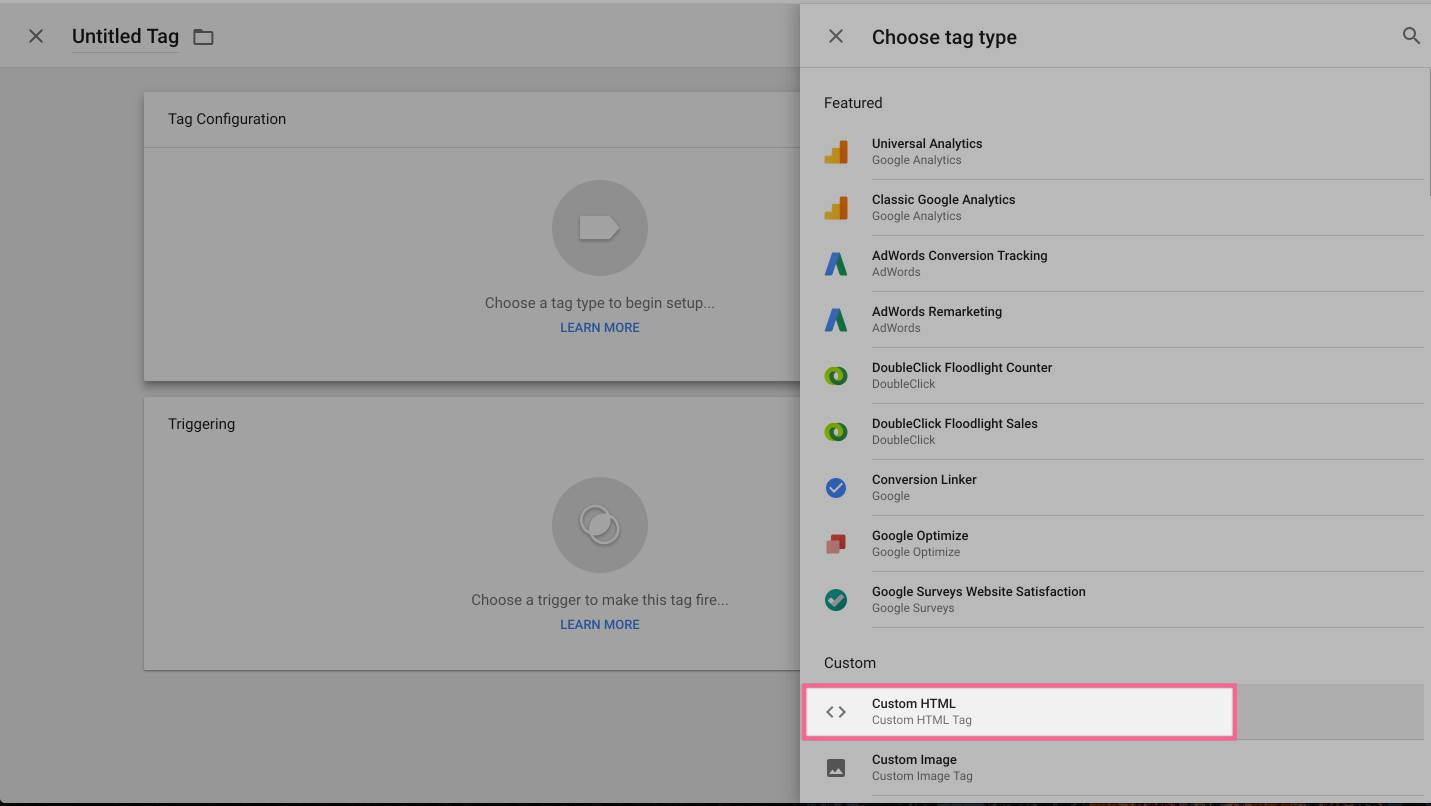
Custom HTML tag
- Insert the Instabot JavaScript, then add a Google Tag Manager trigger
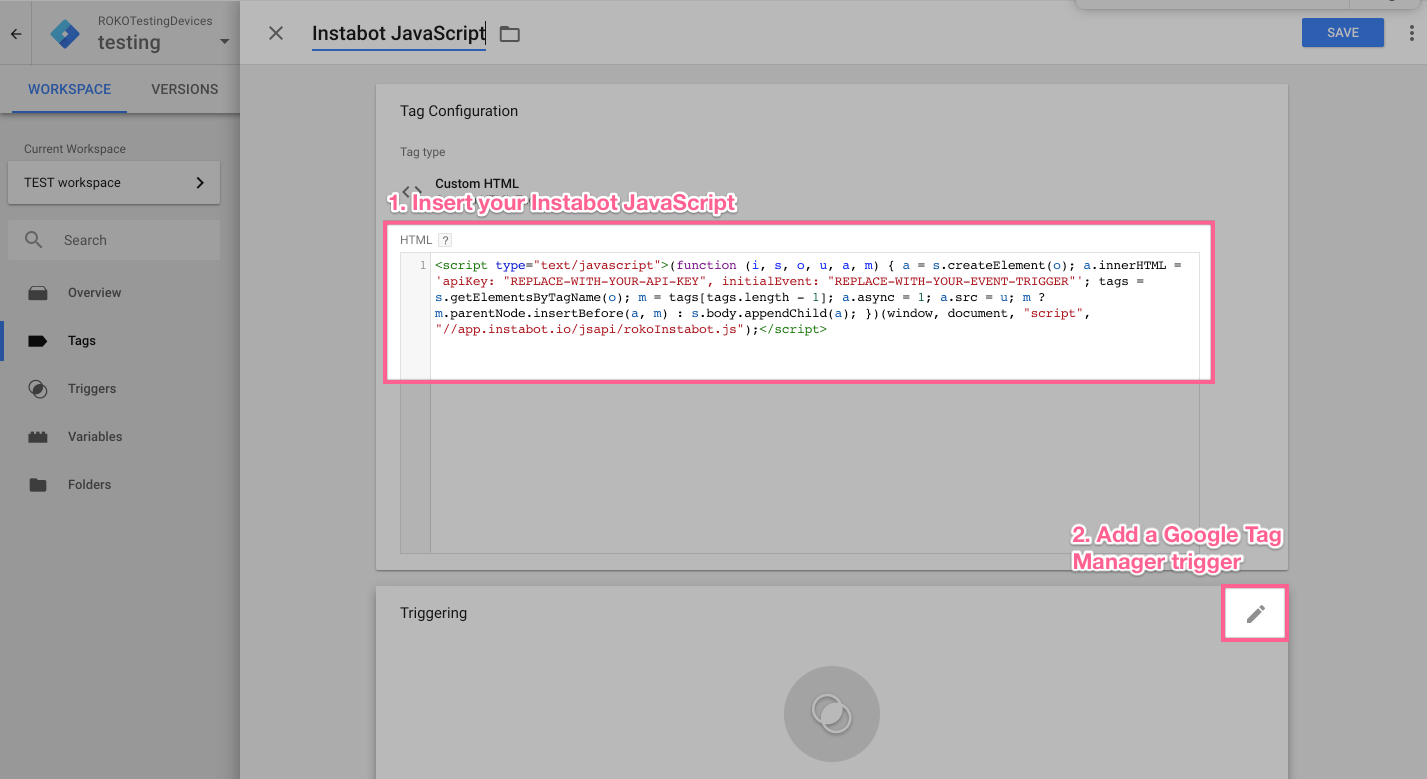
Insert the Instabot JavaScript
- Select "all pages" (or whatever is appropriate) for the GTM trigger, then click Save
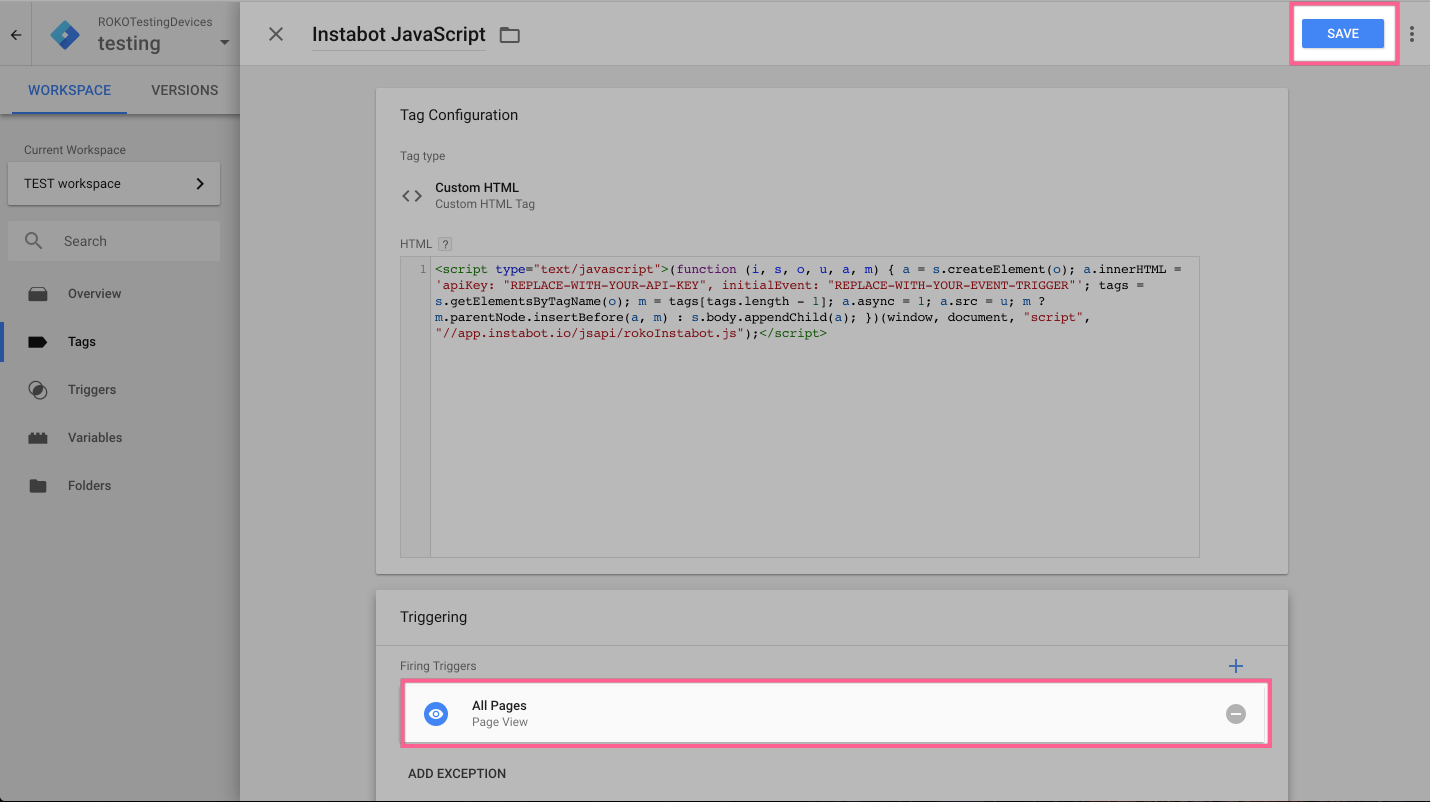
Save GTM trigger
- Click Submit to insert your tag into your page.
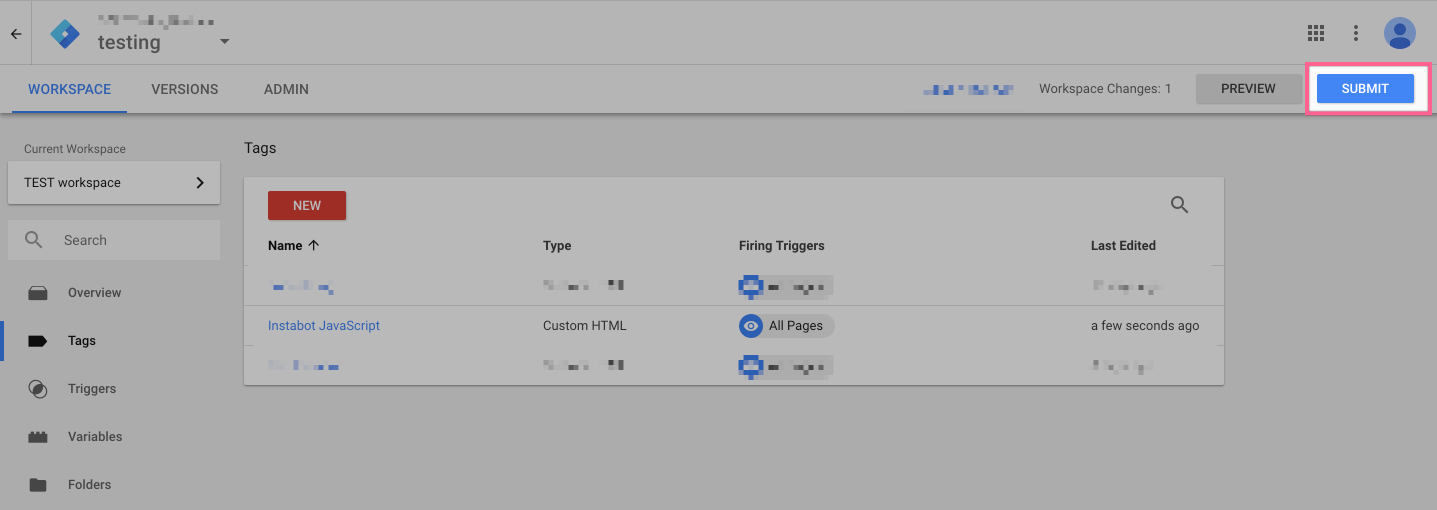
Insert tag via GTM into page
- Finally. click Publish
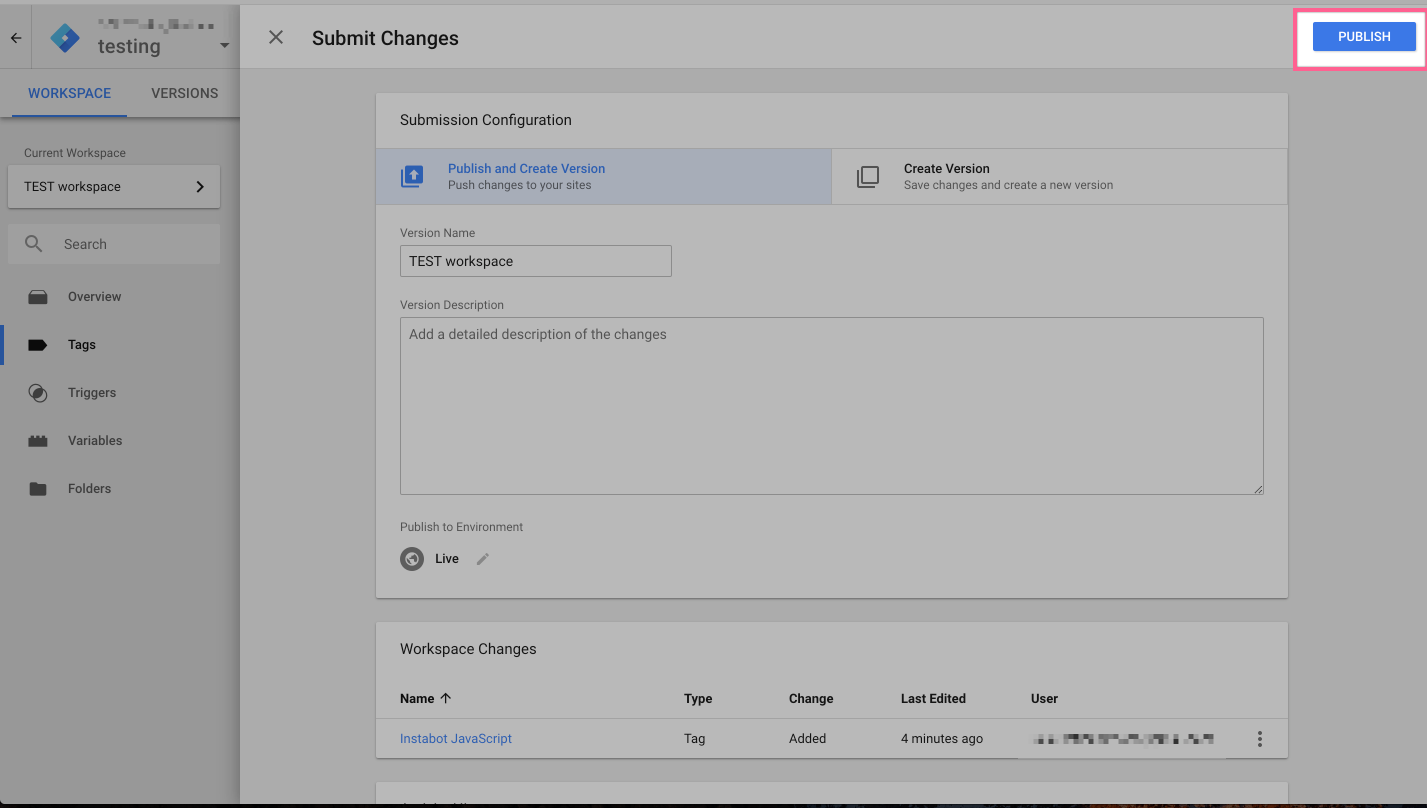
Publish
Updated almost 5 years ago
