Squarespace
Integrate web Instabot into your Squarespace site
Don't have an Instabot account yet?
Overview
This page will guide you through inserting web Instabot into any page of your Squarespace site, or how to configure Instabot to launch when a user clicks a link or button.
Contents
Prerequisites
1. Insert Instabot into your Squarespace site
IMPORTANT
You only have to perform these steps once! Once the Instabot code is inserted into your website, you can change your Instabot's location, behavior, and content in the portal without touching any code, ever again!
- In the Instabot portal, click 'Settings' in the side-panel - this is where you will find your Instabot JavaScript
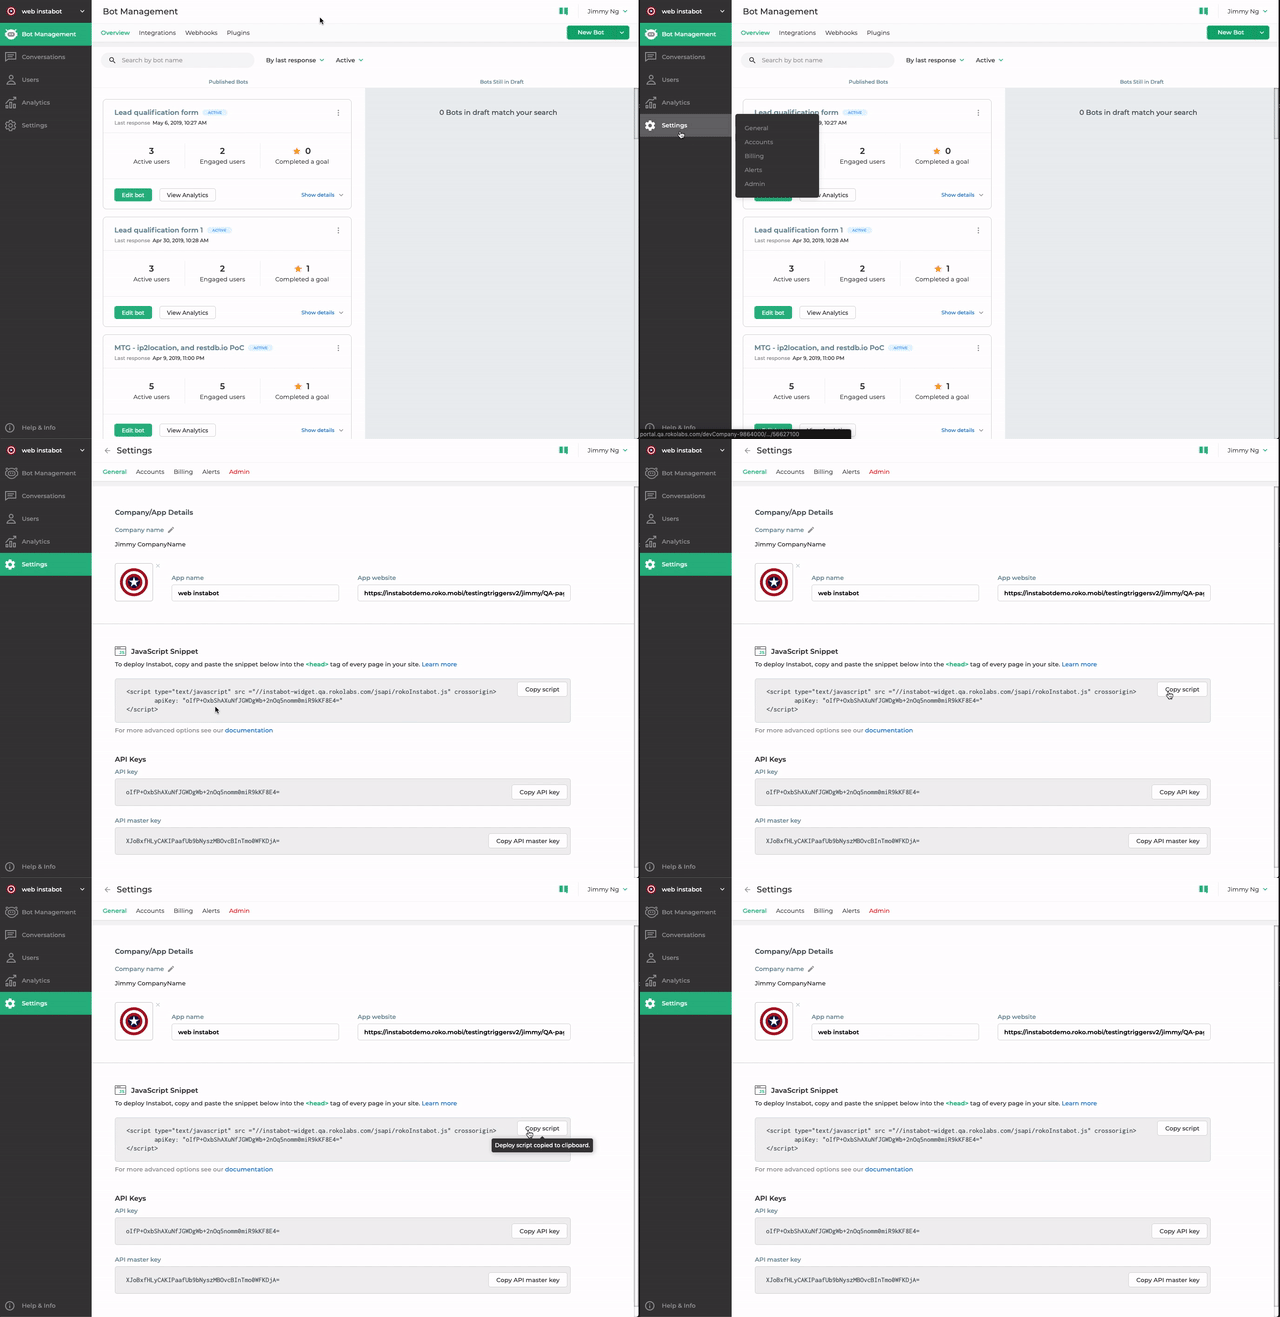
Get Instabot JS from portal
-
Now let's insert the JavaScript into our Squarespace site!
-
Open your Squarespace site, click 'Settings' in the left-menu
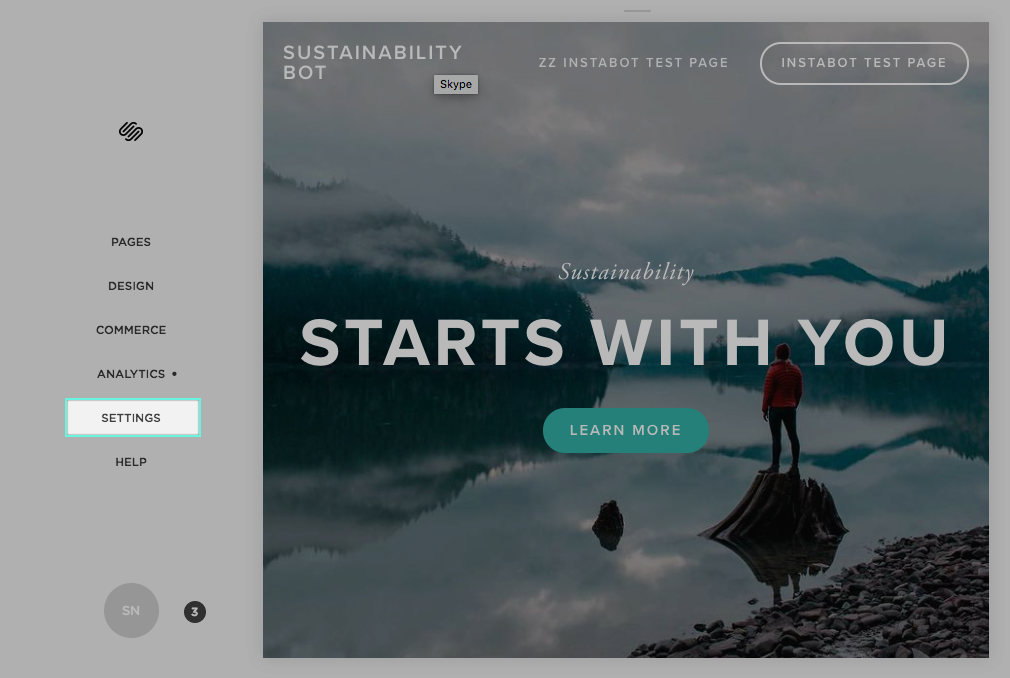
- Click 'Advanced'
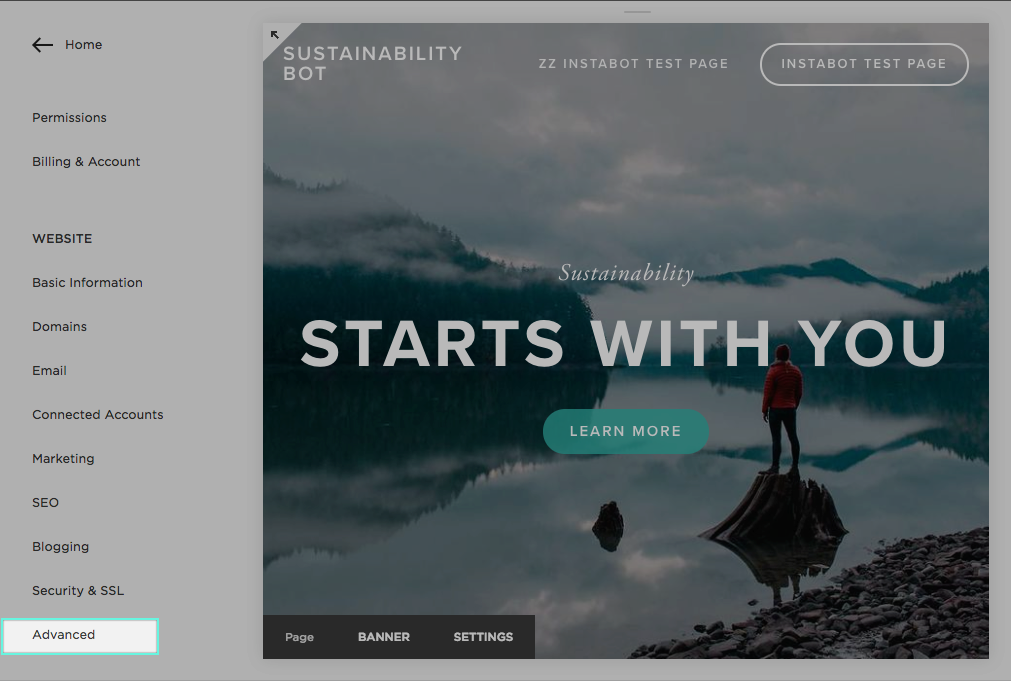
- Click 'Code Injection'
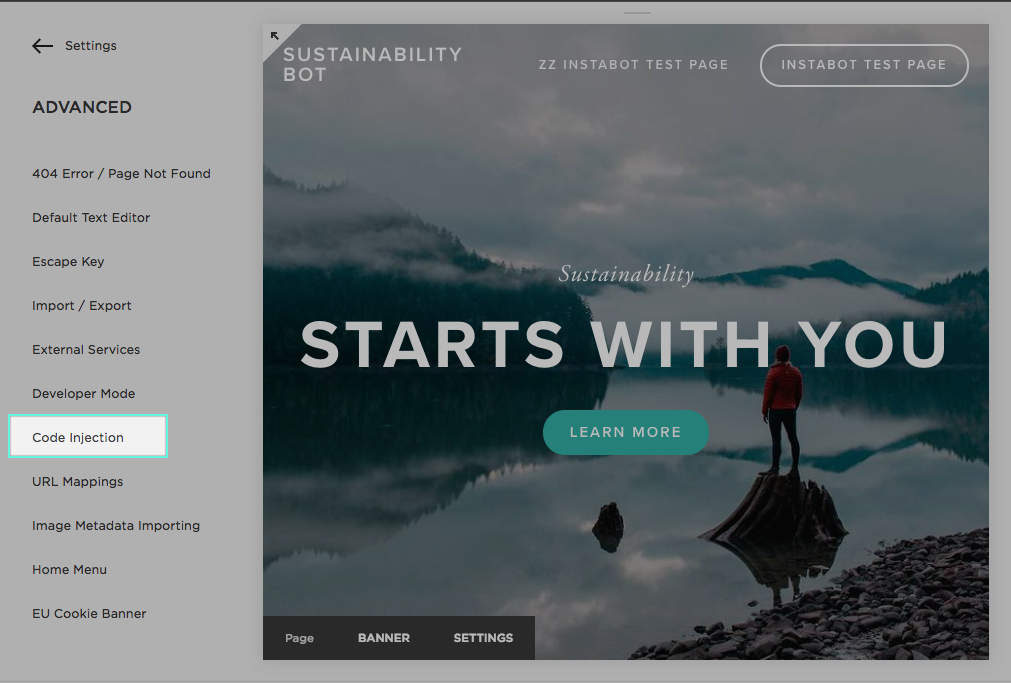
- Paste in your Instabot JavaScript, then click 'Save'
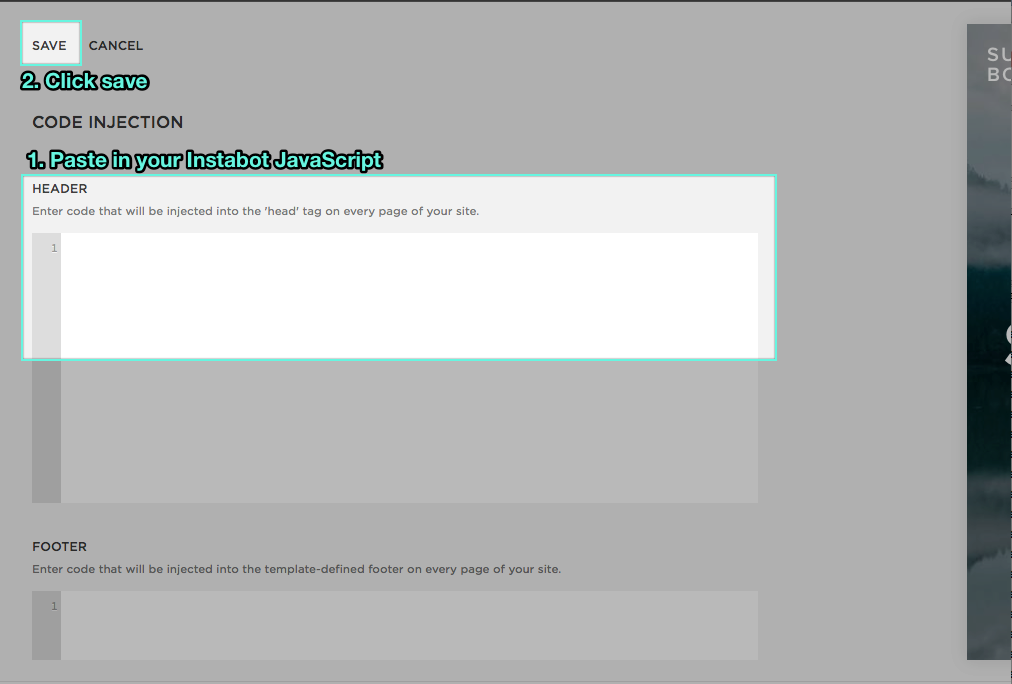
- That's it! Now, open your conversation in the Instabot portal, finalize the triggers, click deploy, and Instabot will begin appearing in your website!
2. Advanced
a. Launch Instabot on click
This section will show you how to configure Instabot to launch when a user clicks on a specific link or button on your Squarespace page.
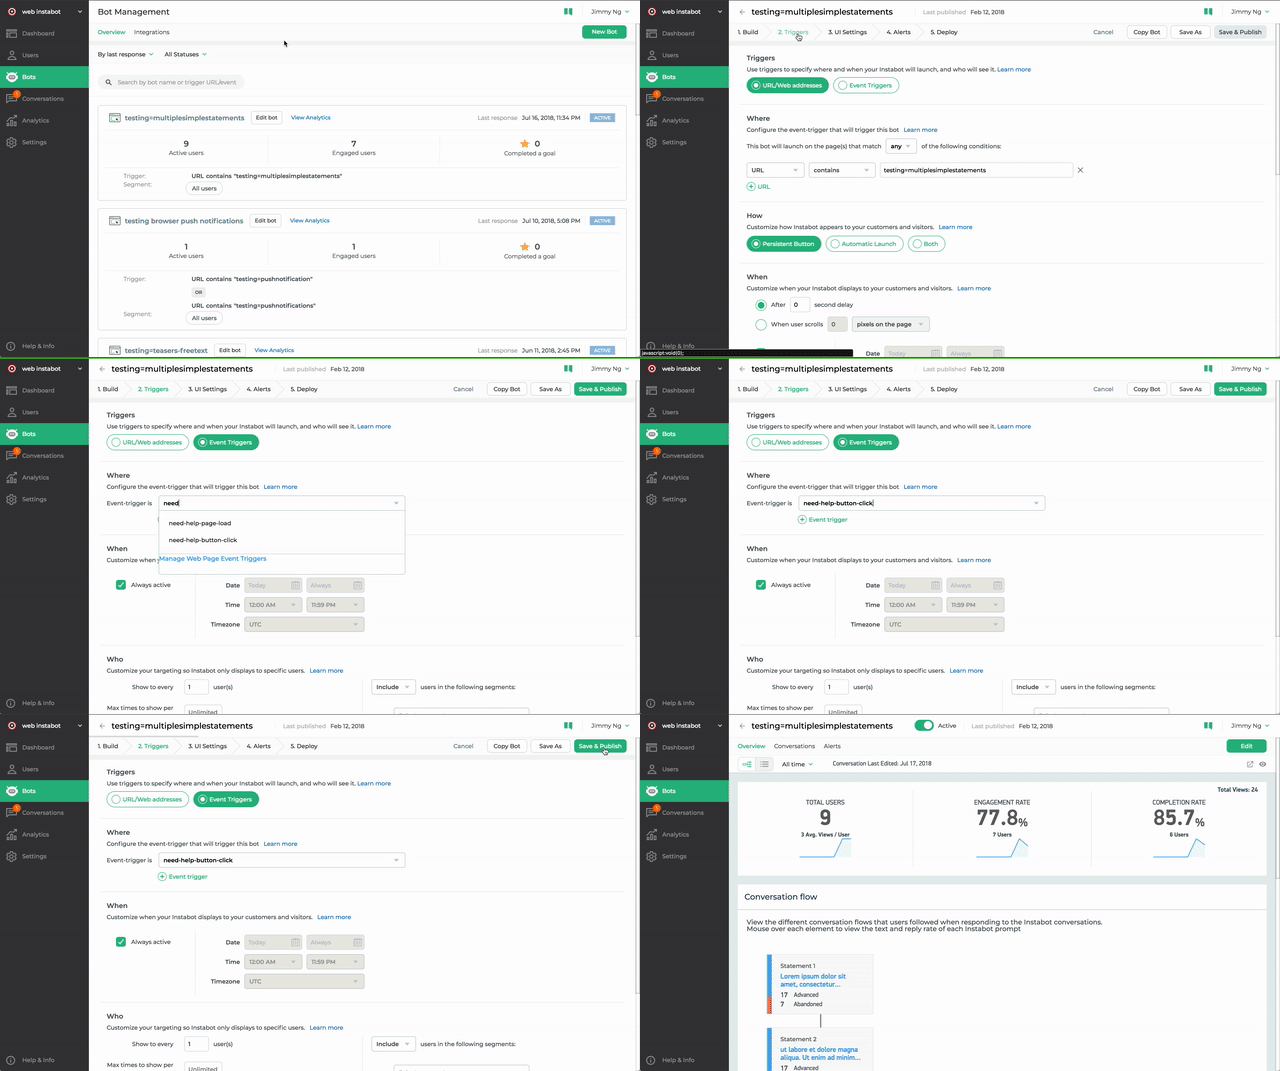
- To start, let's create and assign an Instabot event-trigger to your conversation. Open your Instabot conversation, click
Edit, then open theTriggerstab. Create a new event-trigger by selecting "event-trigger" in the dropdown, naming your event-trigger something intuitive like "need-help-button-click", click "Create New Event Trigger" to add it, then click 'Save'.
- Now we will prepare the Instabot JavaScript snippet to insert into your page. In the below form, enter the required parameters and your Instabot JavaScript will be generated for you:
- Now that we've prepared the Instabot JavaScript, we will now insert it into our page. Let's open our page in edit mode:
- Click
Pagesin the left-hand menu - Find and select the specific page you want to insert Instabot into
- Hover over the page, find, and click
Edit
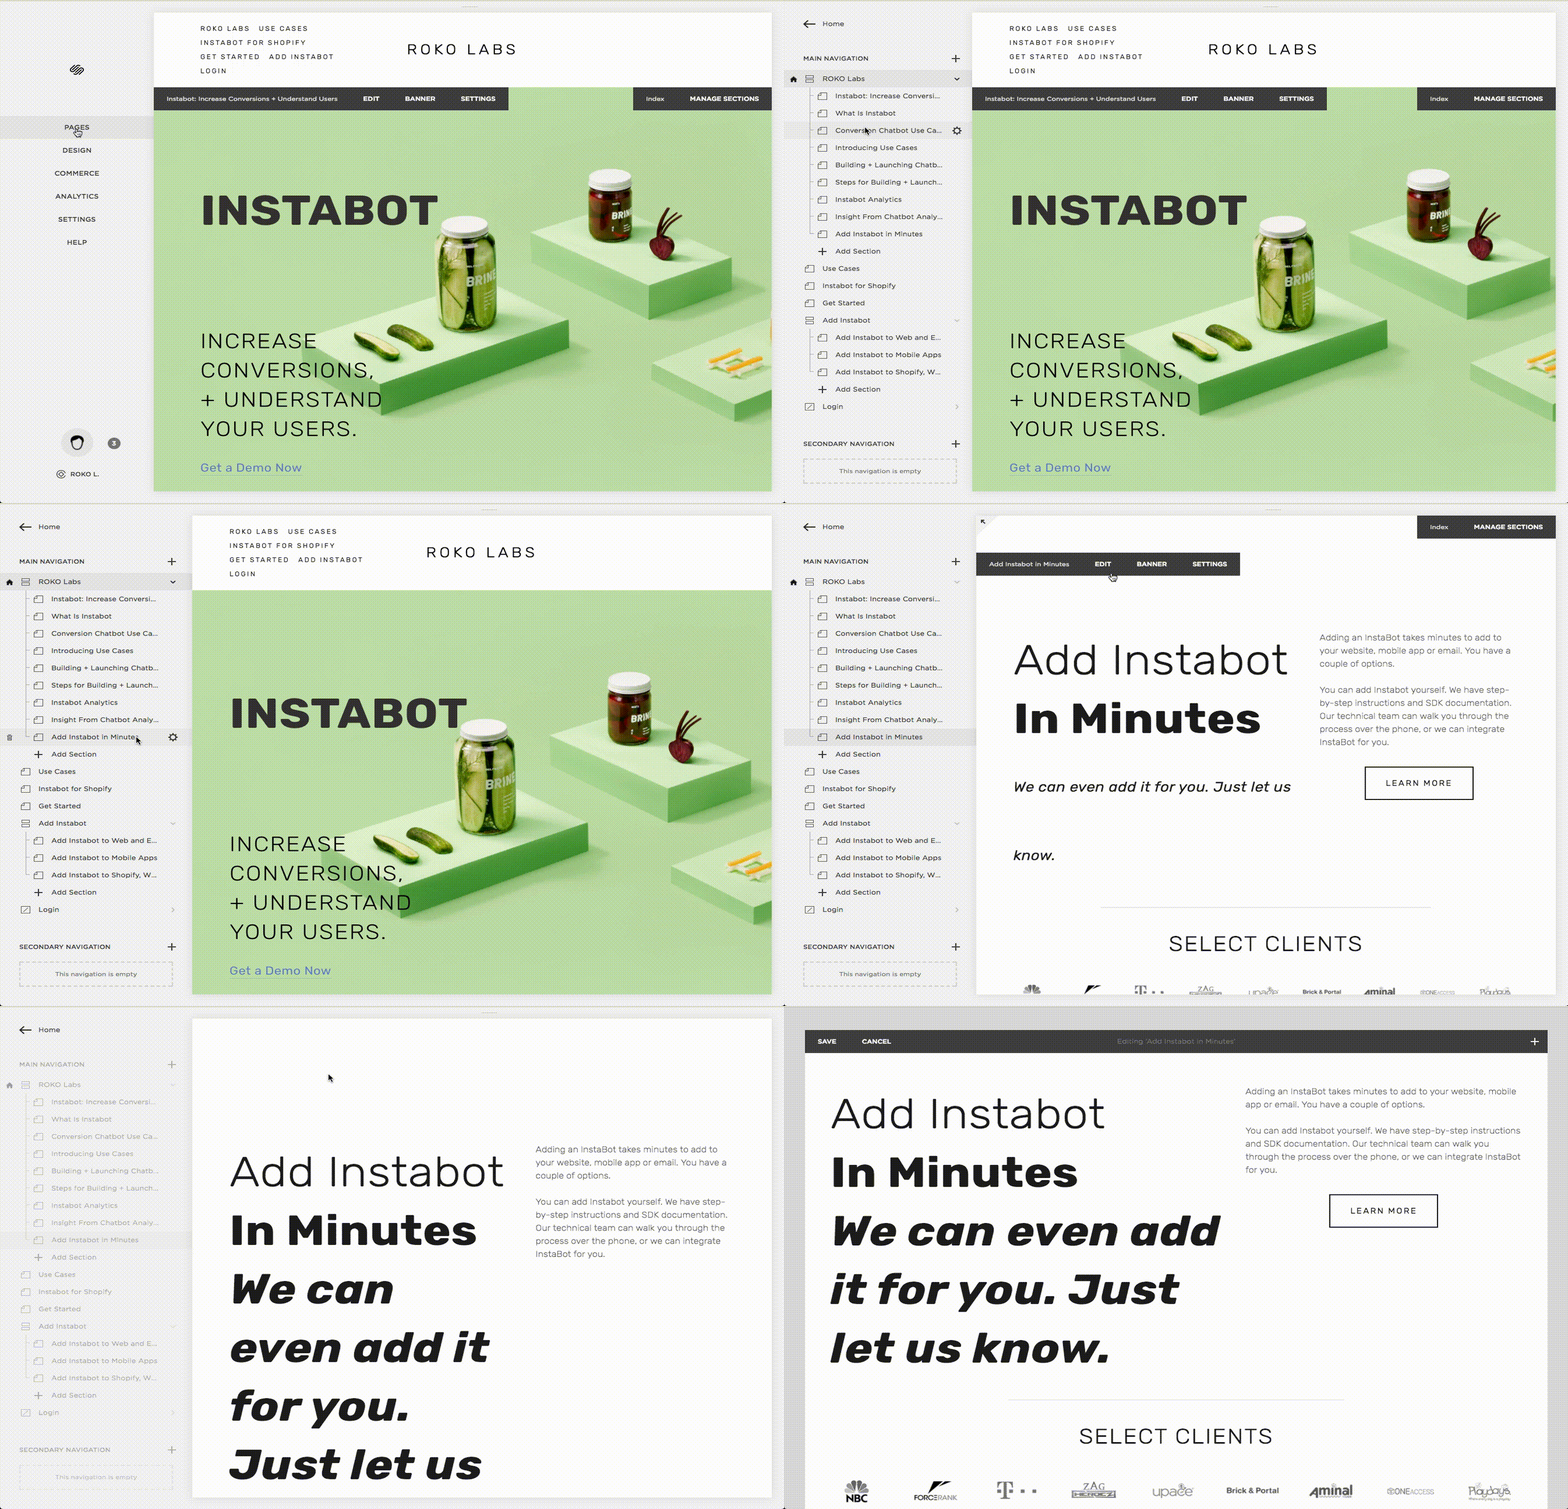
Open page in edit mode
- Now we will add a code block into our page so the JavaScript has a place to live:
- Hover your mouse anywhere on the page until you see a bubble with a line appear
- Click the bubble, the Content Blocks menu will appear
- In the Content Blocks search field, type
Code, then select theCodeblock

Add code block into our page
- Next, we will insert our Instabot JavaScript into the code block:
- Copy the Instabot JavaScript we prepared in the last section
- Paste it into the body of the code block - don't touch the
HTMLorDisplay Sourcesettings - Click
Applyin the code block - Don't click
Savein the top-left menu yet because we want to add a button to the page before finishing
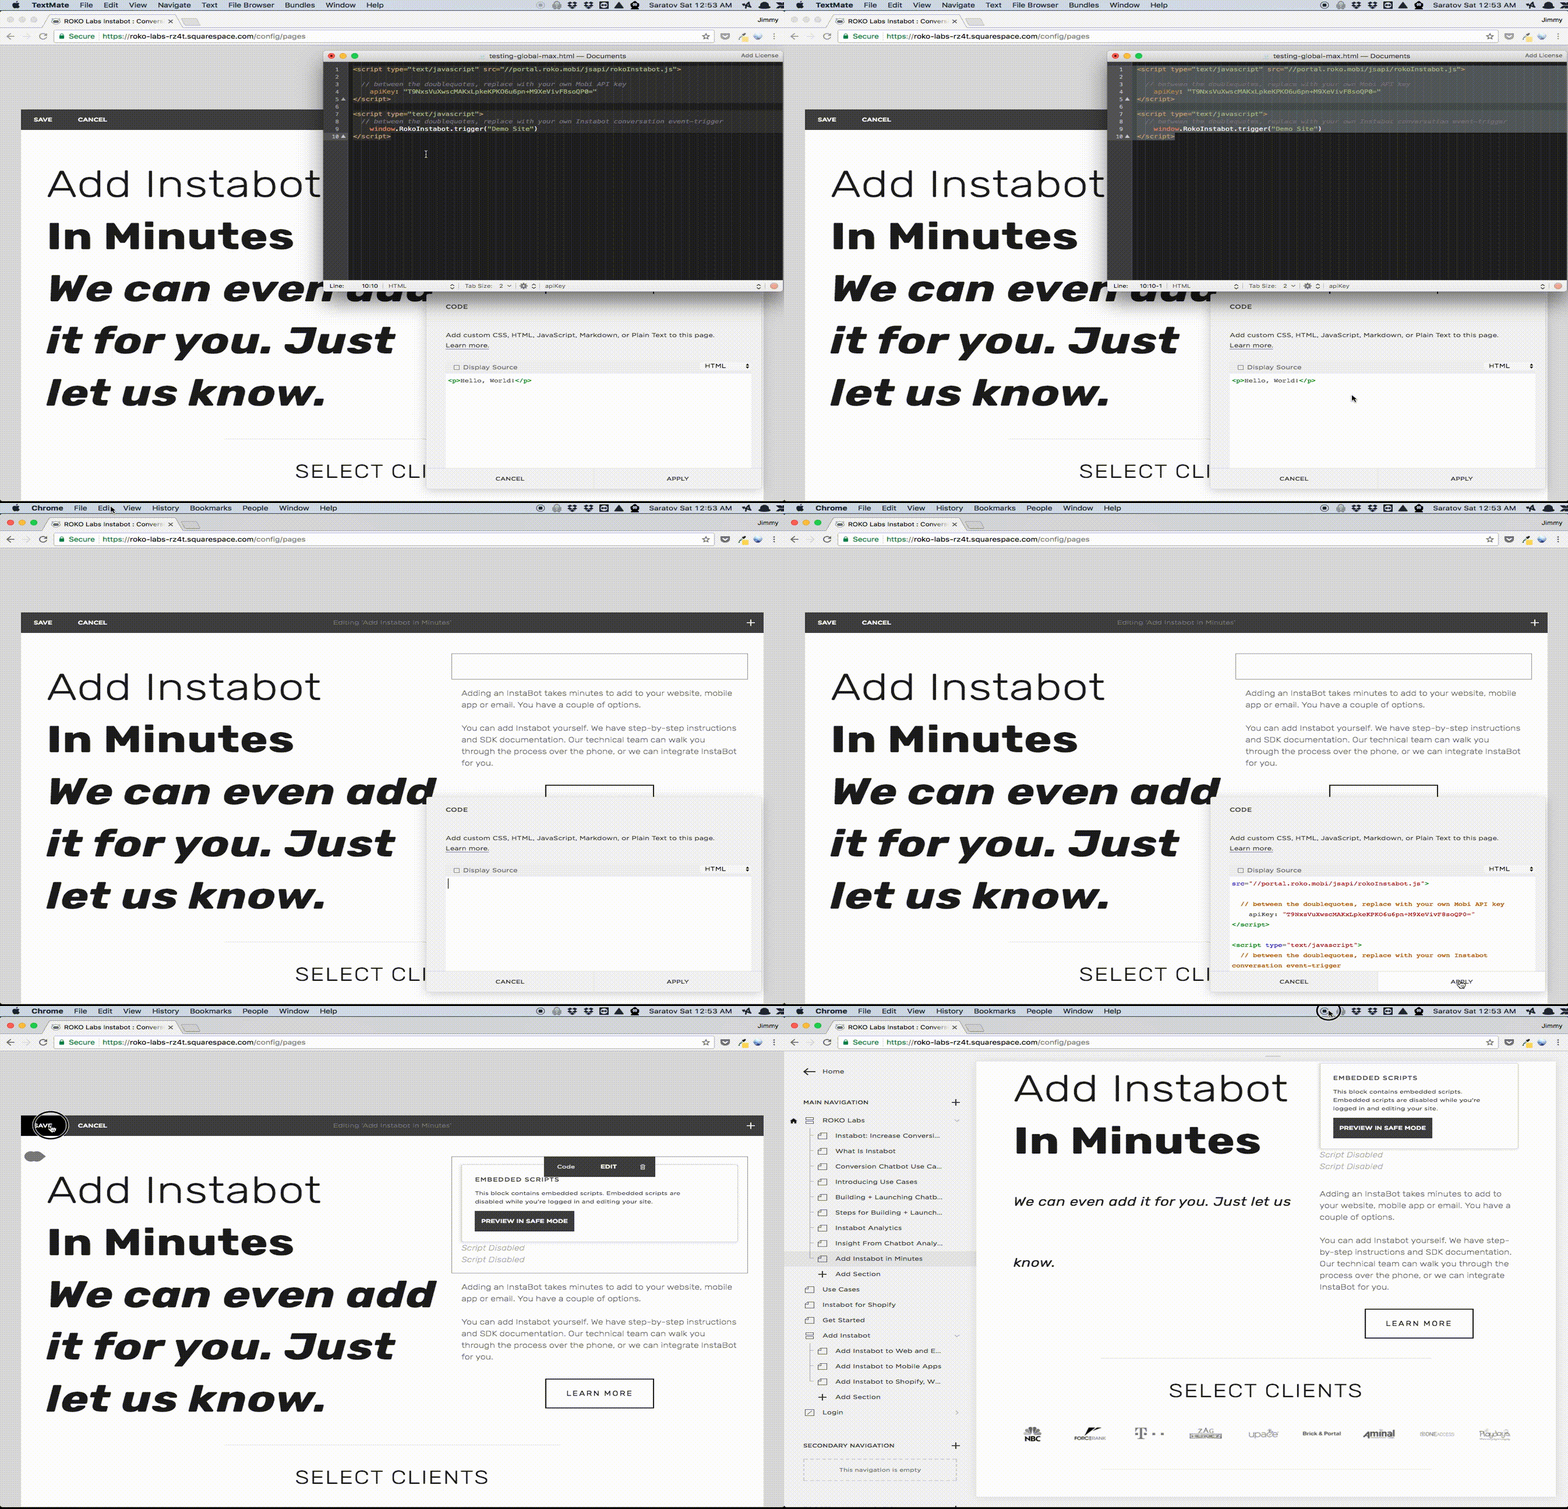
Insert Instabot JavaScript
- Now, we will add a button for the user to click and launch the Instabot:
- Hover your mouse anywhere on the page until you see a bubble with a line appear
- Click the bubble, the Content Blocks menu will appear
- In the Content Blocks search field, type
Button, then select theButtonblock
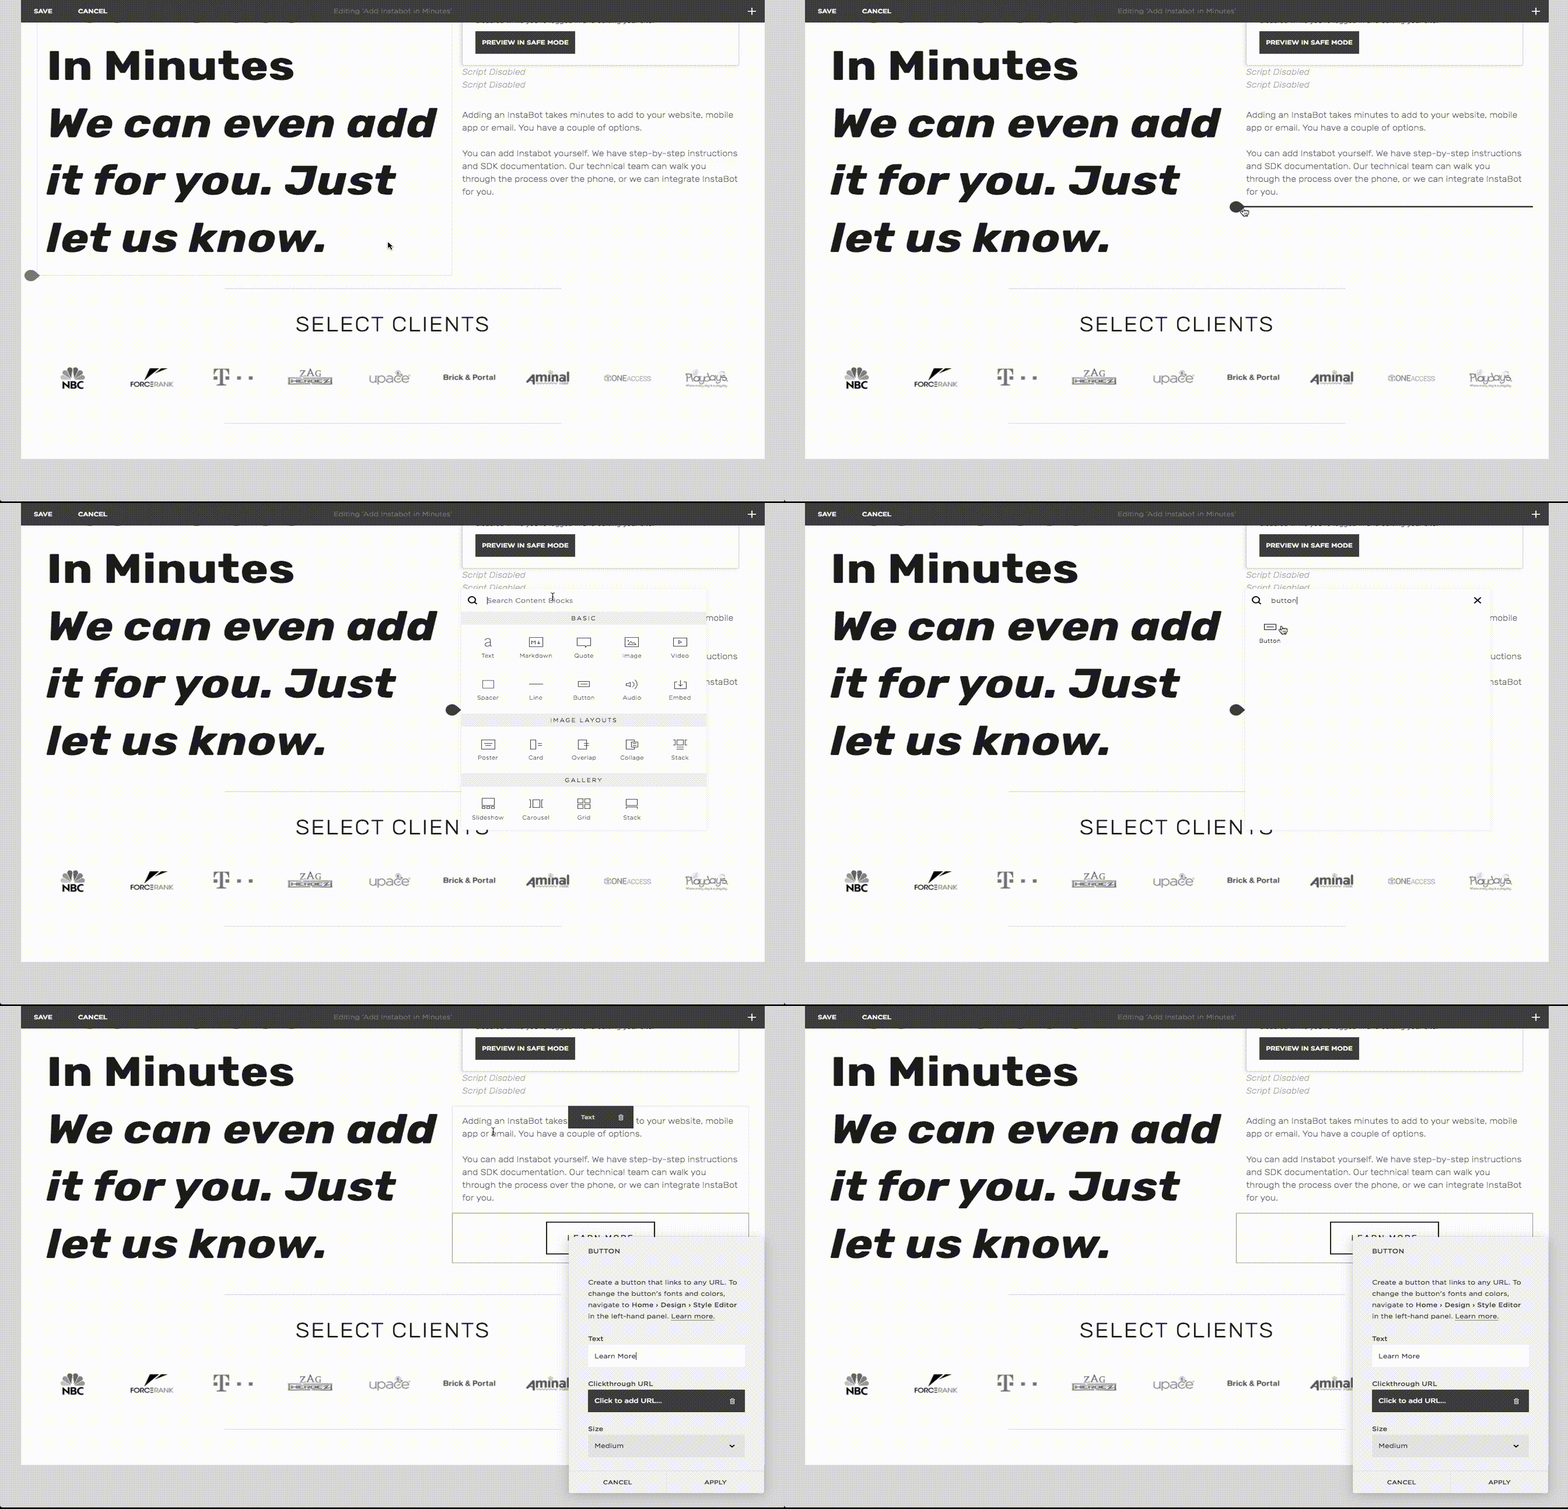
Add a button
- Give your button some text. We'll call it
Want to learn more about Instabot?
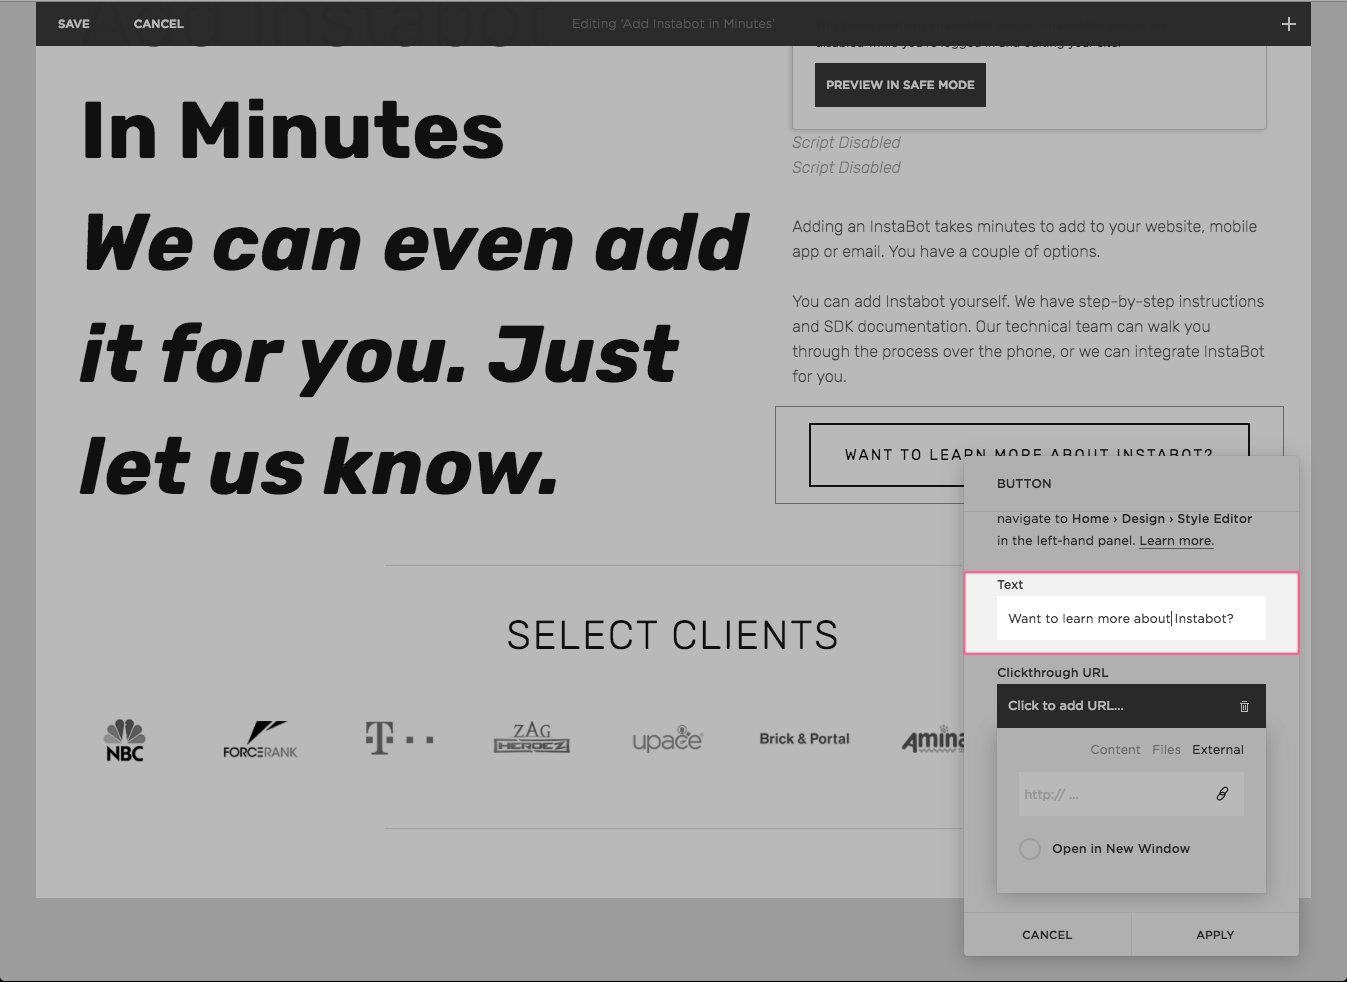
Give our button some text
- Finally, we will link the button to our Instabot JavaScript:
- Click the the
Clickthrough URLfield, selectExternal - Type in
javascript:buttonClick(), then press Enter - Click
Apply - Finally, click
Savein the top-left corner
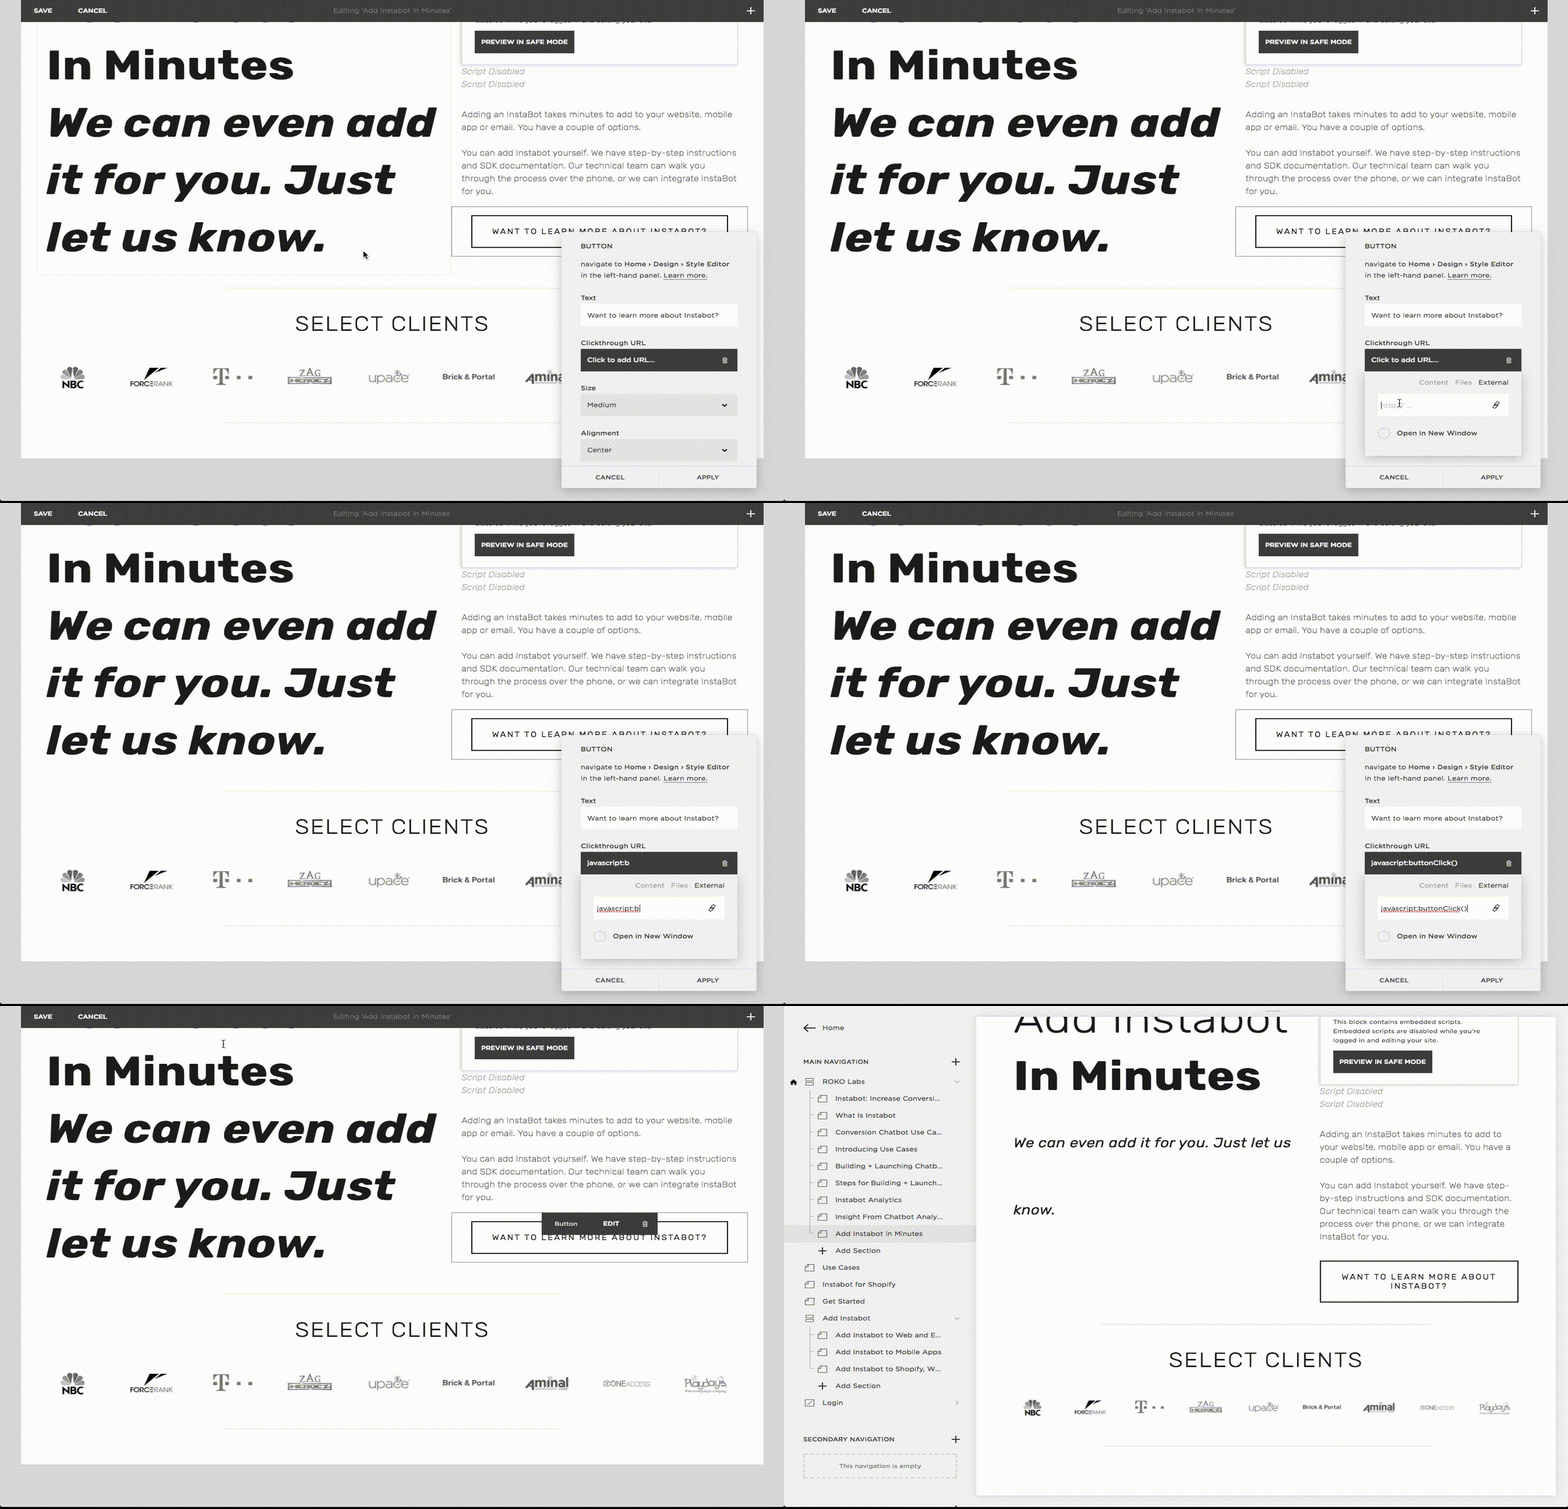
Link the button with launching Instabot
That's it! Log out of Squarespace and reload the page that you just edited, click your button, and you will see your Instabot launch!
Updated almost 6 years ago
