WordPress
Integrate web Instabot into your WordPress site
Don't have an Instabot account yet?
Overview
This page will guide you through inserting web Instabot into any page or post of your WebPress site, or how to configure Instabot to launch when a user clicks a link or button.
Contents
- Install and configure the Instabot WordPress plugin
- Advanced
a. Launch Instabot on click - Troubleshooting
a. WP Rocket plugin
b. Avada theme
Prerequisites
1. Install and configure the Instabot WordPress plugin
You only have to perform these steps once! Once the Instabot code is inserted into your WordPress site, you can change your bot's location, behavior, and content in the Instabot portal without touching any code, ever again!
You can find the Instabot WordPress plugin here: https://wordpress.org/plugins/instabot/
- In your WordPress dashboard, select
Plugins, clickAdd New, search forInstabot,
Install, then finallyActivate
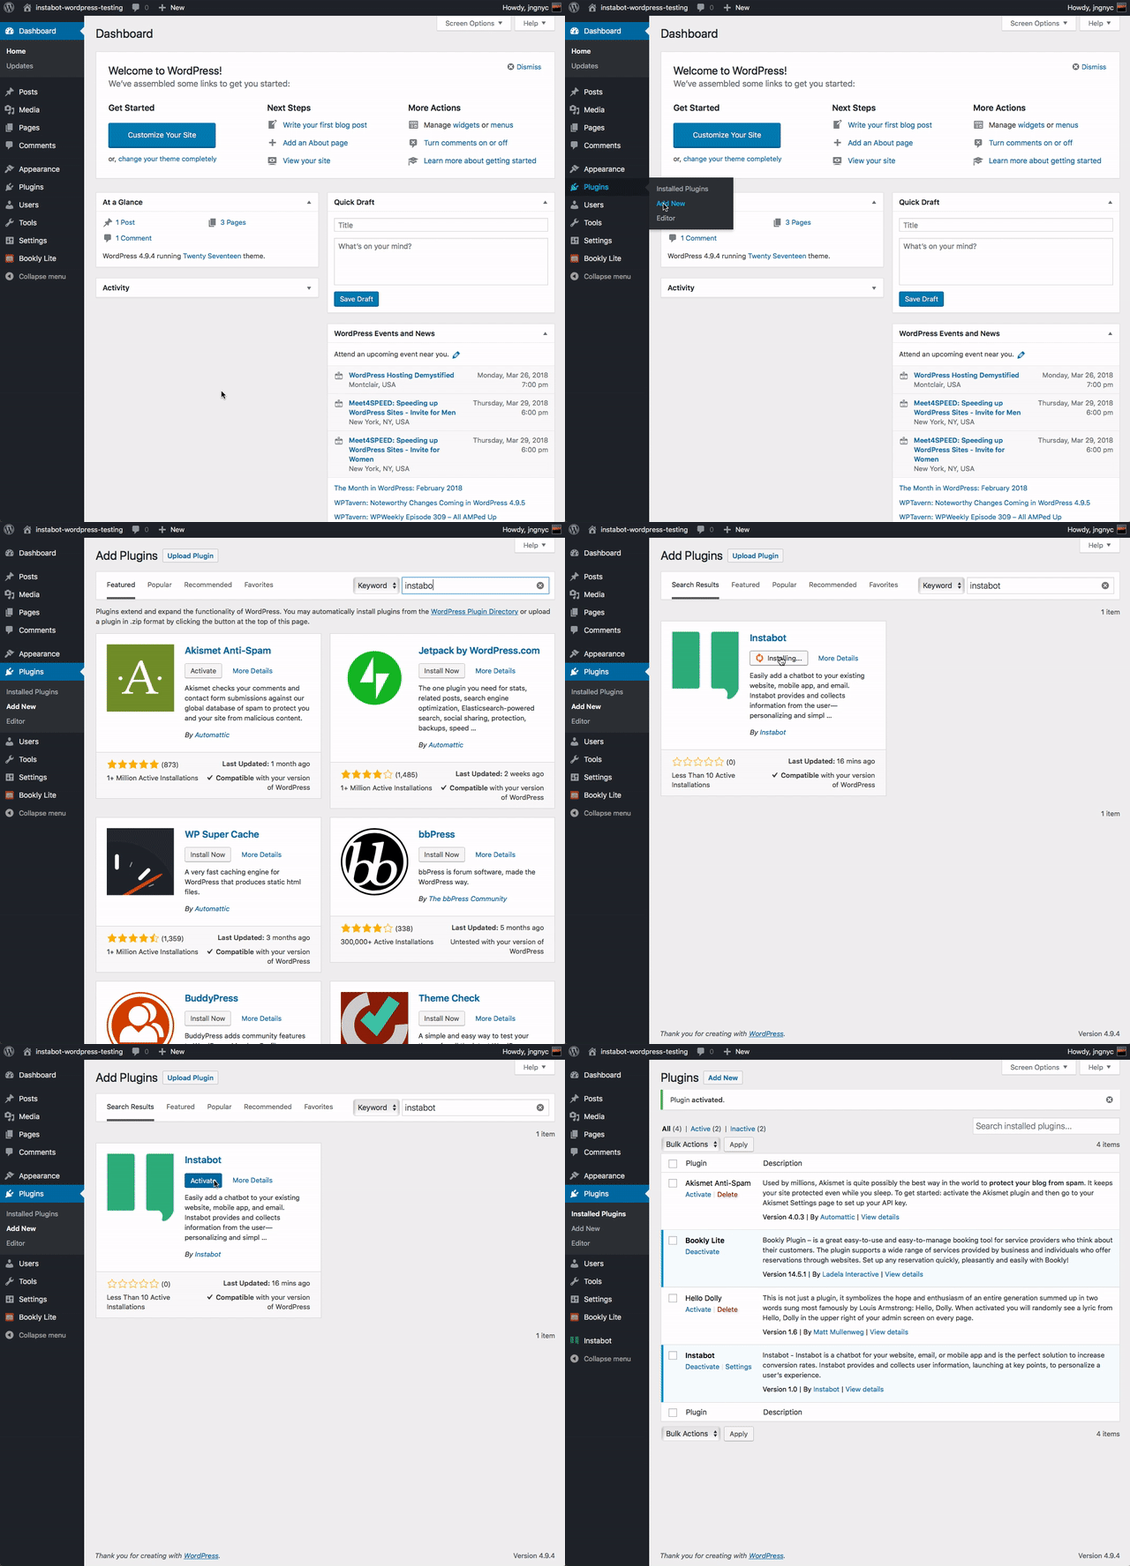
Install the WordPress Instabot plugin
- Get your Instabot API key, enter it into the plugin settings page, then click "Save changes"
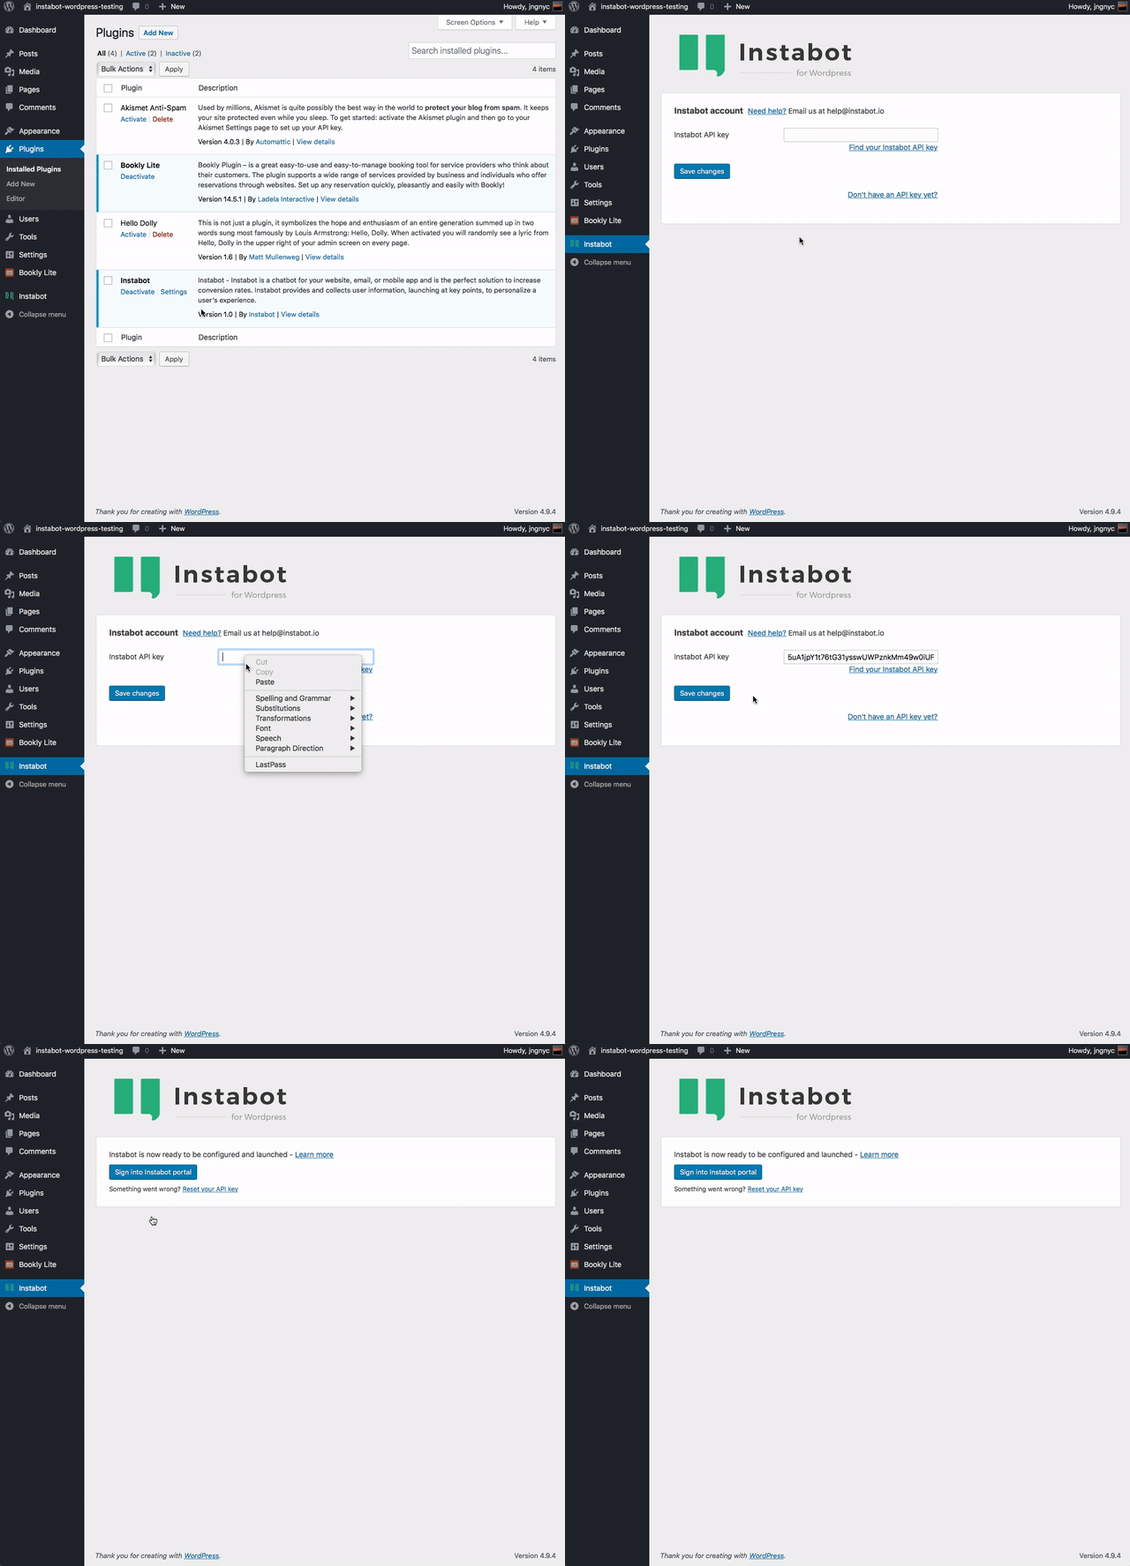
Activate the Scripts n Styles WordPress plugin
- That's it! Now you're ready to create your first bot in the Instabot portal and launch it live!
2. Advanced
a. Launch Instabot on click
Event Triggers
This section will show you how to configure Instabot to launch when a user clicks on a specific link or button on your WordPress page or post.
To insert Instabot into your WordPress site, we'll need to install a WordPress plugin that allows you to insert JavaScript in your WordPress posts.
Steps 1 and 2 only need to be completed once
- In your WordPress dashboard, select Plugins, then
Add New.
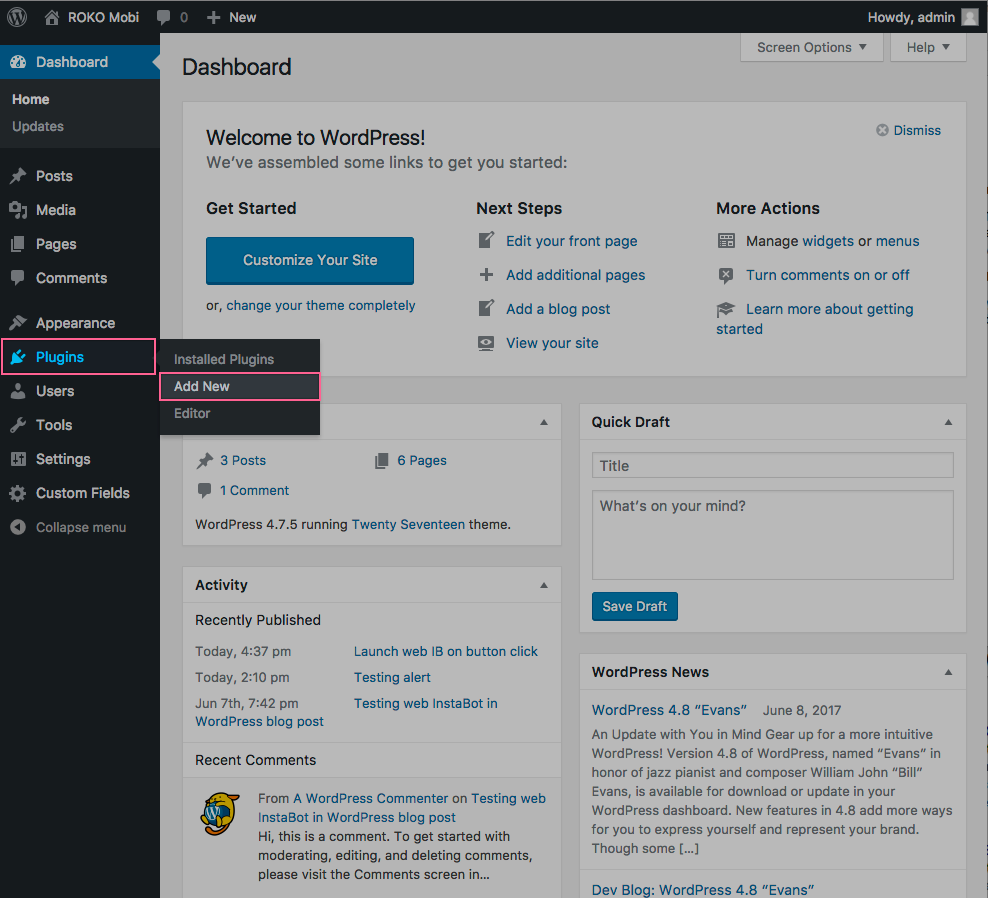
Add a new WordPress plugin
- Search for the WordPress plugin
Code Embed, then clickInstall, then clickActivate.
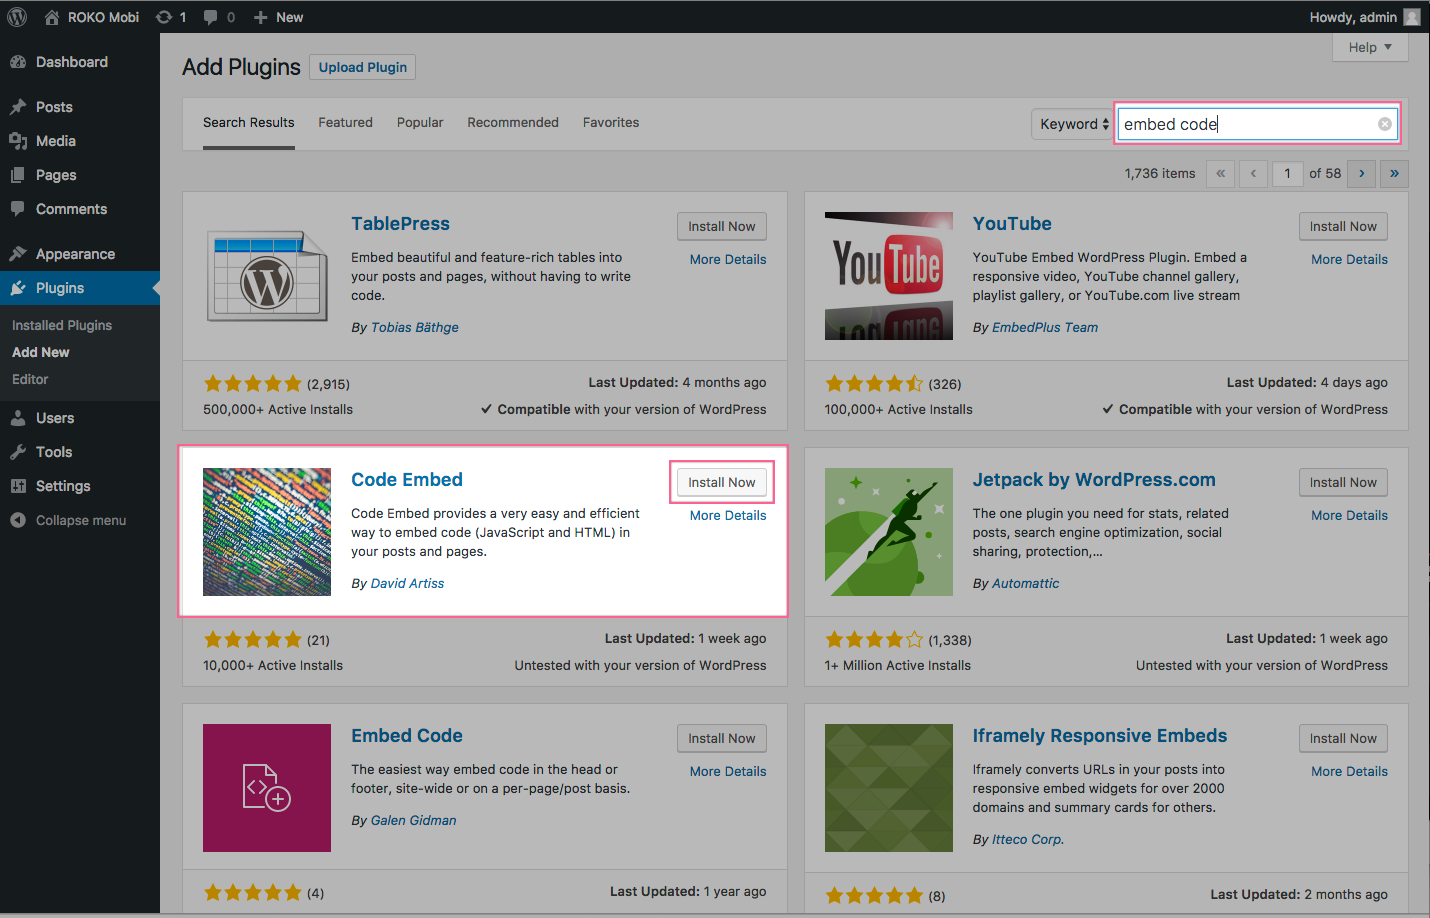
Install the Code Embed WordPress plugin
-
Now, let's jump over to the Instabot portal to create and assign a Instabot event-trigger to your conversation. Open your Instabot conversation, click
Edit, then clickTrigger Settings. -
Create a new event-trigger by selecting "event-trigger" in the dropdown, naming your event-trigger something intuitive like "need-help-button-click", click "Create New Event Trigger" to add it, then click 'Save'.
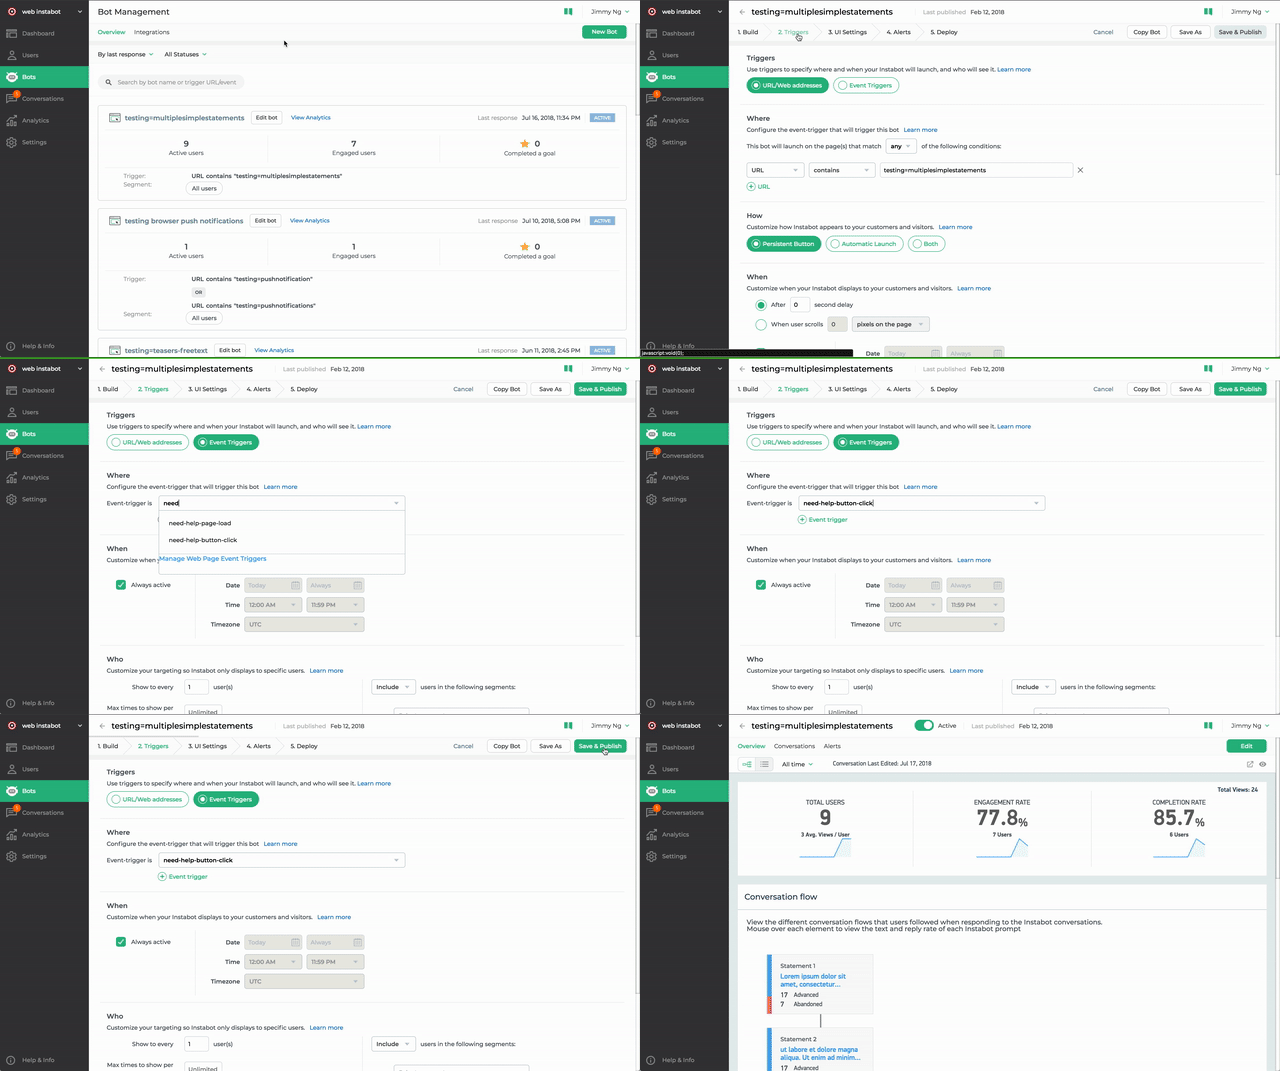
Trigger settings for launching Instabot via event-trigger
- Now we will prepare the Instabot JavaScript snippet to insert into your page - adjust the below required values with your values:
apiKey- Your Instabot API keyYour Instabot event-trigger- The event-trigger attached to your Instabot conversation as configured in the Instabot portalLink name- The text of the link that users will click to launch Instabot
<script type='text/javascript' src='https://widget.instabot.io/jsapi/rokoInstabot.js' crossorigin>

// replace with your own Instabot API key
apiKey: 'Your Instabot API key'
</script>

<!-- replace with your specific conversation's event-trigger in the portal -->
<a href='#' onclick='window.RokoInstabot.trigger("Your Instabot event-trigger")'>

LINK NAME

  </a>
- Open the post you want to insert Instabot into and enable the
Custom Fieldsoption.
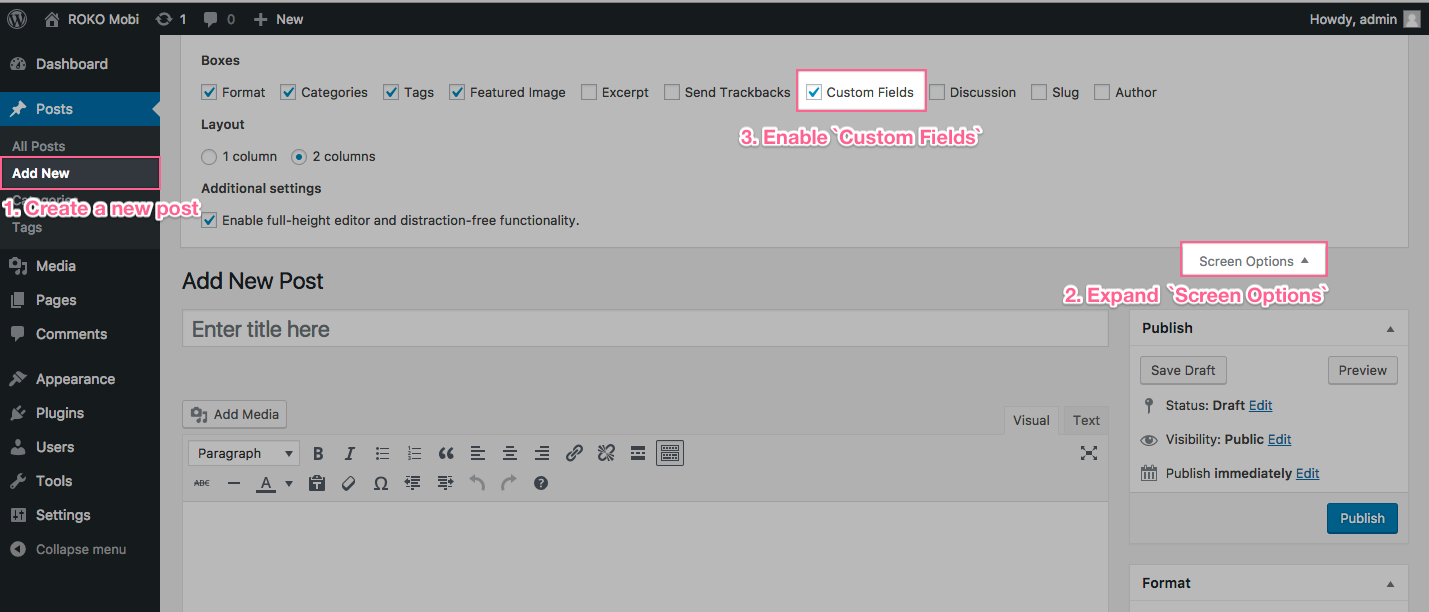
Enable Custom Fields in a new post
- Now, let's insert the Instabot JavaScript into your post:
- In the
Custom Fieldssection, clickEnter New - In the
Namefield, enterCODE1 - In the
Valuefield, paste the web-Instabot JavaScript containing your values - Click
Add Custom Field - In the body of your post, enter
%CODE1%anywhere in the post - Click
Update
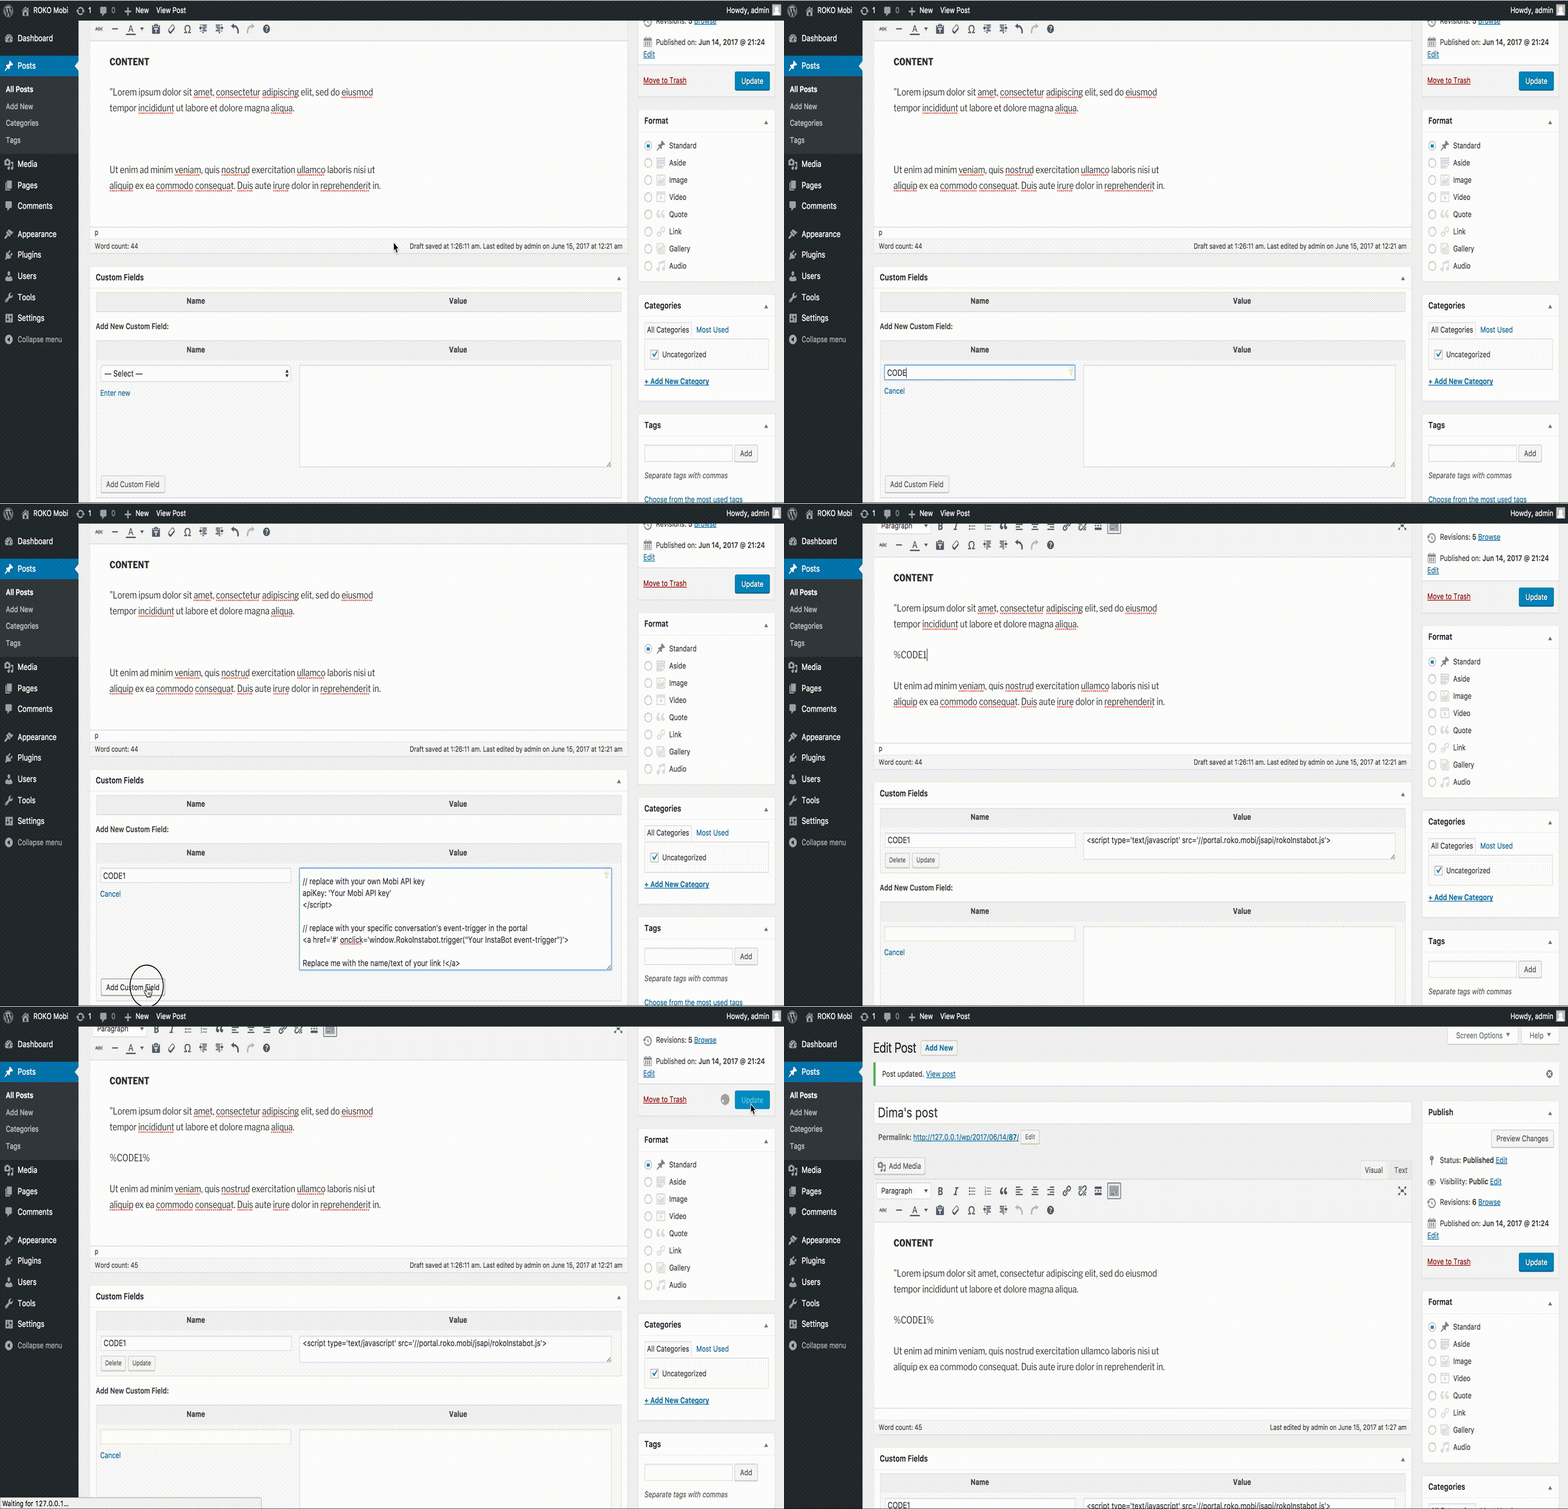
Insert the web Instabot JavaScript into your post
- Now, view your new post, click your link (if applicable), and your Instabot will launch in the bottom-right corner of your post!
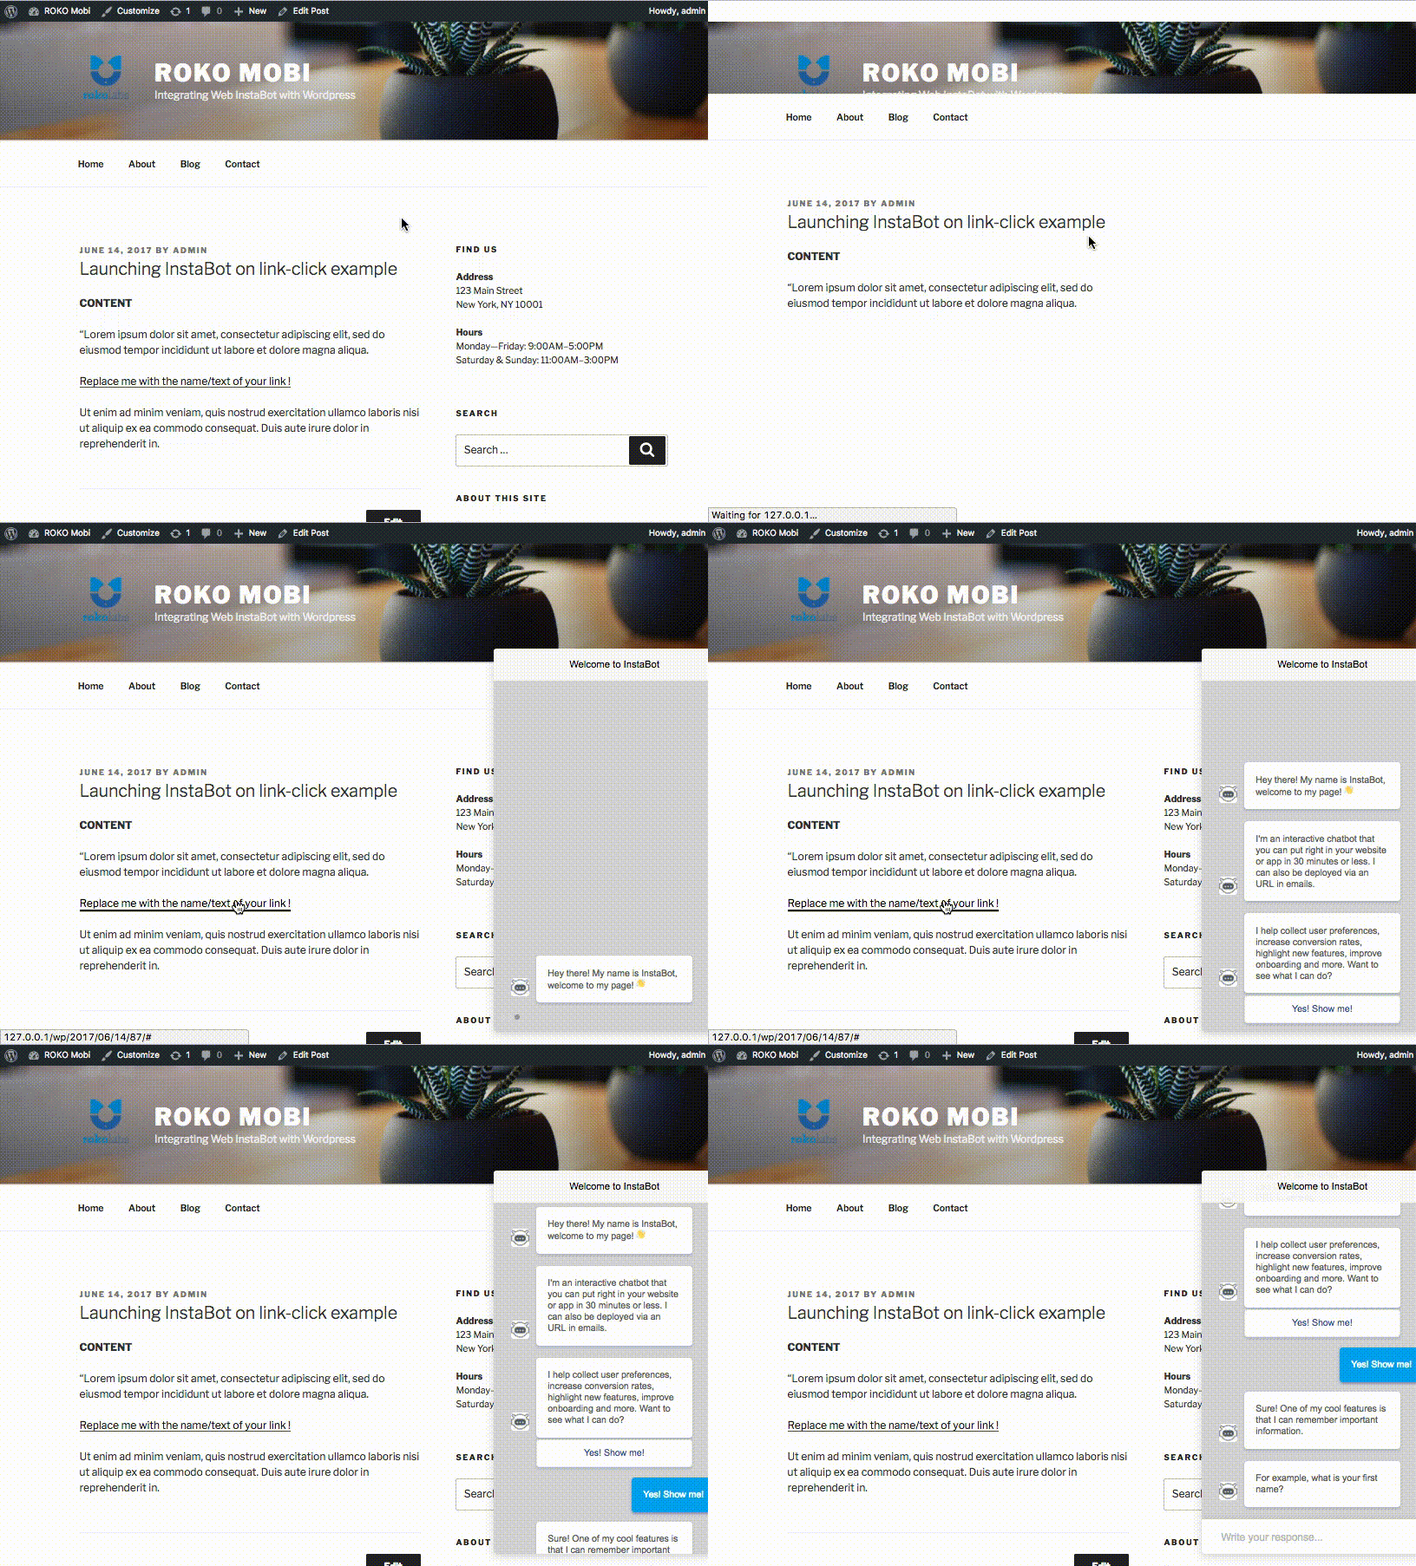
Instabot launching on link-click
3. Troubleshooting
3a. WP Rocket plugin
If you are using the WP Rocket caching plugin to make your WordPress site load faster, please follow the below instructions to avoid any potentially negative interactions between Instabot and the WP Rocket plugin.
- In your WordPress configuration page, open the WP Rocket settings page, then open the File Optimization tab
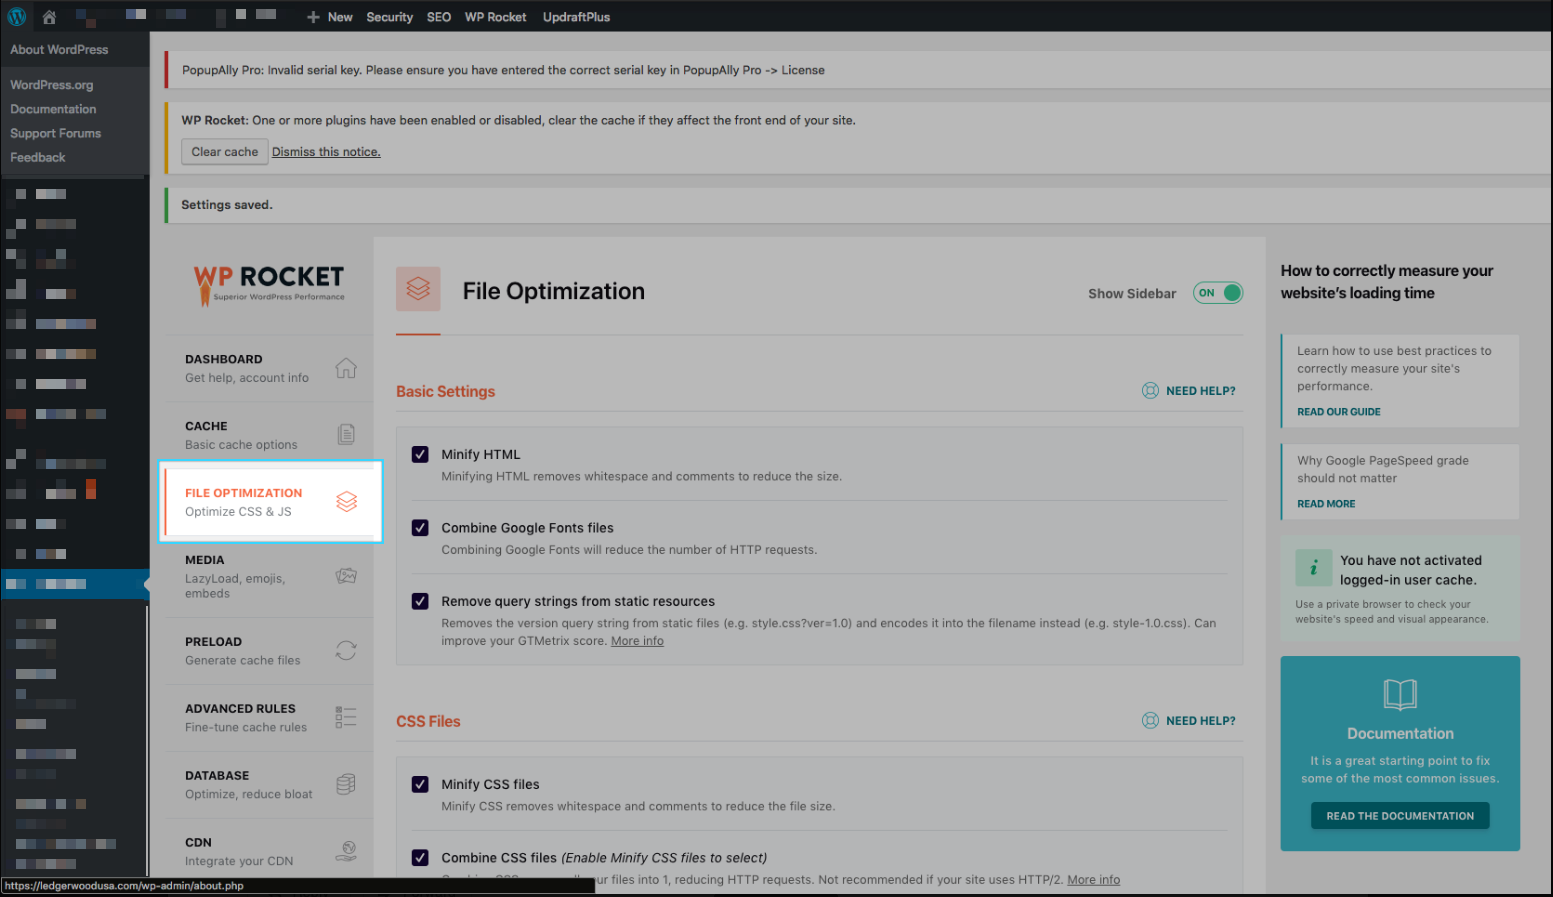
WordPress configuration --> WP Rocket --> File Optimization
- Scroll down to the section "JavaScript Files --> Excluded JavaScript Files", add
widget.instabot.io/jsapi/rokoInstabot.jsas an exclusion
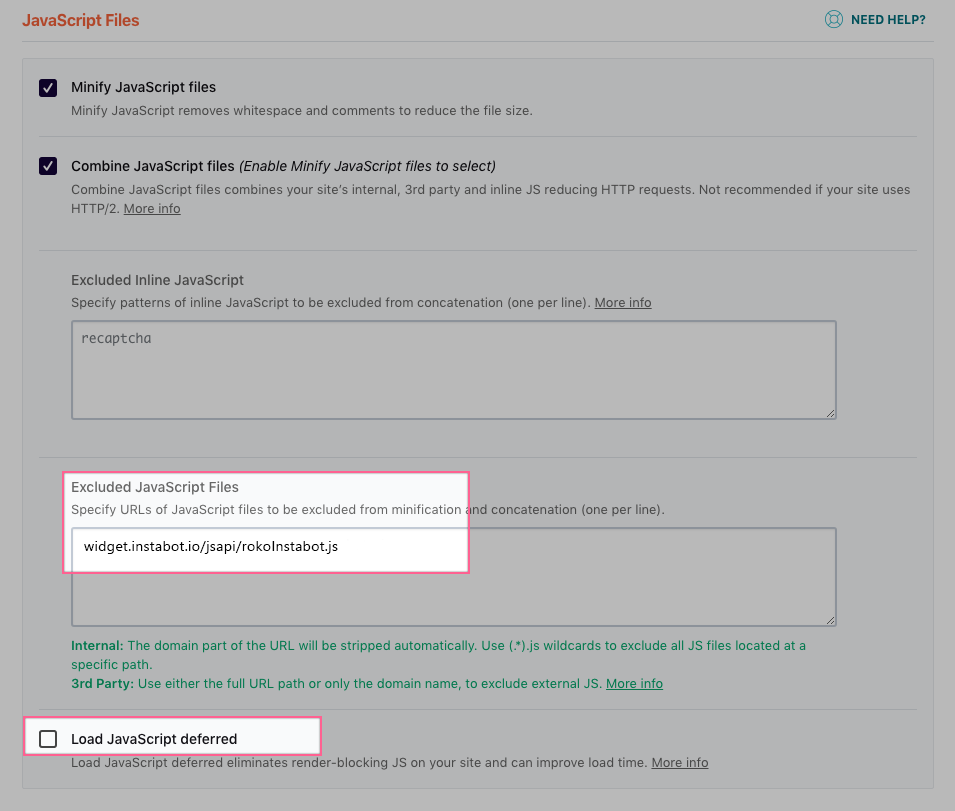
Add /jsapi/rokoInstabot.js
- Uncheck the "Load JavaScript deferred" setting
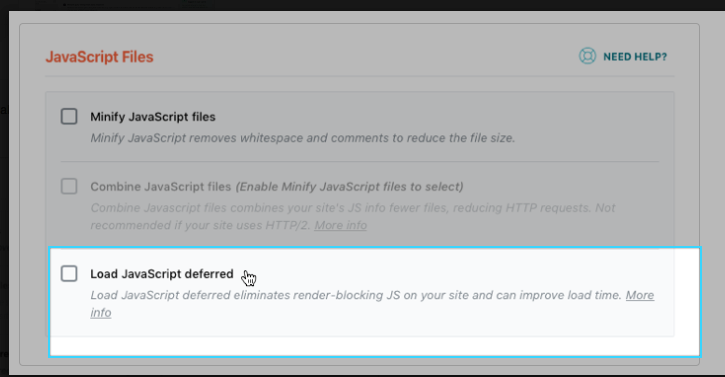
Uncheck "Load JavaScript deferred"
- Click Save, wait ~5min, then you should be all set!
3b. Avada theme
If you are using the Avada theme's 'Code Block' feature to insert Instabot into the page/post, make sure that the "Disable Code Block Encoding" option under "Theme Options > Advanced" is set to enabled.
If this is not possible, try formatting your Instabot JavaScript to remove all new-lines (the code should be a single line) - see an example of this hereFor more information, refer your developer to this article documenting the issue
Updated almost 5 years ago
